There’s nothing like a warm, comforting bowl of soup to soothe the soul. And when it comes to spices, few cuisines can match the bold flavors and aromas of India. In this collection of 18 spicy Indian soup recipes, we’ll take you on a culinary journey through the subcontinent, exploring the diverse regional flavors and ingredients that make each dish unique.
From classic comfort foods like Mulligatawny Soup and Chicken Shorba, to innovative combinations like Sweet Corn and Coconut Soup and Spicy Carrot and Ginger Soup, these recipes showcase the incredible variety of Indian soups. Whether you’re in the mood for something bold and spicy or light and creamy, we’ve got you covered.
Read on to discover the perfect recipe to warm your heart and your belly!
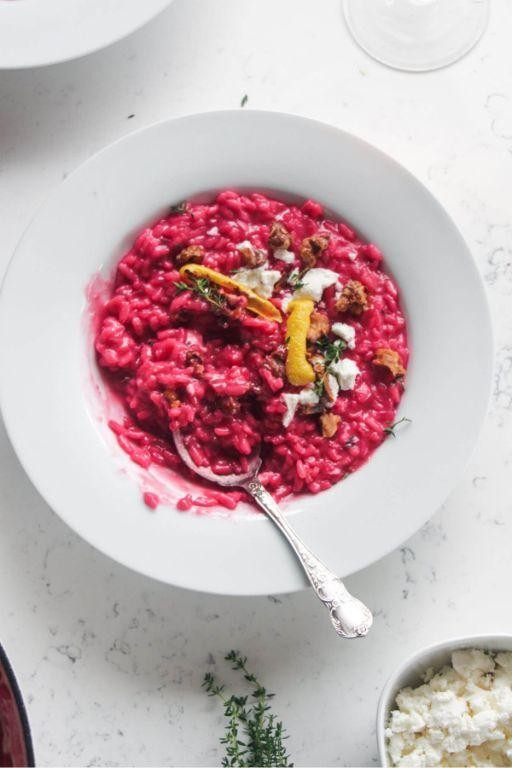
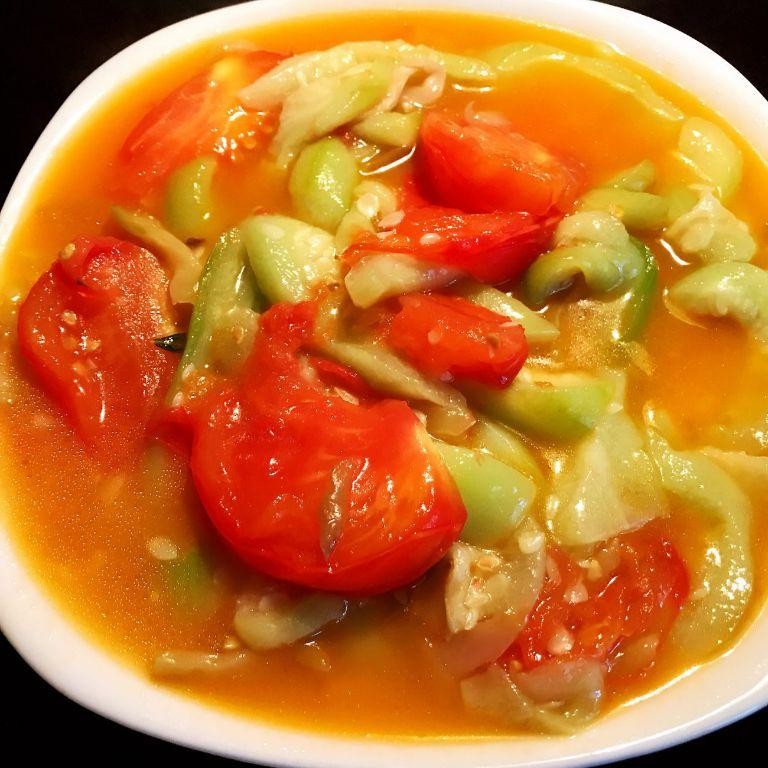
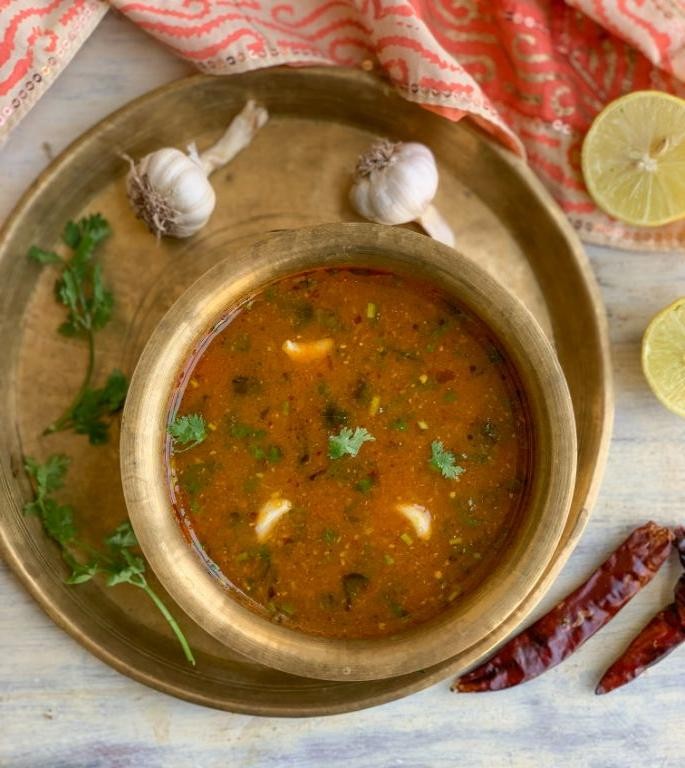
Tomato Rasam Soup
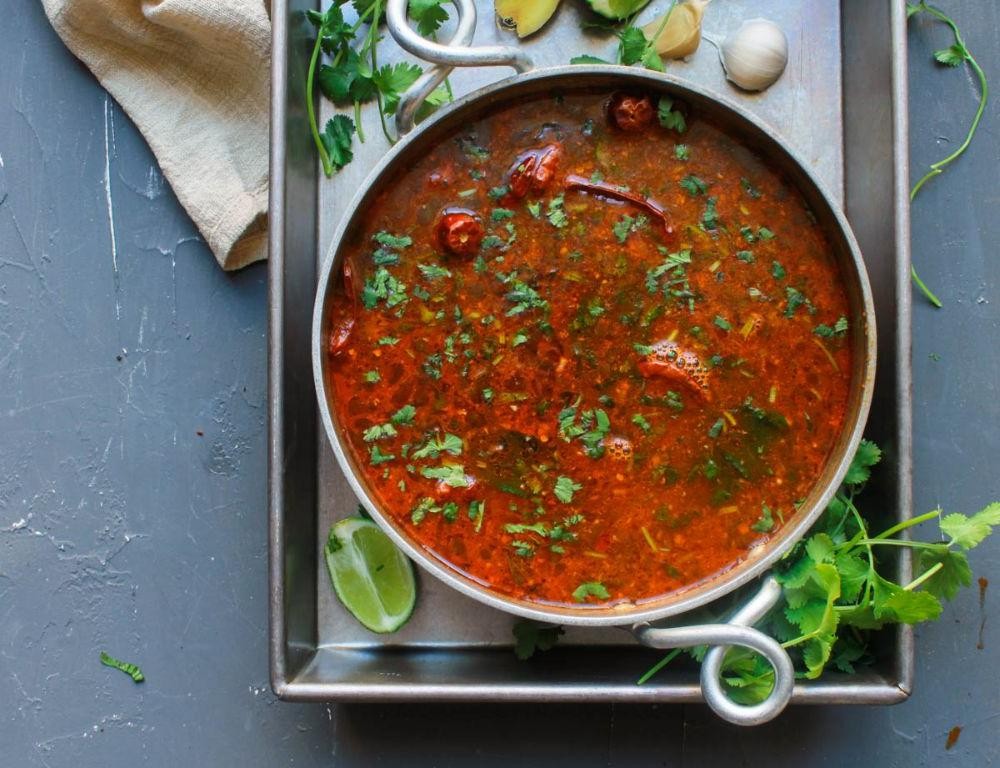
This recipe is a twist on the classic Indian soup, Tomato Rasam, with the added comfort of creamy texture and warm spices. This flavorful and aromatic soup is perfect for a chilly evening or as a comforting side dish.
Ingredients:
– 2 cups fresh tomatoes, diced
– 1 small onion, finely chopped
– 3-4 green chilies, slit
– 1 teaspoon cumin seeds
– 1 teaspoon coriander powder
– 1/2 teaspoon turmeric powder
– 1/2 teaspoon red chili powder
– 1 can (14 oz) of coconut milk
– Salt, to taste
– Fresh cilantro, for garnish
Instructions:
1. Heat oil in a pan over medium heat. Add cumin seeds and let them sizzle.
2. Add chopped onion, green chilies, coriander powder, turmeric powder, and red chili powder. Cook until the onions are translucent.
3. Add diced tomatoes and cook for 5 minutes or until they’re soft.
4. Pour in coconut milk and season with salt to taste.
5. Simmer the soup for 10-15 minutes or until the flavors have melded together.
6. Garnish with fresh cilantro and serve hot.
Cooking Time: 20-25 minutes
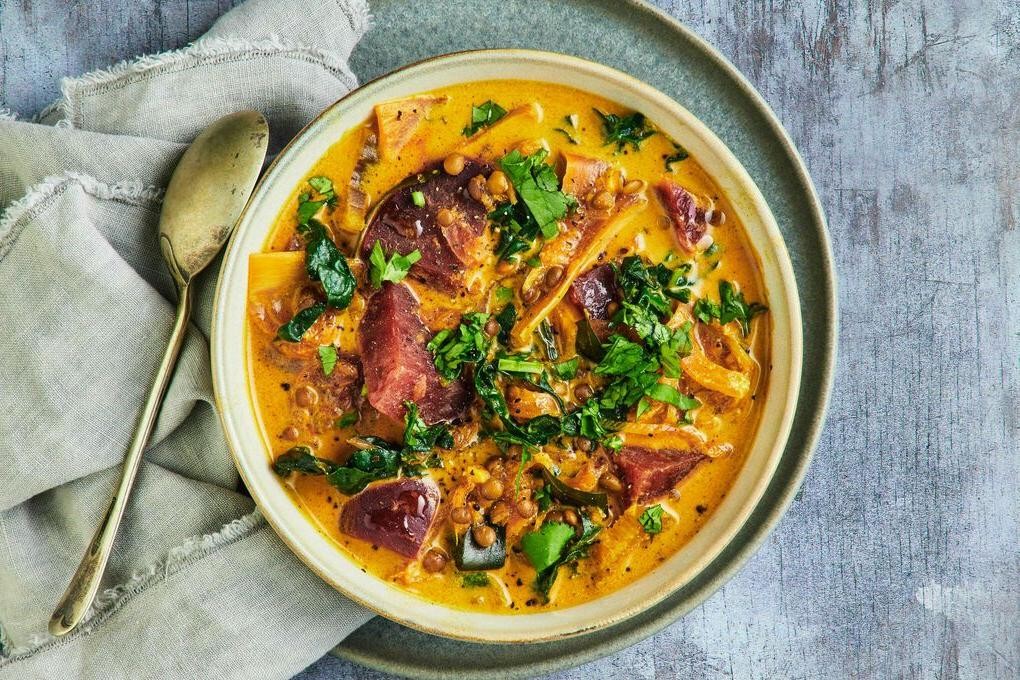
Lentil and Spinach Soup

Warm up with this nutritious and comforting soup, packed with fiber-rich lentils and iron-packed spinach.
Ingredients:
– 1 cup dried green or brown lentils, rinsed and drained
– 2 cups vegetable broth
– 1 onion, chopped
– 3 cloves garlic, minced
– 2 cups fresh spinach leaves
– 1 can (14.5 oz) diced tomatoes
– 1 teaspoon ground cumin
– Salt and pepper, to taste
Instructions:
1. In a large pot, sauté the onion and garlic in a little water until softened.
2. Add the lentils, broth, diced tomatoes, cumin, salt, and pepper. Bring to a boil, then reduce heat and simmer for 30 minutes or until lentils are tender.
3. Stir in fresh spinach leaves and cook until wilted.
4. Serve hot, garnished with a sprinkle of paprika, if desired.
Cooking Time: 40-45 minutes
Mulligatawny Soup
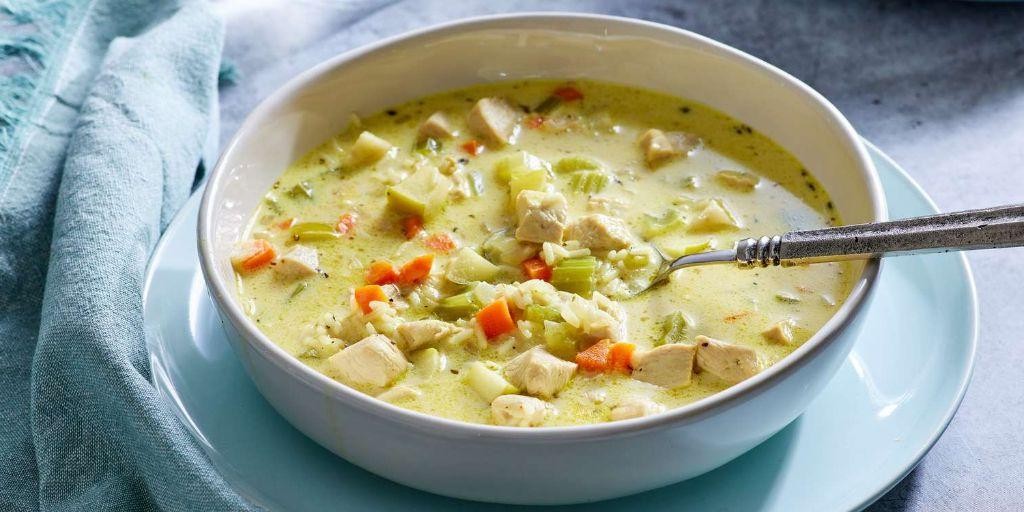
This aromatic soup is a popular Anglo-Indian dish that combines the warmth of spices with the comfort of vegetables and noodles. Mulligatawny Soup is a perfect blend of flavors, textures, and aromas to warm up any meal.
Ingredients:
– 2 tablespoons vegetable oil
– 1 onion, chopped
– 2 cloves garlic, minced
– 1 cup mixed vegetables (carrots, potatoes, peas)
– 1/2 cup cooked chicken or beef, diced
– 1 teaspoon ground cumin
– 1 teaspoon curry powder
– 1/2 teaspoon turmeric
– Salt and pepper to taste
– 4 cups chicken broth
– 1 cup noodles (such as egg noodles or rice noodles)
– Fresh cilantro leaves for garnish
Instructions:
1. Heat oil in a large pot over medium heat. Add onion, garlic, cumin, curry powder, and turmeric. Cook until the mixture is fragrant.
2. Add mixed vegetables, chicken or beef, salt, and pepper. Cook for 5 minutes.
3. Pour in chicken broth and bring to a boil.
4. Reduce heat and simmer for 20-25 minutes or until vegetables are tender.
5. Add noodles and cook according to package instructions.
6. Serve hot, garnished with fresh cilantro leaves.
Cooking Time: 30-40 minutes
Sweet Corn and Coconut Soup

A creamy and comforting soup that combines the sweetness of corn with the richness of coconut milk, perfect for a cozy evening meal or as a side dish for your next gathering.
Ingredients:
– 2 cups fresh sweet corn kernels
– 1 medium onion, chopped
– 3 cloves garlic, minced
– 1 can (14 oz) diced tomatoes
– 1 cup coconut milk
– 4 cups vegetable broth
– 1 tsp ground cumin
– Salt and pepper to taste
– Fresh cilantro leaves for garnish (optional)
Instructions:
1. In a large pot, sauté the onion and garlic in a little water until softened.
2. Add the corn kernels, diced tomatoes, coconut milk, vegetable broth, and cumin. Stir well.
3. Bring to a boil, then reduce heat and simmer for 20 minutes or until the soup has thickened slightly.
4. Season with salt and pepper to taste.
5. Serve hot, garnished with fresh cilantro leaves if desired.
Cooking Time: 25-30 minutes
Spicy Carrot and Ginger Soup

Warm up with this vibrant and flavorful soup, infused with the spicy kick of ginger and the sweetness of carrots.
Ingredients:
– 2 tablespoons olive oil
– 1 medium onion, chopped
– 3 cloves garlic, minced
– 2 inches fresh ginger, peeled and grated
– 4 cups chopped carrots (about 6-8 medium-sized)
– 4 cups vegetable broth
– 1 can (14.5 oz) diced tomatoes
– 1 teaspoon ground cumin
– 1/2 teaspoon smoked paprika
– Salt and pepper, to taste
– Fresh cilantro, for garnish (optional)
Instructions:
1. Heat oil in a large pot over medium heat. Add onion and cook until softened, about 5 minutes.
2. Add garlic, ginger, and cumin; cook for 1 minute.
3. Add carrots, broth, diced tomatoes, smoked paprika, salt, and pepper. Bring to a boil, then reduce heat and simmer for 20-25 minutes or until carrots are tender.
4. Purée the soup using an immersion blender or a regular blender.
5. Taste and adjust seasoning as needed.
6. Serve hot, garnished with cilantro if desired.
Cooking Time: 30-35 minutes
Chicken Shorba
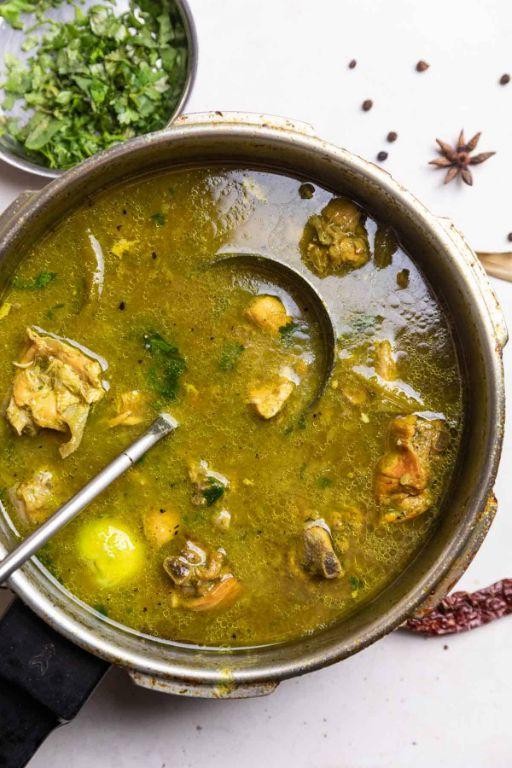
Shorba is a popular Indian soup made with chicken, aromatic spices, and fragrant herbs. This recipe is a simple and comforting take on the classic dish.
Ingredients:
– 1 pound boneless, skinless chicken breast or thighs
– 2 medium onions, chopped
– 2 cloves of garlic, minced
– 1 teaspoon grated ginger
– 1/2 teaspoon cumin powder
– 1/2 teaspoon coriander powder
– 1/4 teaspoon turmeric powder
– 1/4 teaspoon red chili powder
– 1 can (14 oz) diced tomatoes
– 4 cups chicken broth
– Fresh cilantro leaves, chopped (for garnish)
Instructions:
1. Heat oil in a large pot over medium heat.
2. Add onions and cook until translucent, about 5 minutes.
3. Add garlic, ginger, cumin, coriander, turmeric, and chili powder. Cook for 1 minute.
4. Add chicken and cook until browned, about 5-6 minutes.
5. Add diced tomatoes and chicken broth. Bring to a boil, then reduce heat and simmer for 15-20 minutes or until the soup thickens slightly.
6. Season with salt to taste.
7. Garnish with chopped cilantro leaves.
Cooking Time: 25-30 minutes
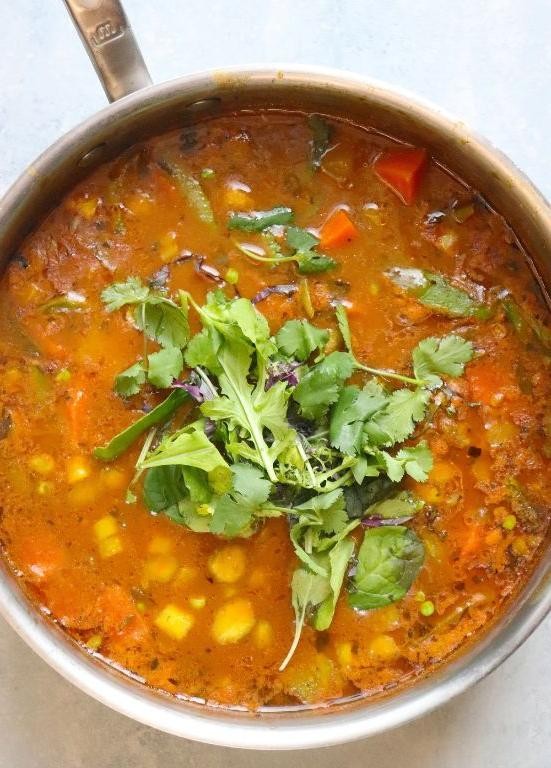
Vegetable Sambar Soup

This Vegetable Sambar Soup is a comforting and nutritious twist on the traditional South Indian recipe. With a blend of aromatic spices, vegetables, and lentils, this soup is perfect for a quick and satisfying meal.
Ingredients:
– 1 cup split red lentils (masoor dal)
– 2 cups water
– 1 tablespoon vegetable oil
– 1 small onion, chopped
– 2 cloves garlic, minced
– 1 medium carrot, peeled and grated
– 1 medium potato, peeled and diced
– 1 cup mixed vegetables (such as bell peppers, tomatoes, and green beans)
– 1 teaspoon ground cumin
– 1 teaspoon ground coriander
– Salt, to taste
– Fresh cilantro leaves, for garnish
Instructions:
1. Rinse the lentils and soak them in water for at least 30 minutes.
2. Heat oil in a large pot over medium heat. Add onion, garlic, carrot, and potato. Cook until the vegetables are tender, about 10 minutes.
3. Add the mixed vegetables, cumin, coriander, and salt. Stir well to combine.
4. Drain and add the soaked lentils. Pour in enough water to cover the mixture and bring to a boil.
5. Reduce heat and simmer for 20-25 minutes or until the lentils are tender.
6. Garnish with cilantro leaves and serve hot.
Cooking Time: 40-45 minutes
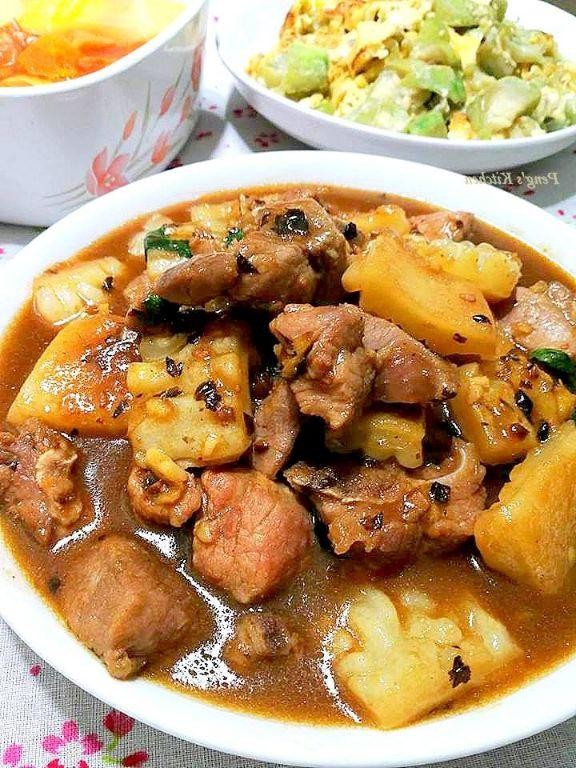
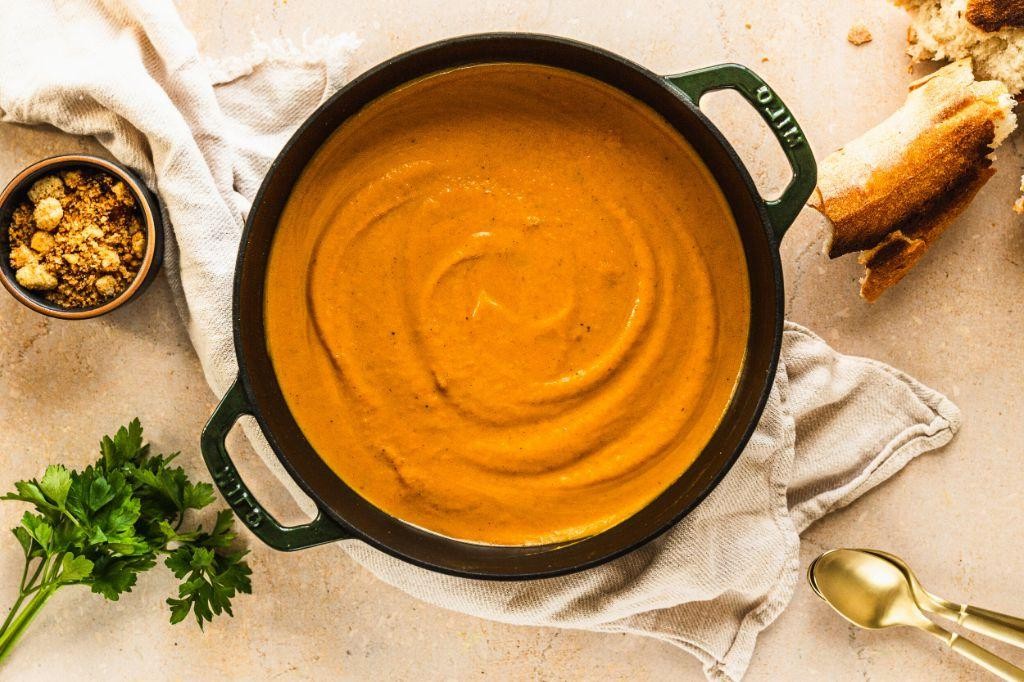
Curried Pumpkin Soup

Warm up with this comforting and aromatic soup, perfect for a cozy fall or winter evening. This curried pumpkin soup is a flavorful twist on the classic pumpkin puree, with the added depth of warm Indian spices.
Ingredients:
– 1 small to medium-sized pumpkin (about 2 lbs), peeled, seeded, and cubed
– 2 tablespoons unsalted butter
– 1 onion, chopped
– 3 cloves garlic, minced
– 1 teaspoon ground cumin
– 1 teaspoon curry powder
– 1/2 teaspoon ground cinnamon
– 1/4 teaspoon ground nutmeg
– 1/4 teaspoon salt
– 1/2 cup chicken or vegetable broth
– 1 cup heavy cream or half-and-half (optional)
– Fresh cilantro leaves for garnish
Instructions:
1. In a large pot, melt butter over medium heat. Add onion and cook until softened, about 5 minutes.
2. Add garlic, cumin, curry powder, cinnamon, nutmeg, and salt. Cook for an additional minute.
3. Add pumpkin cubes and broth. Bring to a boil, then reduce heat and simmer for 20-25 minutes or until the pumpkin is tender.
4. Use an immersion blender to puree the soup until smooth. Alternatively, let it cool and blend in a blender.
5. If desired, stir in heavy cream or half-and-half.
6. Taste and adjust seasoning as needed.
7. Serve hot, garnished with cilantro leaves.
Cooking Time: 25-30 minutes
Masoor Dal Soup

This comforting Indian-inspired soup is made with red lentils, aromatic spices, and a hint of creaminess. Perfect for a cozy evening meal or a quick lunch option.
Ingredients:
– 1 cup masoor dal (red lentils)
– 4 cups water
– 1 onion, chopped
– 2 cloves garlic, minced
– 1 teaspoon ground cumin
– 1 teaspoon ground coriander
– 1/2 teaspoon turmeric powder
– Salt, to taste
– 2 tablespoons vegetable oil
– 2 tablespoons heavy cream (optional)
– Fresh cilantro leaves, for garnish
Instructions:
1. Rinse the lentils and soak them in water for at least 30 minutes.
2. Drain and set aside.
3. Heat oil in a large pot over medium heat. Add onion and cook until softened.
4. Add garlic, cumin, coriander, and turmeric powder. Cook for 1 minute.
5. Add the lentils and 4 cups of water. Bring to a boil, then reduce heat and simmer for 20-25 minutes or until the lentils are tender.
6. Season with salt to taste.
7. Stir in heavy cream (if using).
8. Serve hot, garnished with cilantro leaves.
Cooking Time: 30-35 minutes
Tamarind and Jaggery Soup
This traditional Indian soup is a perfect blend of tangy tamarind and sweet jaggery, offering a unique flavor experience. Serve hot with some crusty bread or as a comforting accompaniment to your favorite Indian dishes.
Ingredients:
– 1 cup tamarind paste
– 1 cup water
– 2 tablespoons jaggery powder
– 1/4 teaspoon ground cumin
– Salt, to taste
– Fresh cilantro, for garnish (optional)
Instructions:
1. In a large saucepan, combine tamarind paste and water. Bring to a boil over high heat, then reduce the heat to medium-low and simmer for 10-12 minutes or until the mixture thickens slightly.
2. Add jaggery powder, cumin, and salt. Stir well to combine.
3. Continue to simmer for another 5-7 minutes or until the soup reaches your desired consistency.
4. Taste and adjust sweetness or tanginess as needed.
5. Garnish with fresh cilantro, if desired.
6. Serve hot.
Cooking Time: Approximately 20-25 minutes
Hot and Sour Tamarind Soup
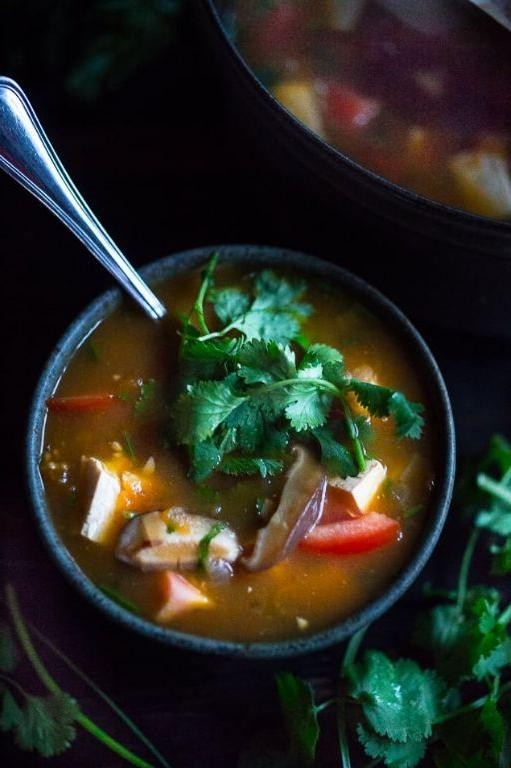
This flavorful soup combines the tanginess of tamarind with the warmth of spices, creating a harmonious balance of hot and sour notes. Perfect for a cozy evening or as a refreshing pick-me-up on a warm day.
Ingredients:
– 2 cups water
– 1 cup tamarind paste
– 1 tablespoon vegetable oil
– 1 small onion, finely chopped
– 2 cloves garlic, minced
– 1 teaspoon ground cumin
– 1/2 teaspoon ground coriander
– 1/4 teaspoon cayenne pepper (optional)
– Salt, to taste
– Fresh cilantro, for garnish
Instructions:
1. In a large pot, heat oil over medium heat.
2. Add onion and garlic; cook until softened, about 3-4 minutes.
3. Add tamarind paste, cumin, coriander, and cayenne pepper (if using). Cook for an additional minute.
4. Pour in water and bring to a boil.
5. Reduce heat and simmer for 15-20 minutes or until the flavors have melded together.
6. Season with salt to taste.
7. Garnish with fresh cilantro before serving.
Cooking Time: 25-30 minutes
Spinach and Lentil Soup

This hearty soup is a perfect blend of nutritious spinach and comforting lentils, making it a great option for a quick and healthy meal.
Ingredients:
– 1 cup dried green or brown lentils, rinsed and drained
– 2 cups water
– 1 onion, chopped
– 3 cloves garlic, minced
– 1 teaspoon ground cumin
– 1 teaspoon smoked paprika (optional)
– Salt and pepper to taste
– 2 cups fresh spinach leaves
Instructions:
1. In a large pot, sauté the onion and garlic until softened.
2. Add the lentils, water, cumin, and paprika (if using). Bring to a boil, then reduce heat and simmer for 20-25 minutes or until the lentils are tender.
3. Stir in the spinach leaves and cook until wilted.
4. Season with salt and pepper to taste.
5. Serve hot, garnished with chopped fresh herbs if desired.
Cooking Time: 30-40 minutes
Turmeric and Black Pepper Soup

This vibrant yellow soup is a perfect blend of warmth and comfort, infused with the anti-inflammatory properties of turmeric and the stimulating effects of black pepper. A simple yet nourishing recipe to add some sunshine to your day.
Ingredients:
– 2 medium onions, chopped
– 3 cloves of garlic, minced
– 1 teaspoon ground turmeric
– 1/2 teaspoon ground cumin
– 1/4 teaspoon ground cinnamon
– 1/4 teaspoon black pepper
– 4 cups vegetable or chicken broth
– 1/2 cup coconut milk (optional)
– Salt, to taste
Instructions:
1. In a large pot, sauté the onions and garlic in a little water until softened.
2. Add turmeric, cumin, cinnamon, and black pepper. Cook for 1 minute.
3. Pour in broth and bring to a boil. Reduce heat and simmer for 20 minutes.
4. Use an immersion blender or transfer soup to a blender to puree.
5. If desired, add coconut milk and stir well.
6. Season with salt to taste.
Cooking Time: 25-30 minutes
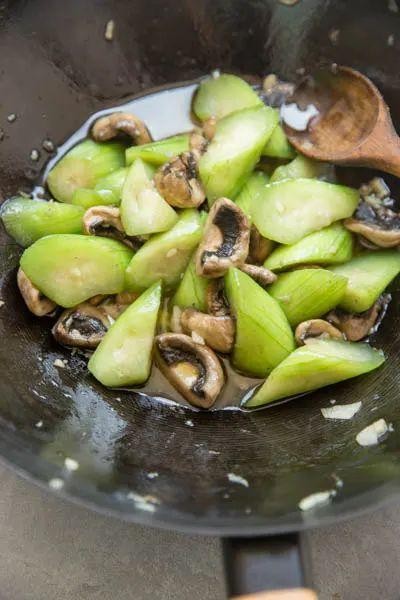
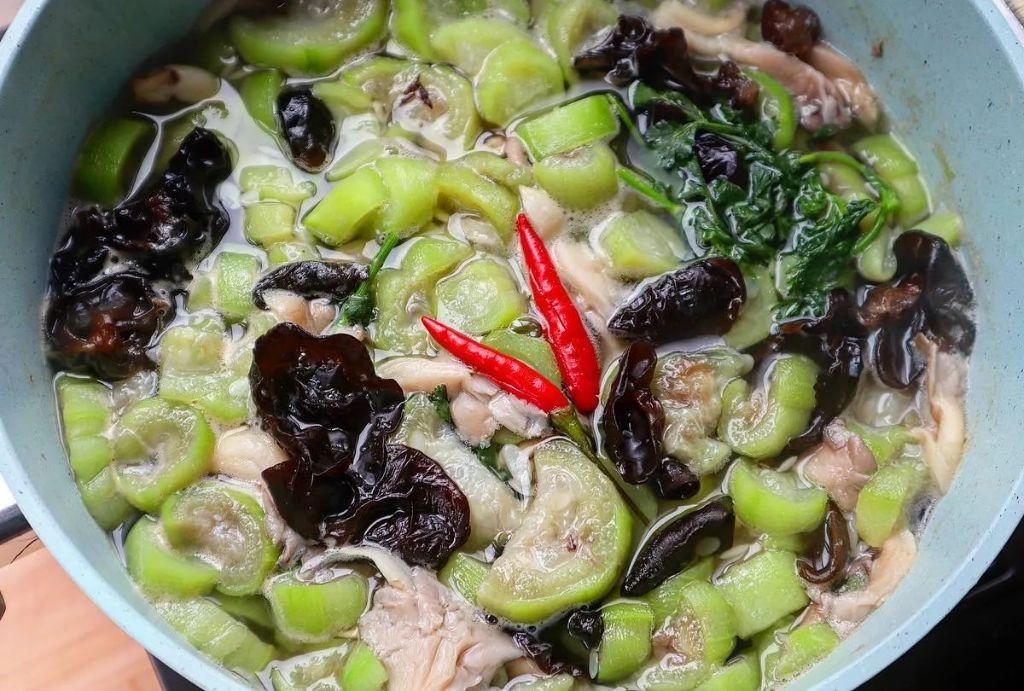
Roasted Eggplant Soup

Roasted Eggplant Soup Recipe
Simplify your evening meal with this flavorful and healthy Roasted Eggplant Soup. This recipe is a perfect blend of roasted eggplant, garlic, and herbs, simmered to perfection in a rich chicken broth.
Ingredients:
– 2 large eggplants
– 3 cloves of garlic, minced
– 1 onion, chopped
– 4 cups of chicken broth
– 1 can (14.5 oz) of diced tomatoes
– 1 tsp dried oregano
– Salt and pepper, to taste
– Fresh parsley, for garnish
Instructions:
1. Preheat the oven to 400°F (200°C).
2. Cut the eggplants in half lengthwise and place them on a baking sheet lined with parchment paper.
3. Roast the eggplant for 30-40 minutes or until tender and lightly browned.
4. In a large pot, sauté the garlic and onion until softened.
5. Add the roasted eggplant, chicken broth, diced tomatoes, oregano, salt, and pepper to the pot.
6. Simmer the soup for 20-25 minutes or until heated through.
7. Taste and adjust seasoning as needed.
8. Serve hot, garnished with fresh parsley.
Cooking Time: 55-65 minutes
Fenugreek Leaves Soup

This traditional Indian soup is a soothing and comforting blend of flavors, perfect for a cozy evening meal. The earthy sweetness of fenugreek leaves pairs beautifully with the spices, making this recipe a delightful treat.
Ingredients:
– 1 cup fenugreek leaves (also known as methi)
– 2 medium onions, chopped
– 2 cloves garlic, minced
– 1 inch ginger, grated
– 1 teaspoon ground cumin
– 1 teaspoon ground coriander
– 1/2 teaspoon turmeric powder
– Salt, to taste
– 4 cups water
– 2 tablespoons ghee or vegetable oil
Instructions:
1. Heat oil in a large pot over medium heat.
2. Add onions and sauté until they start to brown.
3. Add garlic, ginger, cumin, coriander, and turmeric powder. Cook for 1 minute.
4. Add fenugreek leaves and salt. Stir well.
5. Pour in water and bring the mixture to a boil.
6. Reduce heat and simmer for 20-25 minutes or until the soup has thickened slightly.
7. Serve hot, garnished with chopped cilantro (optional).
Cooking Time: 25-30 minutes
Creamy Cashew and Tomato Soup

A rich and comforting soup that’s perfect for a chilly evening or a nutritious meal option. This creamy cashew and tomato soup is a game-changer, with the subtle nutty flavor of cashews complementing the sweetness of fresh tomatoes.
Ingredients:
– 1 cup raw cashews
– 2 cups vegetable broth
– 1 can (14.5 oz) diced tomatoes
– 1 small onion, chopped
– 2 cloves garlic, minced
– 1 tsp dried basil
– Salt and pepper, to taste
– 1/4 cup heavy cream or half-and-half (optional)
Instructions:
1. Soak cashews in water for at least 4 hours or overnight.
2. Drain and rinse the cashews, then add them to a blender with vegetable broth, diced tomatoes, onion, garlic, basil, salt, and pepper.
3. Blend until smooth, adding more broth if needed to achieve desired consistency.
4. Taste and adjust seasoning as needed.
5. If desired, stir in heavy cream or half-and-half for an extra creamy finish.
6. Serve hot, garnished with chopped fresh herbs or a sprinkle of paprika.
Cooking Time: 20-25 minutes (including soaking time)
Ginger and Garlic Rasam
Rasam is a popular Indian soup that is both flavorful and comforting. This recipe combines the warmth of ginger and garlic to create a deliciously spicy and soothing drink.
Ingredients:
– 2 cups water
– 1/2 cup tamarind paste
– 2 inches fresh ginger, grated
– 3 cloves garlic, minced
– 1 teaspoon rasam powder (or substitute with curry powder)
– Salt, to taste
– Fresh cilantro leaves, for garnish
Instructions:
1. Boil the water in a large pot.
2. Add tamarind paste and stir until dissolved.
3. Add grated ginger and minced garlic. Simmer for 5 minutes.
4. Add rasam powder (or curry powder) and salt to taste. Stir well.
5. Reduce heat to low and let it simmer for 10-15 minutes.
6. Garnish with fresh cilantro leaves and serve hot.
Cooking Time: 20-25 minutes
Spiced Butternut Squash Soup
Warm up with this comforting Spiced Butternut Squash Soup recipe! A perfect blend of sweet and savory, this soup is infused with aromatic spices that will leave you feeling cozy on a chilly day.
Ingredients:
– 1 large butternut squash (about 2 lbs)
– 2 tablespoons olive oil
– 1 onion, chopped
– 3 cloves garlic, minced
– 1 teaspoon ground cumin
– 1/2 teaspoon ground coriander
– 1/4 teaspoon ground cinnamon
– 1/4 teaspoon ground nutmeg
– 1/4 teaspoon salt
– 1/8 teaspoon black pepper
– 4 cups vegetable broth
– 1 cup heavy cream or half-and-half (optional)
Instructions:
1. Preheat oven to 400°F (200°C).
2. Peel and cube the butternut squash.
3. In a large pot, heat the olive oil over medium heat. Add the chopped onion and cook until softened, about 5 minutes.
4. Add the minced garlic, cumin, coriander, cinnamon, nutmeg, salt, and pepper. Cook for an additional minute.
5. Add the cubed squash to the pot and pour in the vegetable broth.
6. Bring the mixture to a boil, then reduce heat and simmer for 20-25 minutes or until the squash is tender.
7. Use an immersion blender (or transfer the soup to a blender) to puree the soup until smooth.
8. If desired, stir in heavy cream or half-and-half for added richness.
9. Serve warm and enjoy!
Cooking Time: 30-40 minutes
Summary
Get ready to warm up with these deliciously comforting Indian soup recipes! This collection features 18 spicy and flavorful soups that are sure to become a staple in your kitchen. From classic Tomato Rasam Soup to innovative Sweet Corn and Coconut Soup, there’s something for every palate. Discover the bold flavors of Mulligatawny Soup, Spicy Carrot and Ginger Soup, and more. With ingredients like lentils, spinach, pumpkin, and cashews, these soups are not only tasty but also nutritious. Perfect for a cozy night in or a gathering with friends, these recipes are sure to become your new favorite comfort foods.