Summer has finally arrived, and what better way to beat the heat than with a refreshing Moscow Mule? This classic cocktail has become a staple for warm weather gatherings, and its versatility lends itself well to experimentation. In this article, we’ll explore 18 unique Moscow Mule recipes that will quench your thirst and satisfy your taste buds.
From the classic recipe featuring fresh lime juice to more adventurous options like spicy ginger and blood orange, there’s something for everyone in this collection of creative cocktails. Whether you’re a seasoned mixologist or just looking for a new drink to try, these refreshing Moscow Mule recipes are sure to become your new go-to summer sippers.
Classic Moscow Mule with Fresh Lime Juice
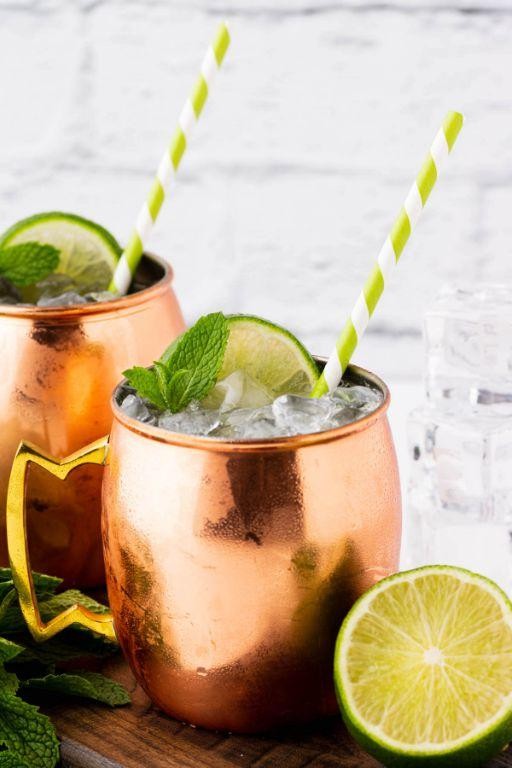
This refreshing twist on the classic Moscow Mule combines the spicy kick of ginger beer with the zesty zip of fresh lime juice, all wrapped up in a crisp and revitalizing drink.
Ingredients:
– 1 1/2 oz vodka
– 4 oz ginger beer
– Juice of 1/2 lime (about 1 tablespoon)
– Ice
– Lime wheel, for garnish
Instructions:
1. Fill a copper mug or highball glass with ice.
2. Add the vodka and ginger beer.
3. Squeeze in the fresh lime juice.
4. Stir gently to combine.
5. Garnish with a lime wheel.
Cooking Time: None! Simply assemble and serve.
Enjoy your revitalizing Moscow Mule with a burst of fresh lime flavor!
Spicy Ginger Moscow Mule with Jalapeño
Elevate your Moscow Mule game with this spicy twist, combining the warmth of ginger and jalapeño peppers.
Ingredients:
– 1 1/2 ounces vodka
– 4 ounces ginger beer
– Juice of 1 lime
– 1-inch piece of fresh ginger, peeled and thinly sliced
– 1-2 slices of jalapeño pepper
– Ice
– Lime wheel, for garnish
– Fresh cilantro leaves, for garnish
Instructions:
1. Fill a copper mug or highball glass with ice.
2. Add the vodka, ginger beer, lime juice, and sliced ginger.
3. Stir gently to combine.
4. Add 1-2 slices of jalapeño pepper, depending on desired level of spiciness.
5. Garnish with a lime wheel and fresh cilantro leaves.
Cooking Time: None needed! Just assemble and serve.
Berry Bliss Moscow Mule with Mixed Berries
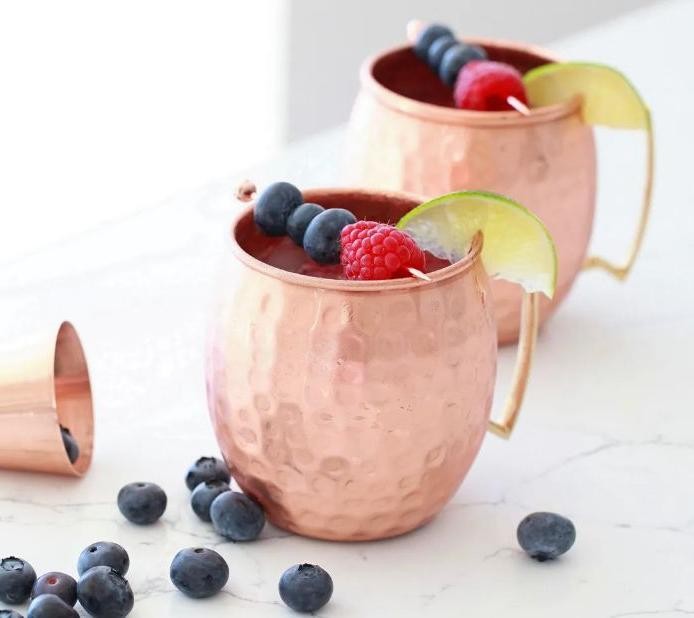
This refreshing twist on the classic Moscow Mule combines the sweetness of mixed berries with the tanginess of lime and ginger beer.
Ingredients:
– 1 1/2 ounces vodka (such as citrus-flavored or plain)
– 1/2 ounce fresh lime juice
– 4 ounces ginger beer
– 1/2 cup mixed berries (blueberries, raspberries, blackberries)
– Ice
– Lime wheel and sprigs of mint for garnish
Instructions:
1. Fill a copper mug or highball glass with ice.
2. Add the vodka, lime juice, and ginger beer.
3. Muddle in the mixed berries using a muddler or the back of a spoon to release their flavors and colors.
4. Stir gently to combine.
5. Garnish with a lime wheel and sprigs of mint.
Cooking Time: 2-3 minutes (depending on how much you want to muddle the berries!)
Cucumber Mint Moscow Mule for a Cool Twist

Beat the heat with this refreshing twist on the classic Moscow Mule! This Cucumber Mint Moscow Mule combines the crispness of cucumber and mint with the spicy kick of ginger beer.
Ingredients:
– 1 1/2 oz vodka
– 4 oz ginger beer
– 1/2 lime, juiced
– 1/2 cup fresh mint leaves
– 1/2 cup thinly sliced cucumber
– Ice cubes
– Lime wheel and sprigs of fresh mint for garnish
Instructions:
1. Fill a copper mug or highball glass with ice cubes.
2. Add the vodka, ginger beer, and lime juice.
3. Muddle the fresh mint leaves and cucumber slices in a small bowl to release their flavors and oils.
4. Add the muddled mint and cucumber mixture to the mug.
5. Stir gently to combine.
6. Garnish with a lime wheel and sprigs of fresh mint.
Cooking Time: None! This is a quick, easy, and refreshing drink perfect for hot summer days.
Tropical Pineapple Moscow Mule with Coconut Rum
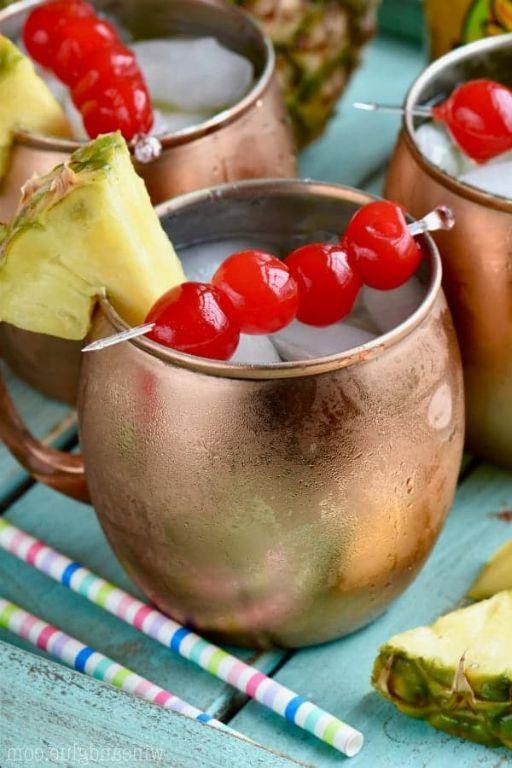
Tropical Pineapple Moscow Mule with Coconut Rum Recipe
Escape to a tropical paradise with this refreshing twist on the classic Moscow Mule. The combination of pineapple, coconut rum, and lime creates a sweet and tangy flavor profile that’s perfect for warm weather.
Ingredients:
• 1 1/2 oz coconut rum
• 4 oz ginger beer
• 1 oz fresh pineapple juice
• 1/2 oz fresh lime juice
• Ice
• Lime wheel, for garnish
• Sprig of mint, for garnish
• Pineapple wedges, for garnish (optional)
Instructions:
1. Fill a copper mug or highball glass with ice.
2. Add the coconut rum, pineapple juice, and lime juice.
3. Top with ginger beer.
4. Stir gently to combine.
5. Garnish with a lime wheel, sprig of mint, and pineapple wedges (if using).
6. Serve immediately and enjoy!
Cooking Time: 0 minutes
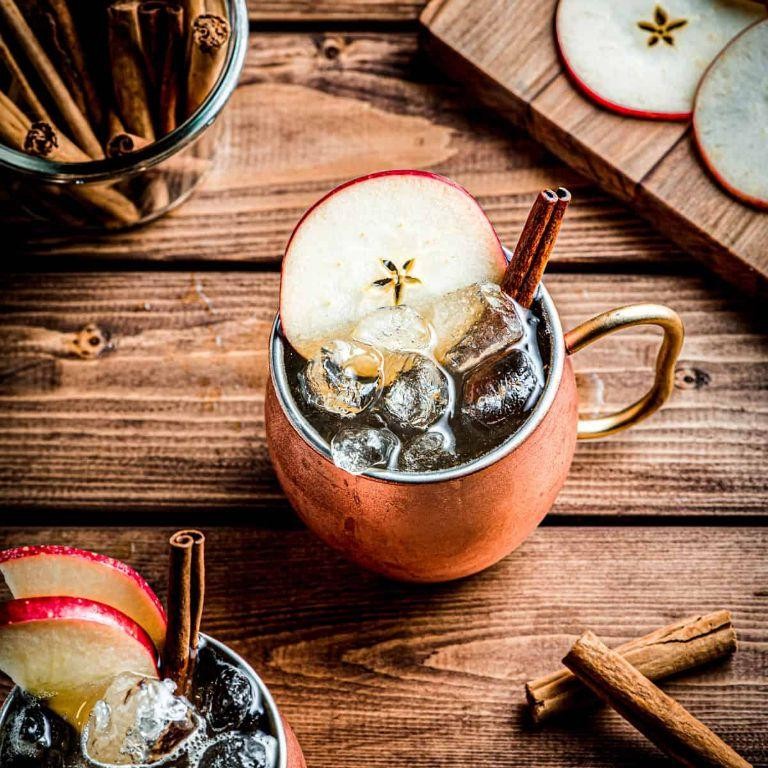
Apple Cider Moscow Mule for Fall Evenings
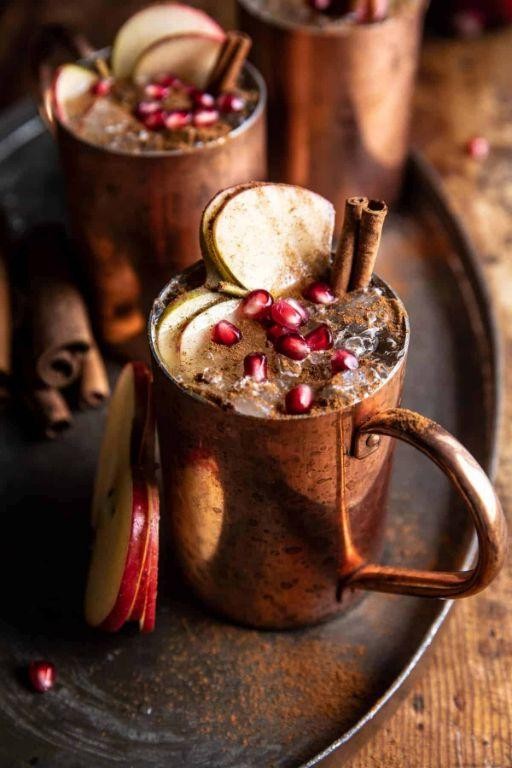
As the seasons change and fall evenings arrive, warm up with a twist on the classic Moscow Mule recipe. This Apple Cider Moscow Mule combines the crisp flavors of apple cider with the spicy kick of ginger beer for a delightful autumnal drink.
Ingredients:
– 1 1/2 oz vodka
– 4 oz apple cider
– 4 oz ginger beer
– Juice of 1 lime
– Ice
– Lime wheel, for garnish
– Cinnamon stick, for garnish (optional)
Instructions:
1. Fill a copper mug or highball glass with ice.
2. Add the vodka and apple cider.
3. Top with ginger beer.
4. Squeeze in the juice of 1 lime.
5. Stir gently to combine.
6. Garnish with a lime wheel and, if desired, a cinnamon stick.
Cooking Time: None! This recipe is ready in just minutes.
Blood Orange Moscow Mule with a Citrus Kick

Elevate the classic Moscow Mule with the bold flavor of blood oranges and a hint of citrus.
Ingredients:
– 1 1/2 oz vodka
– 4 oz ginger beer
– Juice of 1 blood orange (about 2 tablespoons)
– Lime juice (about 1 tablespoon)
– Simple syrup (optional, to taste)
– Ice
– Lime wheel, for garnish
Instructions:
1. Fill a copper mug or highball glass with ice.
2. Add the vodka and ginger beer.
3. Squeeze in the blood orange juice and lime juice.
4. Stir gently to combine.
5. Taste and adjust sweetness with simple syrup if desired.
6. Garnish with a lime wheel.
Cooking Time: 0 minutes (ready to serve!)
Peach Moscow Mule with Fresh Peach Puree
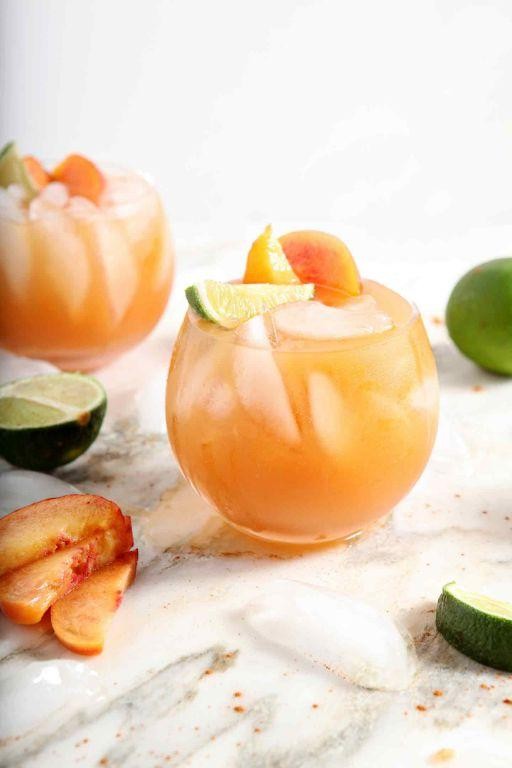
Elevate the classic Moscow Mule recipe by incorporating fresh peaches and their puree, creating a sweet and tangy twist on this refreshing cocktail.
Ingredients:
– 2 oz vodka (such as Absolut)
– 1 oz fresh peach puree
– 4 oz ginger beer
– Juice of 1 lime
– Ice
– Lime wheel for garnish
– Fresh peach slice or wedge for garnish
Instructions:
1. In a copper mug or highball glass, combine vodka and peach puree.
2. Add ginger beer and stir gently to combine.
3. Squeeze in the lime juice and drop the lime wheel into the drink.
4. Fill the glass with ice and stir briefly.
5. Garnish with a fresh peach slice or wedge.
Cooking Time: None, as this is a cocktail recipe!
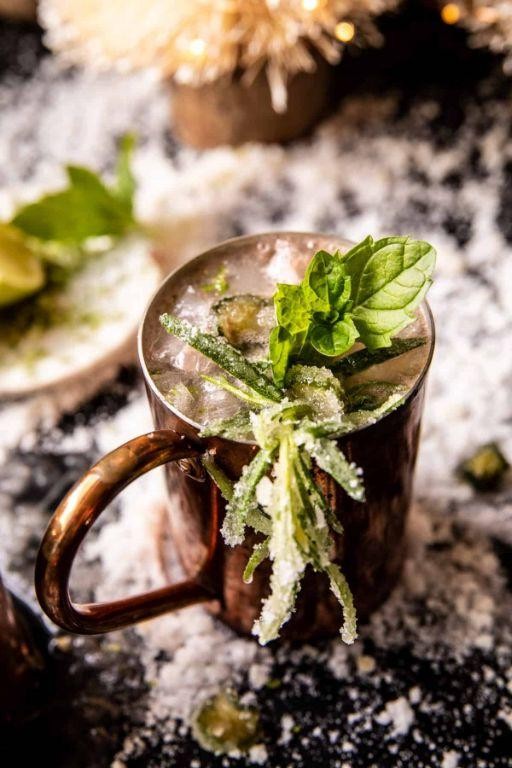
Lavender Infused Moscow Mule for a Floral Touch

Elevate your Moscow Mule game with the subtle, sweet essence of lavender! This refreshing twist on the classic cocktail combines the bold flavors of vodka and ginger beer with the soothing aroma of dried lavender.
Ingredients:
– 1 1/2 oz vodka
– 4 oz ginger beer
– 1/4 cup simple syrup (1:1 sugar:water, dissolved)
– Juice of 1 lime
– 1/4 cup dried lavender buds
– Ice
– Lime wheel and sprig of fresh lavender for garnish
Instructions:
1. In a large glass, gently muddle the dried lavender buds with the simple syrup to release their fragrance.
2. Add the vodka and ginger beer to the glass. Stir to combine.
3. Squeeze in the lime juice and stir again.
4. Fill the glass with ice and garnish with a lime wheel and a sprig of fresh lavender.
Cooking Time: 5 minutes ( preparation time: 1 minute, chilling time: 0 minutes)
Grapefruit Moscow Mule with a Tart Finish
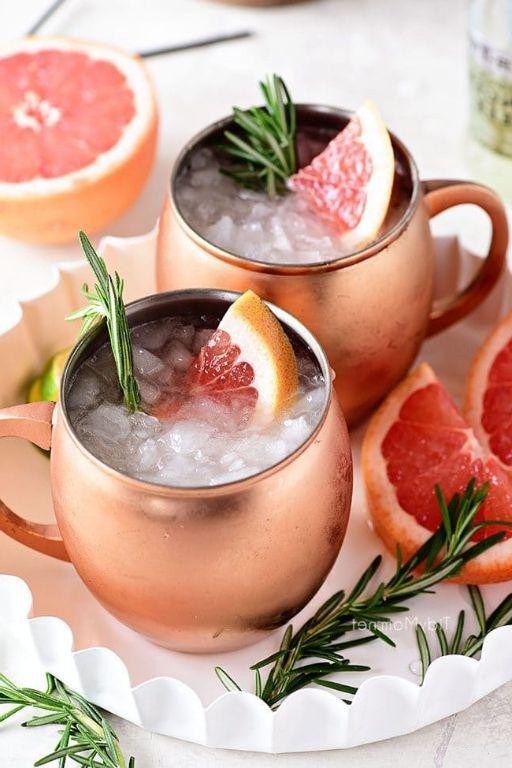
Revive your cocktail game with this refreshing twist on the classic Moscow Mule, featuring the bold flavors of grapefruit and lime.
Ingredients:
– 1 1/2 oz vodka
– 1/2 oz fresh grapefruit juice
– 1/2 oz lime juice
– 4 oz ginger beer
– 1/2 oz simple syrup (equal parts water and granulated sugar, dissolved)
– Lime wheel, for garnish
– Sprig of rosemary or mint, for garnish (optional)
Instructions:
1. Fill a copper mug or highball glass with ice.
2. Add vodka, grapefruit juice, lime juice, and simple syrup.
3. Top with ginger beer and stir gently to combine.
4. Squeeze a lime wheel over the drink and drop it in.
5. Garnish with rosemary or mint, if desired.
Cooking Time: None! Serve immediately and enjoy.
Vanilla Moscow Mule with a Sweet Twist
Vanilla Moscow Mule with a Sweet Twist Recipe
This recipe puts a sweet spin on the classic Moscow Mule by adding vanilla and a touch of sweetness to this refreshing cocktail.
Ingredients:
– 1 1/2 oz vodka
– 4 oz ginger beer
– Juice of 1 lime
– 1 tsp vanilla extract
– 1 tablespoon simple syrup (equal parts water and granulated sugar, dissolved)
– Ice
– Lime wheel, for garnish
– Sprig of fresh mint, for garnish
Instructions:
1. Fill a copper mug or highball glass with ice.
2. Add the vodka, ginger beer, lime juice, vanilla extract, and simple syrup.
3. Stir gently to combine.
4. Squeeze in a sliver of lime and drop it in.
5. Garnish with a lime wheel and sprig of fresh mint.
Cooking Time: 5 minutes
Pomegranate Moscow Mule for a Festive Flavor

Elevate your Moscow Mule game with this unique and flavorful twist, combining the tartness of pomegranate with the spices of the classic cocktail.
Ingredients:
– 1 1/2 oz vodka
– 4 oz ginger beer
– 1/2 oz lime juice
– 1/2 oz pomegranate juice
– 1/4 oz simple syrup (optional)
– Lime wheel, for garnish
– Pomegranate seeds, for garnish
Instructions:
1. Fill a copper mug or highball glass with ice.
2. Add vodka and ginger beer.
3. Squeeze in lime juice and add pomegranate juice.
4. Stir gently to combine.
5. If desired, add simple syrup to balance the flavors.
6. Garnish with a lime wheel and sprinkle pomegranate seeds on top.
Cooking Time: None! This cocktail is ready to serve immediately.
Spiced Moscow Mule with Cinnamon and Clove
Elevate the classic Moscow Mule by adding warm spices like cinnamon and clove. This unique twist will transport you to a cozy winter evening.
Ingredients:
– 1 1/2 oz vodka
– 4 oz ginger beer
– Juice of 1 lime
– 1/2 teaspoon ground cinnamon
– 1/8 teaspoon ground cloves
– Ice
– Lime wheel, for garnish
– Sprig of fresh mint, for garnish (optional)
Instructions:
1. Fill a copper mug or highball glass with ice.
2. Add the vodka, ginger beer, and lime juice.
3. Add the cinnamon and clove grounds. Stir gently to combine.
4. Squeeze in a bit more lime juice, if desired.
5. Garnish with a lime wheel and a sprig of fresh mint, if desired.
Cooking Time: None! This refreshing drink is ready in just a few minutes.
Watermelon Moscow Mule for a Summer Refresher

Summer Refresher: Watermelon Moscow Mule Recipe
Beat the heat with a twist on the classic Moscow Mule! This refreshing cocktail combines the sweetness of watermelon with the spicy kick of ginger beer.
Ingredients:
– 1 1/2 oz vodka (or gin, if preferred)
– 3 oz watermelon puree
– 1 oz lime juice
– 4 oz ginger beer
– Splash of simple syrup (optional)
– Lime wheel and mint sprigs for garnish
Instructions:
1. In a copper mug or highball glass, combine vodka, watermelon puree, and lime juice.
2. Add ginger beer and stir gently to combine.
3. Taste and adjust sweetness by adding a splash of simple syrup, if desired.
4. Garnish with a lime wheel and mint sprigs.
Cooking Time: 5 minutes
Elderflower Moscow Mule with a Sophisticated Edge
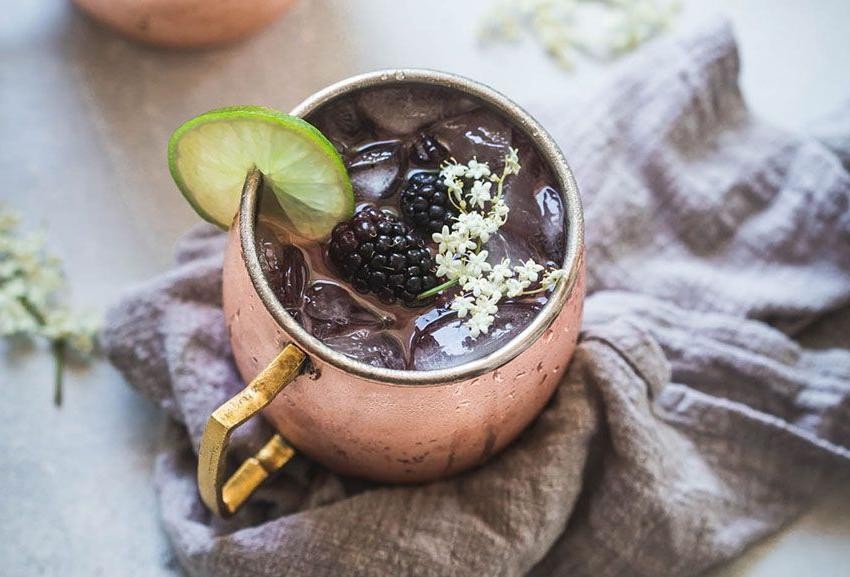
This refreshing twist on the classic Moscow Mule adds a touch of elegance with the subtle sweetness and delicate flavor of elderflower liqueur.
Ingredients:
– 1 1/2 oz vodka
– 4 oz ginger beer
– 1/2 oz lime juice
– 1/2 oz elderflower liqueur
– Slice of lime, for garnish
– Sprig of mint, for garnish
Instructions:
1. Fill a copper mug or highball glass with ice.
2. Add the vodka, ginger beer, and lime juice.
3. Add a splash of elderflower liqueur (about 1/4 oz).
4. Stir gently to combine.
5. Squeeze a slice of lime over the drink and drop it in.
6. Garnish with a sprig of mint.
Cooking Time: None! This cocktail is ready to serve immediately.
Chocolate Moscow Mule for a Decadent Treat
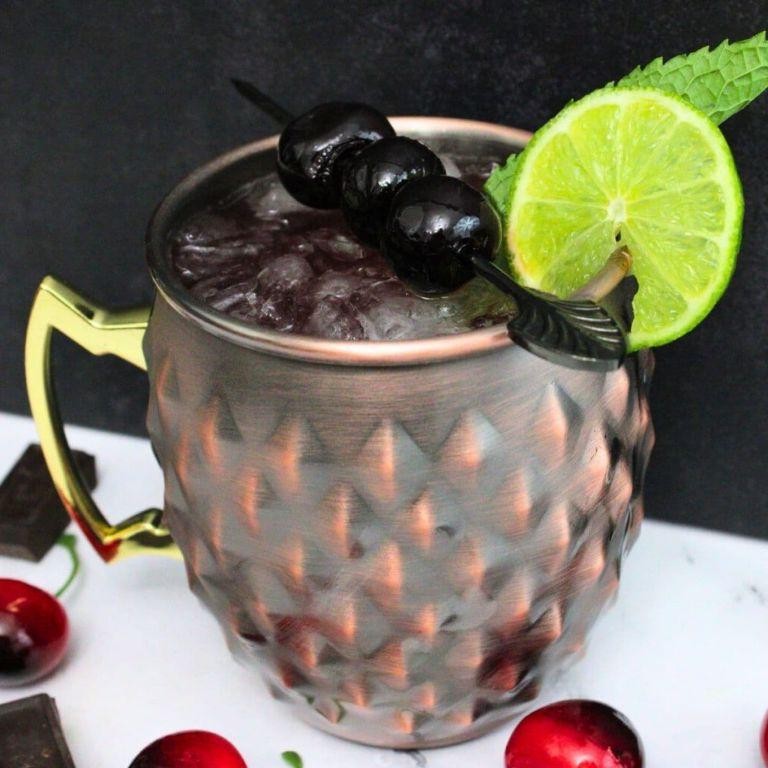
Elevate your cocktail game with this rich and indulgent twist on the classic Moscow Mule. This decadent treat combines the spicy kick of ginger beer with the velvety smoothness of chocolate.
Ingredients:
– 1 1/2 oz vodka
– 1/2 oz Godiva white chocolate liqueur
– 4 oz ginger beer
– Lime juice (to taste)
– Ice
– Lime wheel, for garnish
– Sprinkle of cayenne pepper, optional
Instructions:
1. Fill a copper mug or highball glass with ice.
2. Add the vodka and Godiva white chocolate liqueur.
3. Top with ginger beer and stir gently to combine.
4. Squeeze a sliver of lime juice into the mixture (to taste).
5. Garnish with a lime wheel and sprinkle with cayenne pepper, if desired.
Cooking Time: 2 minutes
Enjoy your decadent treat, and cheers to a sweet and spicy evening!
Passion Fruit Moscow Mule with Tropical Vibes
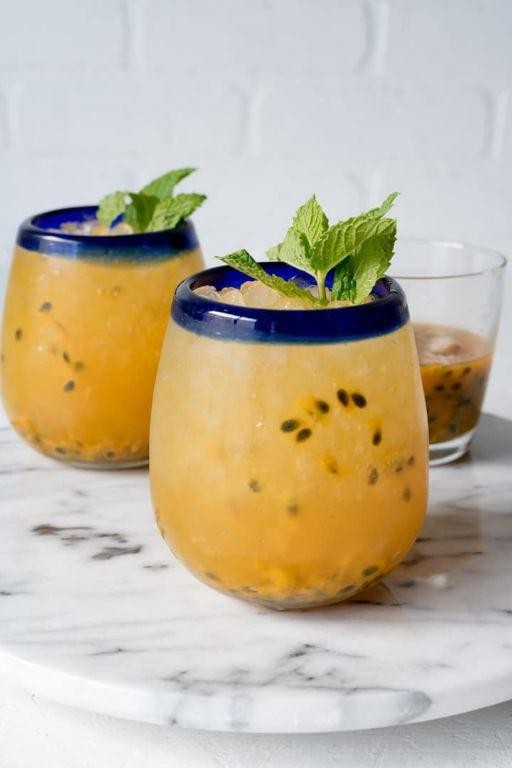
Transport yourself to a tropical paradise with this refreshing twist on the classic Moscow Mule.
Ingredients:
– 2 oz Ginger-infused Vodka
– 4 oz Passion Fruit puree
– 1 oz Fresh lime juice
– 1/2 oz Simple syrup (equal parts water and sugar, dissolved)
– Splash of Club soda
– Ice
– Lime wheel, for garnish
– Sprig of fresh mint, for garnish
Instructions:
1. Fill a copper mug or highball glass with ice.
2. Add the ginger-infused vodka, passion fruit puree, lime juice, and simple syrup.
3. Stir gently to combine.
4. Top with a splash of club soda.
5. Garnish with a lime wheel and sprig of fresh mint.
Cooking Time: 0 minutes (ready in an instant!)
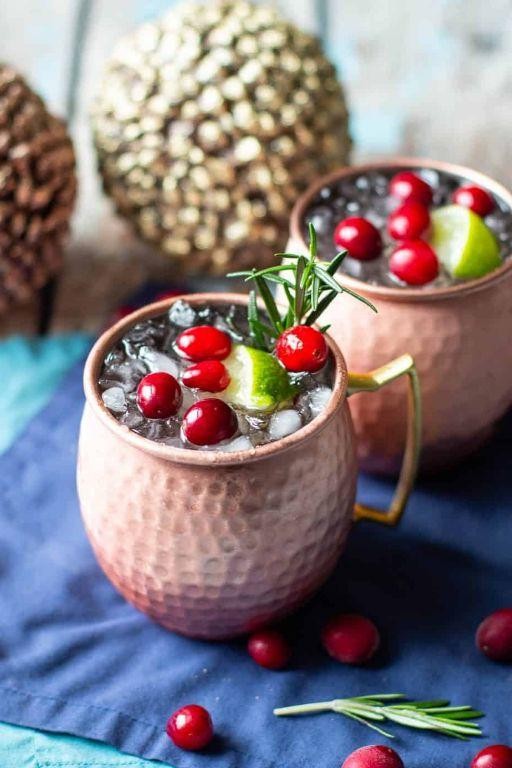
Rosemary Moscow Mule with Herbal Notes

Elevate your Moscow Mule game with the subtle yet sophisticated flavors of rosemary and herbal notes.
Ingredients:
– 1 1/2 oz vodka (preferably a crisp, clean vodka)
– 4 oz ginger beer
– Juice of 1 lime
– 1 sprig of fresh rosemary
– 1/2 tsp simple syrup (equal parts water and granulated sugar, dissolved)
– Ice
– Lime wheel, for garnish
Instructions:
1. Fill a copper mug or highball glass with ice.
2. Add vodka and ginger beer.
3. Squeeze in lime juice and add sprig of rosemary.
4. Stir gently to combine.
5. Top with simple syrup (optional).
6. Garnish with a lime wheel and additional rosemary sprigs, if desired.
Cooking Time: None! Simply assemble the ingredients and serve.
Summary
Get ready to spice up your summer with these refreshing Moscow Mule recipes! From classic flavors like fresh lime juice and ginger, to fruity twists like berry bliss and tropical pineapple, there’s something for everyone. Try a cool cucumber mint Moscow Mule on a hot day or indulge in a decadent chocolate Moscow Mule for a sweet treat. With 18 unique recipes to choose from, you’ll never get bored with these creative takes on the classic cocktail.