As the seasons change and autumn leaves begin to fall, our thoughts turn to warm, comforting dishes that celebrate the flavors and textures of the season. One of the most versatile and delicious ingredients in your fall recipe arsenal is the humble butternut squash. When prepared using the Hasselback method – where the squash is sliced into thin, fan-like sections and roasted to perfection – this sweet and nutty vegetable becomes a star of the show.
In this article, we’ll explore 18 creative Hasselback butternut squash recipes that are sure to become your new go-to’s for cozy fall gatherings. From classic maple glaze to bold and spicy chili flavors, these recipes showcase the incredible range of possibilities when it comes to preparing this beloved winter squash. So grab a pen, pencil, or your phone’s notes app – we’re about to dive into the world of Hasselback butternut squash recipes that will make your taste buds do the happy dance!
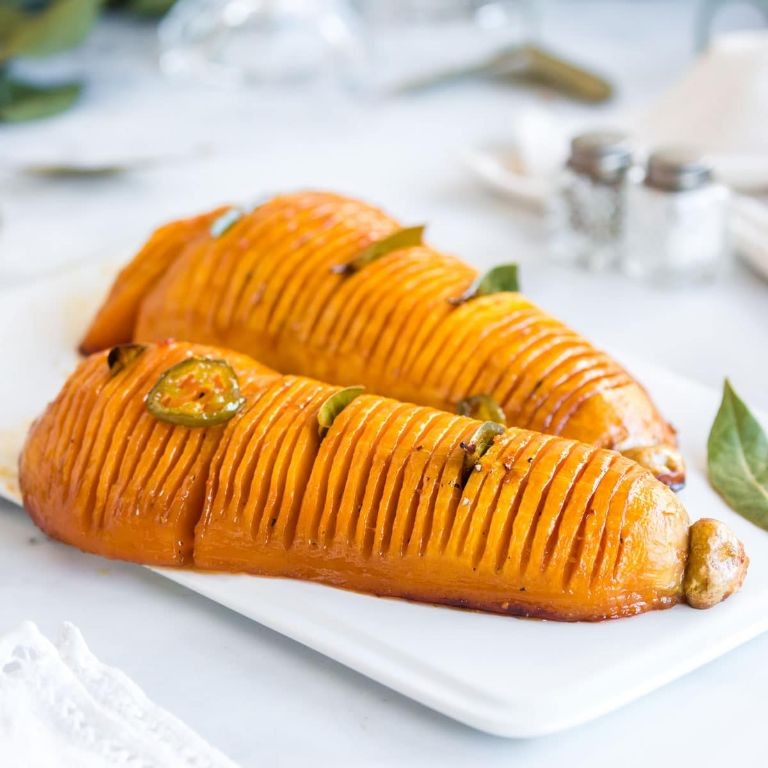
Maple Glazed Hasselback Butternut Squash
Elevate your fall menu with this sweet and savory recipe that combines the natural sweetness of butternut squash with the richness of maple syrup. This impressive-looking side dish is surprisingly easy to make!
Ingredients:
– 1 large butternut squash (about 2 lbs)
– 2 tbsp unsalted butter, melted
– 2 tbsp pure maple syrup
– 1 tsp ground cinnamon
– 1/4 tsp salt
– Fresh thyme leaves for garnish
Instructions:
1. Preheat oven to 400°F (200°C).
2. Cut the butternut squash in half lengthwise and scoop out the seeds.
3. Place each squash half on a baking sheet, cut side up.
4. In a small bowl, whisk together melted butter, maple syrup, cinnamon, and salt.
5. Brush the glaze evenly over each squash half, making sure to get it into all the nooks and crannies.
6. Roast for 45-50 minutes, or until the squash is tender and caramelized.
7. Garnish with fresh thyme leaves and serve warm.
Cooking Time: 45-50 minutes
Herb-Roasted Hasselback Butternut Squash
A seasonal twist on traditional roasted squash, this recipe adds a pop of flavor and visual appeal with its elegant spiral design. Perfect as a side dish or main course for any fall or winter meal.
Ingredients:
– 1 large butternut squash (about 2 lbs)
– 2 tbsp olive oil
– 1 tsp ground cumin
– 1 tsp smoked paprika
– 1/4 cup chopped fresh parsley
– 1/4 cup chopped fresh sage
– Salt and pepper to taste
Instructions:
1. Preheat oven to 400°F (200°C).
2. Cut the squash in half lengthwise and scoop out seeds.
3. Place each squash half on a baking sheet, cut side up.
4. Drizzle with olive oil and sprinkle with cumin, smoked paprika, parsley, and sage.
5. Season with salt and pepper to taste.
6. Roast for 45-50 minutes or until tender, flipping halfway through.
Cooking Time: 45-50 minutes
Cheesy Hasselback Butternut Squash with Parmesan
Discover the perfect fall side dish: sweet butternut squash meets savory Parmesan cheese. This recipe is a game-changer for your next family dinner or special occasion.
Ingredients:
– 1 large butternut squash (about 2 lbs)
– 2 tbsp olive oil
– 1/4 cup grated Parmesan cheese
– 1/2 cup shredded mozzarella cheese
– 2 cloves garlic, minced
– Salt and pepper to taste
– Fresh thyme leaves for garnish (optional)
Instructions:
1. Preheat oven to 400°F (200°C).
2. Peel the butternut squash and cut it in half lengthwise.
3. Place the squash on a baking sheet, cut side up.
4. Drizzle with olive oil and sprinkle with minced garlic.
5. In a small bowl, mix Parmesan and mozzarella cheese.
6. Stuff each squash half with the cheesy mixture, dividing evenly.
7. Season with salt and pepper to taste.
8. Bake for 45-50 minutes or until the squash is tender and the cheese is melted.
9. Garnish with fresh thyme leaves, if desired.
Cooking Time: 45-50 minutes
Spicy Chili Hasselback Butternut Squash
Elevate your fall cooking with this flavorful and visually appealing Spicy Chili Hasselback Butternut Squash. This recipe combines the natural sweetness of butternut squash with the warmth of chili flakes and a hint of spice.
Ingredients:
– 1 large butternut squash (about 2 lbs)
– 2 tbsp olive oil
– 1 tsp salt
– 1/2 tsp black pepper
– 1/4 tsp chili flakes
– 1/4 cup chopped fresh cilantro (optional)
Instructions:
1. Preheat oven to 425°F (220°C).
2. Cut the butternut squash in half lengthwise and scoop out the seeds.
3. In a small bowl, mix together olive oil, salt, black pepper, and chili flakes.
4. Brush the mixture evenly onto the cut sides of the squash.
5. Place the squash on a baking sheet, cut side up.
6. Roast for 45-50 minutes or until the squash is tender and caramelized.
7. Garnish with chopped cilantro, if desired.
Cooking Time: 45-50 minutes
Garlic Butter Hasselback Butternut Squash
Roast a flavorful and visually appealing butternut squash with this easy recipe, perfect for a cozy fall or winter evening. This Garlic Butter Hasselback Butternut Squash is a delicious side dish that’s sure to impress.
Ingredients:
– 1 large butternut squash (about 2 lbs)
– 2 tbsp unsalted butter, softened
– 2 cloves garlic, minced
– 1 tsp salt
– 1/4 tsp black pepper
– Fresh thyme leaves for garnish (optional)
Instructions:
1. Preheat oven to 400°F (200°C).
2. Cut the butternut squash in half lengthwise and scoop out the seeds.
3. In a small bowl, mix together softened butter, minced garlic, salt, and pepper.
4. Spread the garlic butter mixture evenly onto each squash half, leaving a 1/2-inch border around the edges.
5. Place the squash halves on a baking sheet, cut side up.
6. Roast for 45-50 minutes or until the squash is tender and caramelized.
7. Garnish with fresh thyme leaves, if desired.
Cooking Time: 45-50 minutes
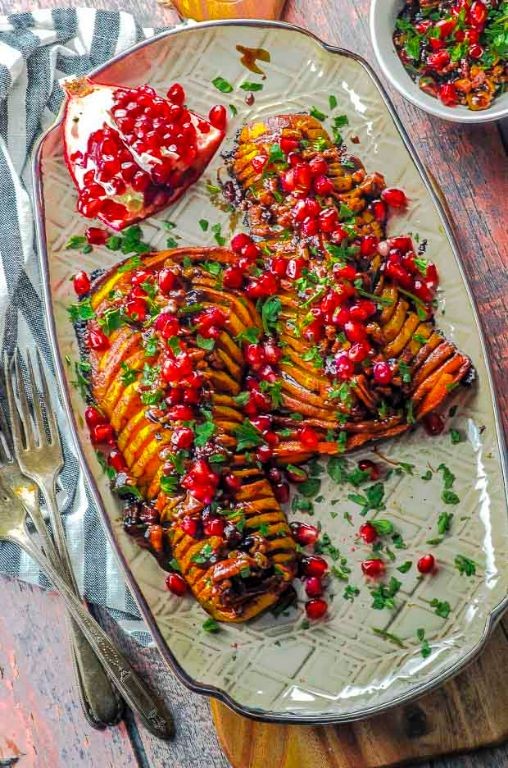
Balsamic Glazed Hasselback Butternut Squash

This sweet and savory side dish is a perfect addition to any fall or winter meal. The combination of roasted butternut squash, caramelized onions, and tangy balsamic glaze creates a deliciously complex flavor profile.
Ingredients:
– 1 large butternut squash (about 2 lbs)
– 2 tbsp olive oil
– 1 onion, thinly sliced
– 2 cloves garlic, minced
– 1/4 cup balsamic vinegar
– 2 tbsp honey
– Salt and pepper to taste
– Fresh thyme leaves for garnish (optional)
Instructions:
1. Preheat oven to 425°F (220°C).
2. Cut the butternut squash in half lengthwise and scoop out seeds.
3. In a bowl, toss together olive oil, sliced onion, garlic, salt, and pepper. Spread mixture on a baking sheet and roast for 20-25 minutes or until caramelized.
4. In a small saucepan, combine balsamic vinegar and honey. Bring to a simmer over medium heat and cook for 5-7 minutes or until thickened.
5. Place the butternut squash halves on a baking sheet and brush with the balsamic glaze. Roast in preheated oven for 30-40 minutes or until tender.
Cooking Time: Approximately 50-60 minutes
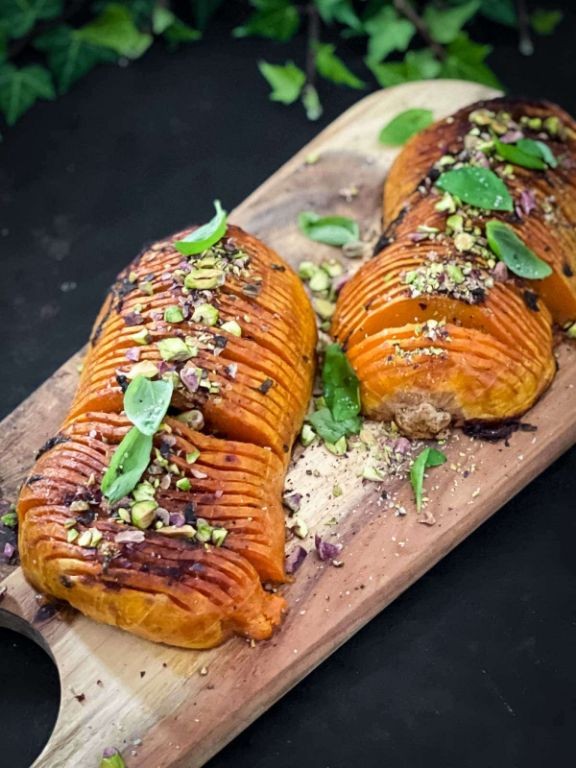
Pumpkin Seed Crusted Hasselback Butternut Squash

Elevate your fall menu with this unique and flavorful side dish, featuring the sweetness of butternut squash paired with the crunch of pumpkin seeds.
Ingredients:
– 1 large butternut squash (about 2 lbs)
– 2 tbsp olive oil
– 2 tsp salt
– 1 tsp black pepper
– 1/4 cup pumpkin seeds
– 1 tsp garlic powder
Instructions:
1. Preheat oven to 425°F (220°C).
2. Cut the butternut squash in half lengthwise and scoop out the seeds.
3. In a small bowl, mix together olive oil, salt, black pepper, and garlic powder.
4. Place the squash cut-side up on a baking sheet lined with parchment paper.
5. Drizzle the oil mixture over the squash, then sprinkle pumpkin seeds evenly across both halves.
6. Roast in the preheated oven for 45-50 minutes, or until the squash is tender and caramelized.
Cooking Time: 45-50 minutes
Rosemary and Thyme Hasselback Butternut Squash

Elevate your fall cooking with this fragrant and flavorful recipe, perfect for a cozy dinner or as a side dish. The combination of rosemary and thyme adds a savory depth to the natural sweetness of the butternut squash.
Ingredients:
– 1 large butternut squash (about 2 lbs)
– 2 tbsp olive oil
– 2 sprigs fresh rosemary, chopped
– 1 tsp dried thyme
– Salt and pepper, to taste
– Optional: 1/4 cup grated Parmesan cheese
Instructions:
1. Preheat oven to 425°F (220°C).
2. Cut the squash in half lengthwise and scoop out the seeds.
3. In a small bowl, mix together olive oil, rosemary, thyme, salt, and pepper.
4. Place the squash halves on a baking sheet lined with parchment paper.
5. Brush the herb mixture evenly onto the squash flesh.
6. Roast for 45-50 minutes or until tender, flipping halfway through.
7. Optional: Sprinkle Parmesan cheese over the squash and return to oven for an additional 2-3 minutes.
Cooking Time: 45-50 minutes
Brown Sugar Cinnamon Hasselback Butternut Squash
Elevate your autumnal meals with this unique and flavorful Brown Sugar Cinnamon Hasselback Butternut Squash recipe. The combination of sweet brown sugar, warm cinnamon, and nutty butternut squash will become a new favorite.
Ingredients:
– 1 large butternut squash (about 2 lbs)
– 2 tbsp brown sugar
– 1 tsp ground cinnamon
– 2 tbsp unsalted butter, softened
– Salt to taste
– Optional: chopped fresh herbs like parsley or thyme for garnish
Instructions:
1. Preheat oven to 400°F (200°C).
2. Cut the butternut squash in half lengthwise and scoop out seeds.
3. In a small bowl, mix together brown sugar and cinnamon.
4. Place the squash cut-side up on a baking sheet lined with parchment paper.
5. Dot the top of each squash half with softened butter, then sprinkle with the brown sugar-cinnamon mixture.
6. Season with salt to taste.
7. Roast in the preheated oven for 45-50 minutes, or until the squash is tender and caramelized.
Cooking Time: 45-50 minutes
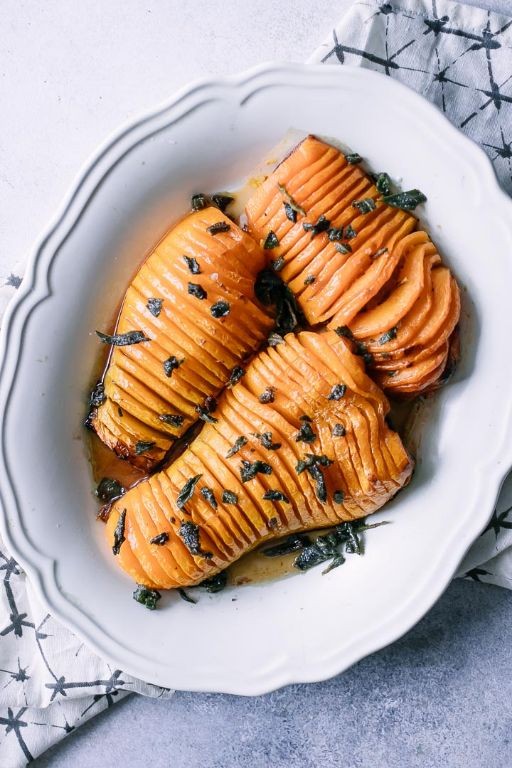
Savory Sage Hasselback Butternut Squash

Elevate your fall meals with this flavorful and visually appealing dish, perfect for a cozy dinner or special occasion. This Savory Sage Hasselback Butternut Squash recipe combines the natural sweetness of butternut squash with the earthy flavors of sage and Parmesan cheese.
Ingredients:
– 1 large butternut squash (about 2 lbs)
– 2 tbsp olive oil
– 2 tsp chopped fresh sage
– 1/4 cup grated Parmesan cheese
– Salt and pepper, to taste
– Optional: 1/4 cup chopped hazelnuts or pecans for garnish
Instructions:
1. Preheat oven to 425°F (220°C).
2. Peel the butternut squash and slice it in half lengthwise.
3. Scoop out the seeds and pulp, leaving a 1/4-inch border around the edges.
4. In a small bowl, mix together olive oil, chopped sage, salt, and pepper.
5. Brush the mixture evenly onto both squash halves, making sure to get into the crevices.
6. Place the squash on a baking sheet lined with parchment paper, cut side up.
7. Sprinkle Parmesan cheese over the top of each squash half.
8. Roast for 45-50 minutes or until the squash is tender and caramelized.
9. Garnish with chopped nuts, if desired.
Cooking Time: 45-50 minutes
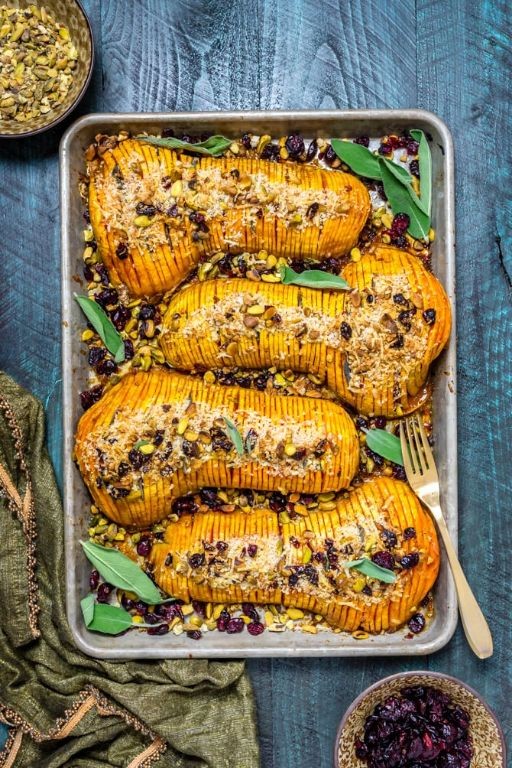
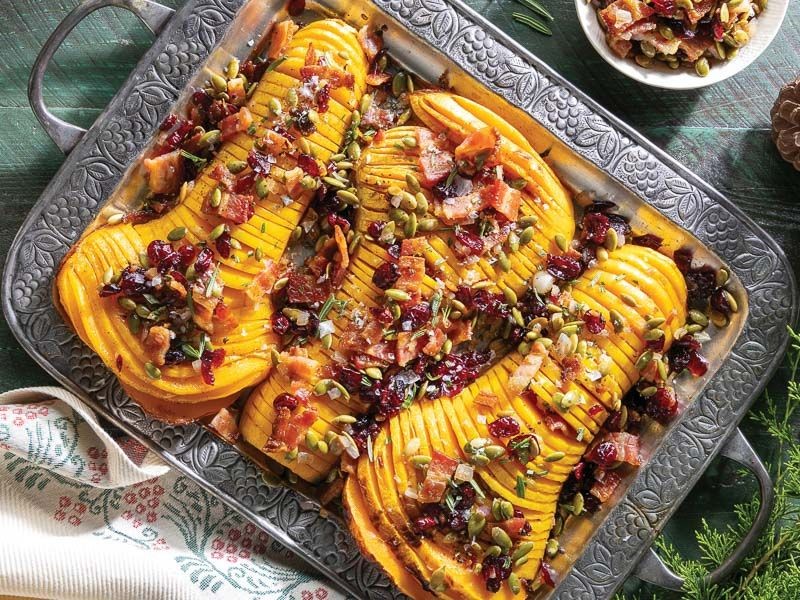
Cranberry Stuffed Hasselback Butternut Squash
This recipe combines the natural sweetness of butternut squash with the tanginess of cranberries, creating a unique and flavorful side dish perfect for the fall season.
Ingredients:
– 1 large butternut squash (about 2 lbs)
– 1/4 cup brown sugar
– 2 tbsp olive oil
– 1/4 cup fresh or frozen cranberries
– 1/4 cup chopped pecans or walnuts
– Salt and pepper to taste
Instructions:
1. Preheat oven to 400°F (200°C).
2. Cut the butternut squash in half lengthwise, scooping out seeds and pulp.
3. In a bowl, mix together brown sugar, olive oil, cranberries, and nuts.
4. Stuff each squash half with the cranberry mixture, dividing it evenly between the two.
5. Place the stuffed squash on a baking sheet lined with parchment paper, cut side up.
6. Season with salt and pepper to taste.
7. Roast in the preheated oven for 45-50 minutes or until the squash is tender.
Cooking Time: 45-50 minutes
Pesto Drizzled Hasselback Butternut Squash
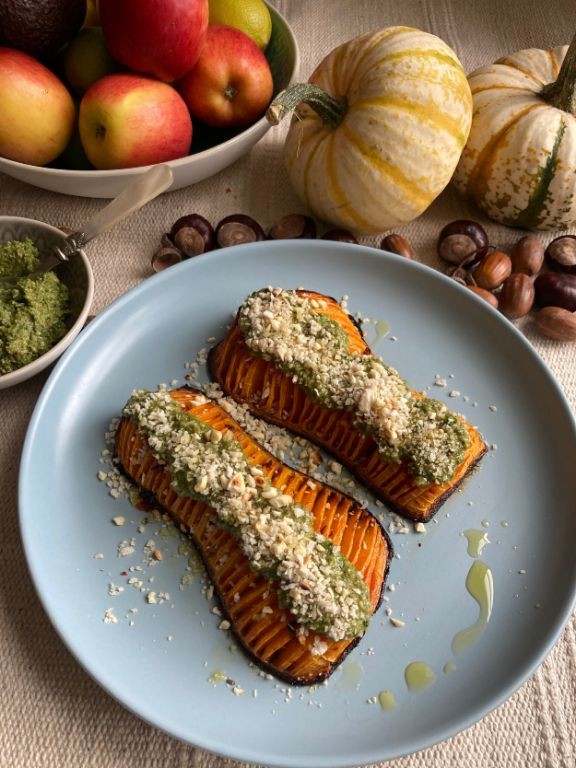
This recipe combines the natural sweetness of roasted butternut squash with the vibrant flavor of pesto, creating a delicious and easy-to-make side dish perfect for fall gatherings.
Ingredients:
– 1 large butternut squash (about 2 lbs)
– 2 tbsp olive oil
– Salt and pepper to taste
– 1/4 cup freshly made pesto
– 1/4 cup grated Parmesan cheese
Instructions:
1. Preheat oven to 425°F (220°C).
2. Cut the butternut squash in half lengthwise and scoop out seeds.
3. Place the squash on a baking sheet, cut side up, drizzle with olive oil, and season with salt and pepper.
4. Roast for 45-50 minutes, or until tender and caramelized.
5. Remove from oven and let cool slightly.
6. Drizzle pesto over the squash, followed by Parmesan cheese.
7. Serve warm or at room temperature.
Cooking Time: 45-50 minutes
Smoky Paprika Hasselback Butternut Squash
Elevate your roasted squash game with this flavorful and visually stunning recipe, perfect for a cozy fall or winter evening. Smoky paprika adds a depth of flavor to the naturally sweet butternut squash.
Ingredients:
– 1 large butternut squash (about 2 lbs)
– 2 tbsp olive oil
– 1 tsp smoky paprika
– 1 tsp brown sugar
– Salt and pepper, to taste
– Optional: chopped fresh parsley or thyme for garnish
Instructions:
1. Preheat oven to 425°F (220°C).
2. Cut the butternut squash in half lengthwise and scoop out the seeds.
3. In a small bowl, mix together olive oil, smoky paprika, brown sugar, salt, and pepper.
4. Place the squash halves on a baking sheet lined with parchment paper.
5. Brush the spice mixture evenly onto both squash halves.
6. Roast for 45-50 minutes or until the squash is tender and caramelized.
7. Garnish with chopped fresh herbs, if desired.
Cooking Time: 45-50 minutes
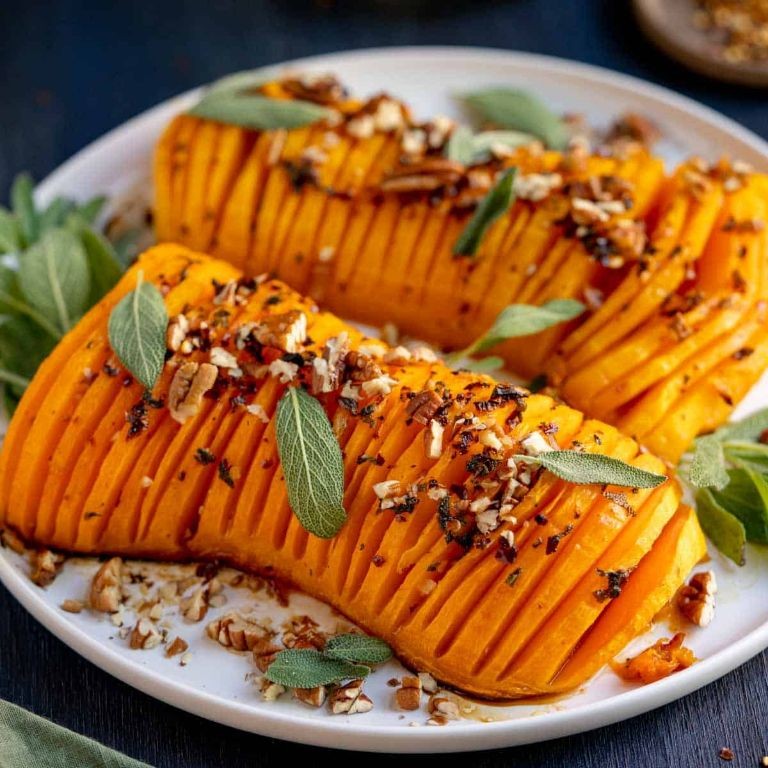
Walnut and Blue Cheese Hasselback Butternut Squash
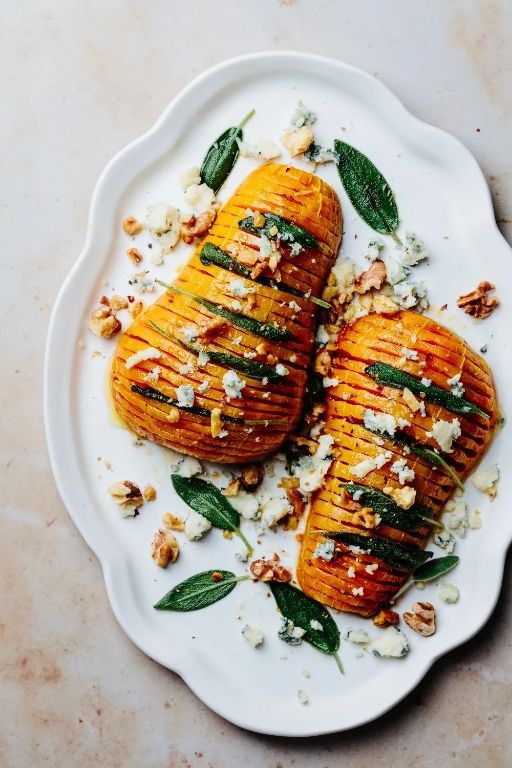
Walnut and Blue Cheese Hasselback Butternut Squash: A flavorful and nutritious side dish that combines the sweetness of roasted butternut squash with the savory flavors of blue cheese, walnuts, and thyme.
Ingredients:
– 1 large butternut squash (about 2 lbs)
– 1/4 cup walnut halves
– 1/4 cup crumbled blue cheese
– 2 tbsp olive oil
– 1 tsp dried thyme
– Salt and pepper to taste
Instructions:
1. Preheat oven to 400°F (200°C).
2. Cut the butternut squash in half lengthwise and scoop out the seeds.
3. Place the squash on a baking sheet, cut side up.
4. Drizzle olive oil over the squash and sprinkle with thyme, salt, and pepper.
5. Top each squash half with an equal amount of walnut halves and blue cheese crumbles.
6. Roast in the preheated oven for 45-50 minutes, or until the squash is tender and caramelized.
Lemon Zest Hasselback Butternut Squash
Transform a humble butternut squash into a stunning side dish with the bright, citrusy flavor of lemon zest. This Hasselback-inspired recipe is perfect for your next dinner party or family gathering.
Ingredients:
– 1 large butternut squash (about 2 lbs)
– 2 tbsp unsalted butter, softened
– 1/4 cup brown sugar
– 2 cloves garlic, minced
– 1 tsp salt
– 1/2 tsp black pepper
– 1/4 cup freshly grated lemon zest
– 2 tbsp freshly squeezed lemon juice
Instructions:
1. Preheat oven to 400°F (200°C).
2. Cut the butternut squash in half lengthwise and scoop out the seeds.
3. In a small bowl, mix together butter, brown sugar, garlic, salt, and pepper.
4. Place the squash halves on a baking sheet, cut side up. Brush the sugar mixture evenly over both squashes.
5. Sprinkle lemon zest over the squash, then drizzle with lemon juice.
6. Roast in the preheated oven for 45-50 minutes, or until the squash is tender and caramelized.
Cooking Time: 45-50 minutes
Curry Spiced Hasselback Butternut Squash

This flavorful side dish combines the natural sweetness of butternut squash with the warmth of Indian-inspired spices. Perfect for a quick and easy accompaniment to your favorite meals.
Ingredients:
– 1 large butternut squash (about 2 lbs)
– 2 tbsp olive oil
– 1 tsp ground cumin
– 1 tsp curry powder
– 1/2 tsp salt
– 1/4 tsp black pepper
– 1/4 cup chopped fresh cilantro (optional)
Instructions:
1. Preheat oven to 400°F (200°C).
2. Cut the butternut squash in half lengthwise and scoop out the seeds.
3. In a small bowl, mix together olive oil, cumin, curry powder, salt, and black pepper.
4. Place the squash halves on a baking sheet lined with parchment paper, cut side up.
5. Brush the spice mixture evenly over both squash halves.
6. Roast in the preheated oven for 45-50 minutes, or until the squash is tender and caramelized.
7. Garnish with chopped cilantro, if desired.
Cooking Time: 45-50 minutes
Apple Cider Glazed Hasselback Butternut Squash

Elevate your fall baking with this simple yet impressive Apple Cider Glazed Hasselback Butternut Squash recipe. The combination of caramelized butternut squash, tangy apple cider glaze, and crispy breadcrumbs is sure to become a new favorite.
Ingredients:
– 1 large butternut squash (about 2 lbs)
– 1/4 cup apple cider
– 2 tbsp brown sugar
– 1 tsp ground cinnamon
– 1/4 tsp salt
– 2 tbsp unsalted butter, melted
– 1/4 cup panko breadcrumbs
– Fresh thyme leaves for garnish (optional)
Instructions:
1. Preheat oven to 400°F (200°C).
2. Cut the butternut squash in half lengthwise and scoop out the seeds.
3. In a small bowl, whisk together apple cider, brown sugar, cinnamon, and salt.
4. Brush the mixture evenly onto both squash halves.
5. Drizzle melted butter over the glaze.
6. Sprinkle panko breadcrumbs on top of each squash half.
7. Roast in the preheated oven for 45-50 minutes or until caramelized and tender.
8. Garnish with fresh thyme leaves, if desired.
Cooking Time: 45-50 minutes
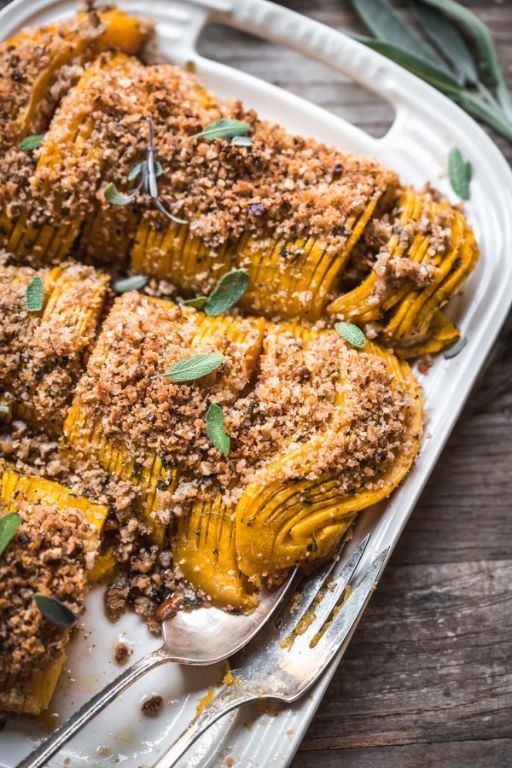
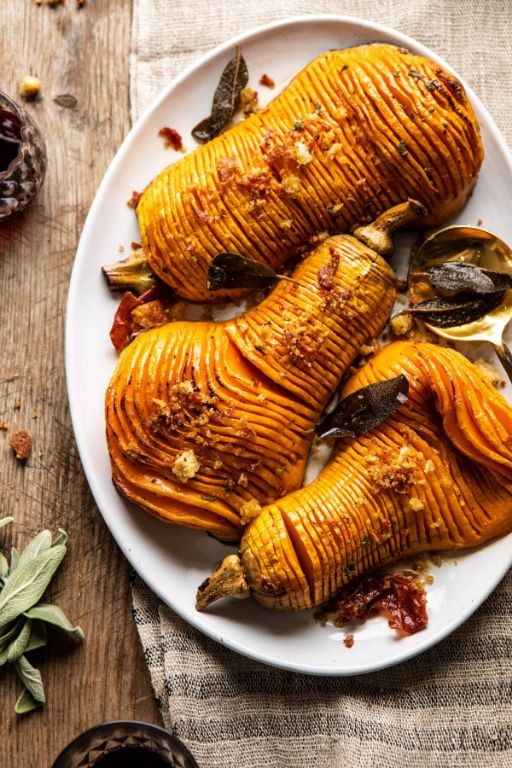
Caramelized Onion Hasselback Butternut Squash
Transform a humble butternut squash into a show-stopping side dish by layering it with sweet caramelized onions and crispy breadcrumbs. This recipe is perfect for the fall season, as it combines the natural sweetness of roasted squash with the savory flavors of onion and butter.
Ingredients:
– 1 large butternut squash (about 2 lbs)
– 1 large onion, thinly sliced
– 2 tbsp unsalted butter
– 1/4 cup breadcrumbs
– Salt and pepper to taste
– Optional: thyme or rosemary for added flavor
Instructions:
1. Preheat oven to 425°F (220°C).
2. Cut the squash in half lengthwise and scoop out seeds.
3. In a large skillet, caramelize the onions over medium-low heat for about 20-25 minutes, stirring occasionally.
4. Arrange the squash halves on a baking sheet lined with parchment paper.
5. Top each squash half with a layer of caramelized onions, then sprinkle with breadcrumbs and dot with butter.
6. Season with salt, pepper, and optional herbs (if using).
7. Roast in the preheated oven for 45-50 minutes, or until the squash is tender and caramelized.
Cooking Time: 45-50 minutes
Summary
Get ready to delight your taste buds with these 18 creative Hasselback butternut squash recipes perfect for Fall. From sweet and savory glazes to bold and zesty flavors, there’s something for everyone. Try Maple Glazed Hasselback Butternut Squash, Herb-Roasted Hasselback Butternut Squash, or Cheesy Hasselback Butternut Squash with Parmesan. Or go bold with Spicy Chili Hasselback Butternut Squash or Smoky Paprika Hasselback Butternut Squash. Whatever your taste, these recipes will make your Fall cooking shine!