As the seasons change, our palates crave a taste of fall’s iconic flavors. Pumpkin is one such ingredient that never fails to evoke feelings of warmth and comfort. But did you know that this versatile gourd can also be a powerful tool in your weight loss arsenal? With its high fiber and water content, pumpkin can help keep you feeling full and satisfied, making it an excellent addition to many healthy recipes.
In this article, we’ll explore 20 mouth-watering and nutritious pumpkin recipes that are perfect for those looking to shed a few pounds. From savory soups and curries to sweet treats and breakfast ideas, these dishes showcase the incredible versatility of pumpkin in the kitchen. Whether you’re a busy parent, an athlete, or simply someone looking to upgrade their diet, you’ll find inspiration and motivation in this collection of deliciously healthy recipes.
Roasted Pumpkin and Quinoa Salad
This autumnal salad combines the comforting warmth of roasted pumpkin with the nutty goodness of quinoa, all wrapped up in a fresh and zesty dressing. Perfect for a cozy fall evening or a quick lunch.
Ingredients:
– 1 small sugar pumpkin (about 2 lbs), peeled and cubed
– 1 cup quinoa, rinsed and drained
– 2 cups water or vegetable broth
– 2 tbsp olive oil
– 1 tsp ground cumin
– Salt and pepper to taste
– 1/4 cup chopped fresh cilantro
– 2 tbsp freshly squeezed lime juice
– 1/4 cup crumbled feta cheese (optional)
Instructions:
1. Preheat oven to 400°F (200°C).
2. Roast the pumpkin cubes on a baking sheet lined with parchment paper for about 30-40 minutes, or until tender and caramelized.
3. Cook the quinoa according to package instructions using water or broth.
4. In a large bowl, combine roasted pumpkin, cooked quinoa, olive oil, cumin, salt, and pepper. Toss to combine.
5. Stir in chopped cilantro, lime juice, and crumbled feta cheese (if using).
6. Serve warm or at room temperature.
Cooking Time: 45 minutes
Pumpkin Spice Smoothie Bowl

Kick-start your fall mornings with this warm and comforting Pumpkin Spice Smoothie Bowl. A blend of creamy pumpkin, sweet banana, and spices, topped with crunchy granola and a dollop of whipped cream.
Ingredients:
– 1/2 cup frozen pumpkin puree
– 1 ripe banana
– 1 tablespoon honey
– 1/4 teaspoon ground cinnamon
– 1/4 teaspoon ground nutmeg
– 1/4 teaspoon ground ginger
– 1/2 cup unsweetened almond milk
– 1/4 cup plain Greek yogurt
– Handful of granola for topping
– Whipped cream and pumpkin pie spice for garnish (optional)
Instructions:
1. Combine pumpkin puree, banana, honey, cinnamon, nutmeg, and ginger in a blender.
2. Blend until smooth and creamy.
3. Add almond milk and Greek yogurt; blend until well combined.
4. Pour into a bowl and top with granola.
5. Garnish with whipped cream and a sprinkle of pumpkin pie spice, if desired.
Cooking Time: 5 minutes
Low-Calorie Pumpkin Soup
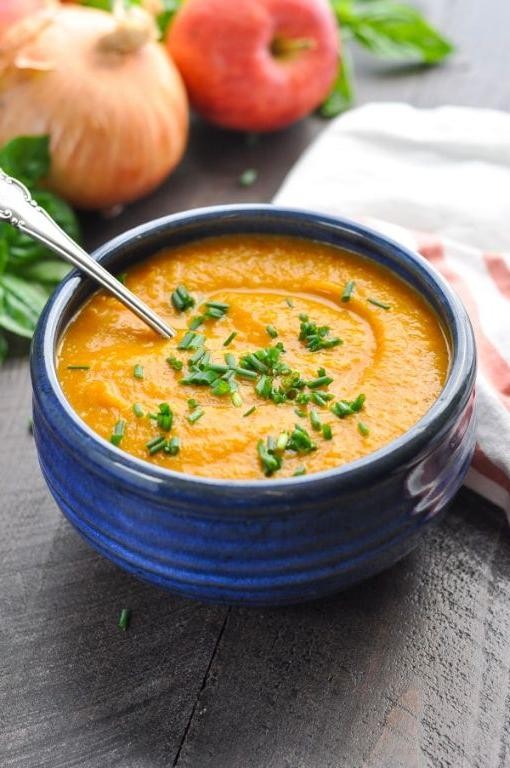
Warm up with this creamy and comforting low-calorie pumpkin soup, perfect for a cozy evening or a healthy lunch.
Ingredients:
– 1 small to medium-sized pumpkin (about 2 lbs), peeled and cubed
– 2 tablespoons olive oil
– 1 onion, chopped
– 3 cloves garlic, minced
– 4 cups low-sodium chicken broth
– 1/2 cup non-fat plain Greek yogurt
– 1 teaspoon ground cumin
– Salt and pepper to taste
– Fresh cilantro leaves for garnish (optional)
Instructions:
1. In a large pot, heat the olive oil over medium heat. Add the chopped onion and cook until softened, about 5 minutes.
2. Add the minced garlic and cook for an additional minute.
3. Add the cubed pumpkin, chicken broth, cumin, salt, and pepper. Bring to a boil, then reduce the heat and simmer for 20-25 minutes or until the pumpkin is tender.
4. Use an immersion blender (or transfer the soup to a blender in batches) to puree the soup until smooth.
5. Stir in the non-fat Greek yogurt. Taste and adjust seasoning as needed.
6. Serve hot, garnished with fresh cilantro leaves if desired.
Cooking Time: 25-30 minutes
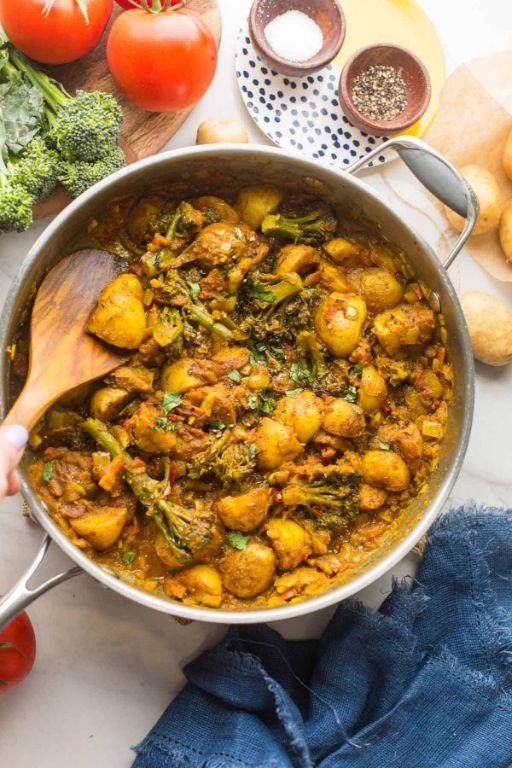
Pumpkin and Chickpea Curry
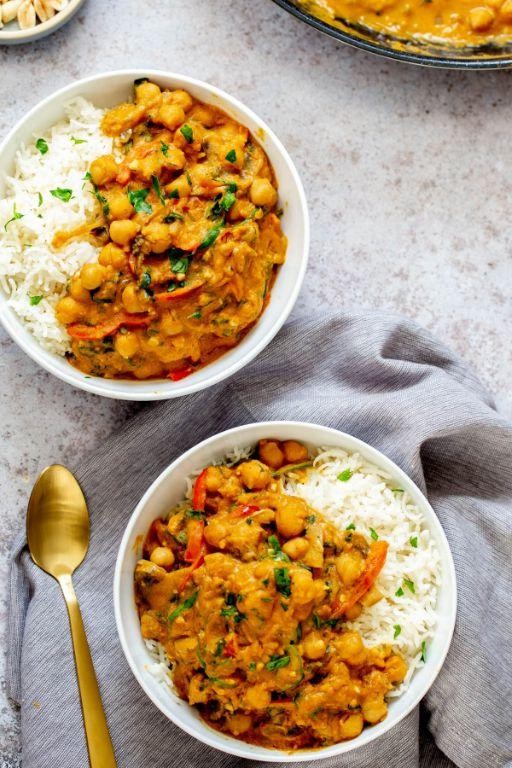
A flavorful and nutritious curry that combines the warmth of pumpkin with the comfort of chickpeas, perfect for a cozy autumn evening.
Ingredients:
– 1 medium-sized pumpkin, peeled and diced
– 1 can chickpeas (14 oz), drained and rinsed
– 2 tablespoons olive oil
– 1 onion, chopped
– 2 cloves garlic, minced
– 1 teaspoon ground cumin
– 1 teaspoon curry powder
– 1/2 teaspoon turmeric
– Salt and pepper, to taste
– 2 cups vegetable broth
– 1 can coconut milk (14 oz)
– Fresh cilantro leaves, for garnish
Instructions:
1. Heat oil in a large saucepan over medium heat.
2. Add onion and cook until softened, about 3-4 minutes.
3. Add garlic, cumin, curry powder, and turmeric; cook for an additional minute.
4. Add diced pumpkin, chickpeas, vegetable broth, and coconut milk; stir to combine.
5. Bring the mixture to a simmer, then reduce heat to low and let cook for 20-25 minutes or until pumpkin is tender.
6. Season with salt and pepper to taste.
7. Garnish with fresh cilantro leaves and serve over rice or with naan bread.
Cooking Time: 25 minutes
Baked Pumpkin with Herbs
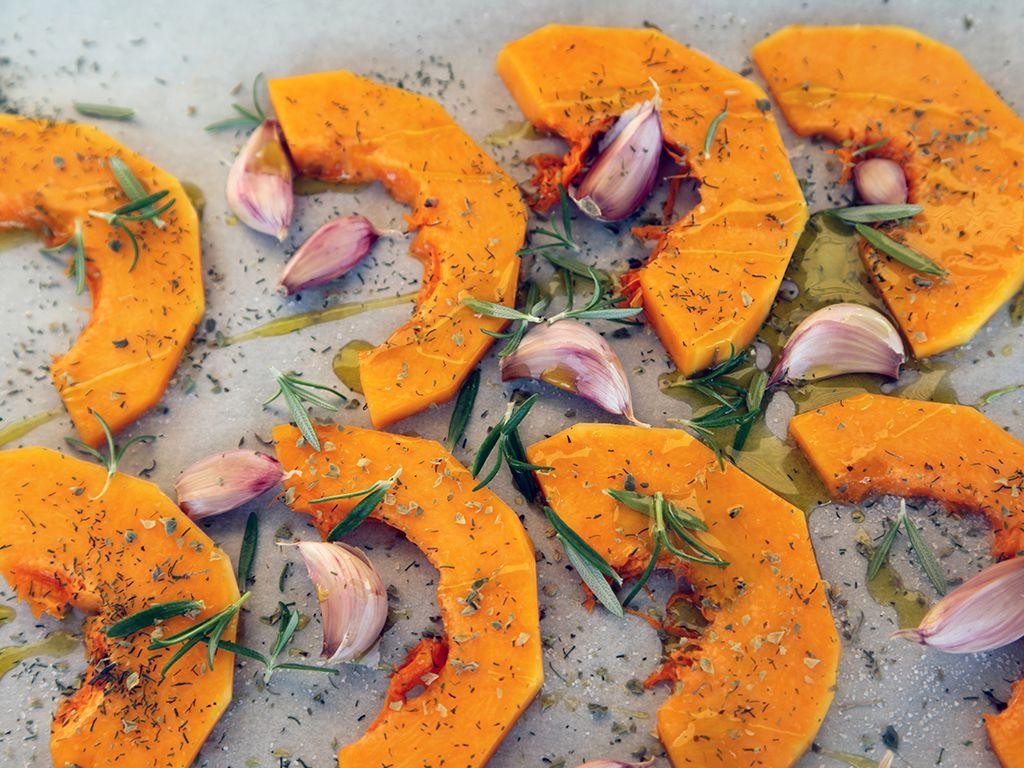
This recipe brings out the natural sweetness of pumpkin by baking it with a blend of aromatic herbs, creating a perfect side dish or appetizer for fall gatherings.
Ingredients:
– 1 small to medium-sized pumpkin (about 2 lbs)
– 2 tbsp olive oil
– 1 tsp dried sage
– 1 tsp dried thyme
– 1/2 tsp salt
– 1/4 tsp black pepper
– 1/4 cup chicken or vegetable broth
Instructions:
1. Preheat oven to 400°F (200°C).
2. Cut the pumpkin in half lengthwise and scoop out the seeds.
3. In a small bowl, mix together olive oil, sage, thyme, salt, and pepper.
4. Brush the mixture evenly onto both sides of the pumpkin halves.
5. Place the pumpkin halves on a baking sheet lined with parchment paper.
6. Pour the broth into the center of each pumpkin half.
7. Bake for 45-50 minutes or until the pumpkin is tender and caramelized.
8. Serve warm, garnished with fresh herbs if desired.
Cooking Time: 45-50 minutes
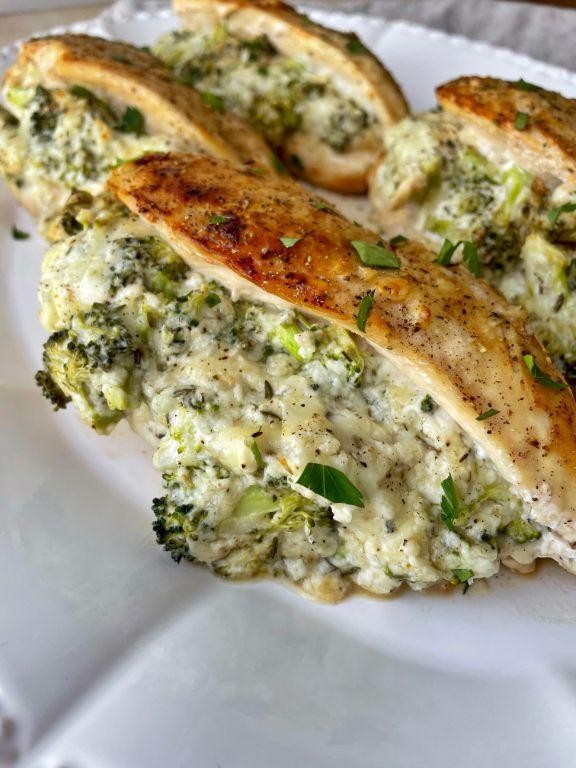
Pumpkin and Spinach Stuffed Chicken
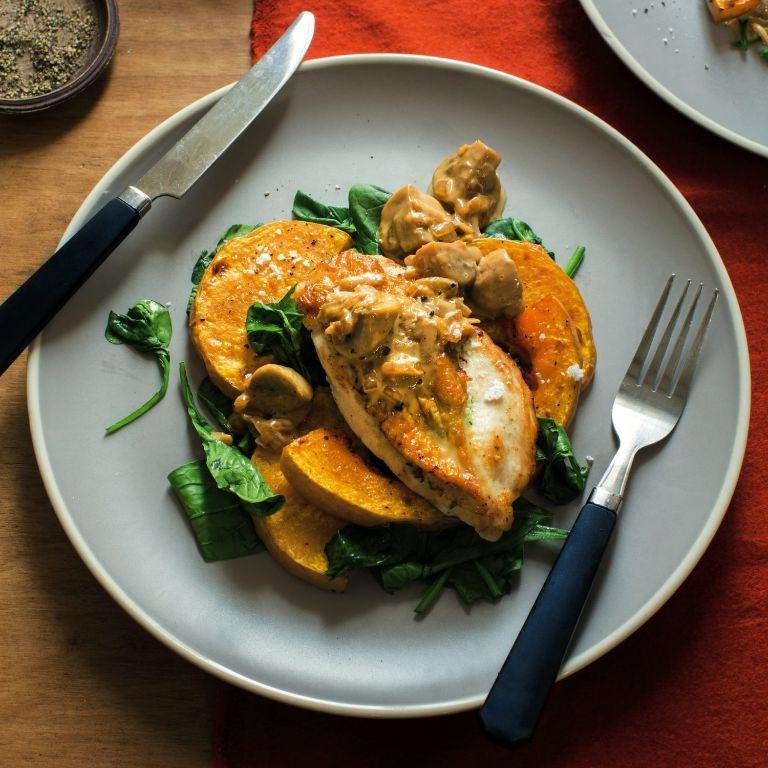
Elevate your chicken game with this autumn-inspired recipe that combines the warmth of pumpkin puree with the earthiness of spinach. This dish is perfect for a cozy dinner or special occasion.
Ingredients:
– 4 boneless, skinless chicken breasts
– 1 cup cooked pumpkin puree
– 1/2 cup fresh spinach leaves
– 2 cloves garlic, minced
– 1 tablespoon olive oil
– Salt and pepper to taste
– Optional: 1/4 cup shredded cheddar cheese
Instructions:
1. Preheat oven to 375°F (190°C).
2. In a bowl, mix together pumpkin puree, spinach, garlic, salt, and pepper.
3. Lay chicken breasts flat and make a horizontal incision in each breast to create a pocket.
4. Stuff each breast with the pumpkin-spinach mixture, dividing it evenly among the four breasts.
5. Drizzle olive oil over the stuffed chicken and sprinkle with optional cheese (if using).
6. Bake for 25-30 minutes or until chicken is cooked through.
Cooking Time: 25-30 minutes
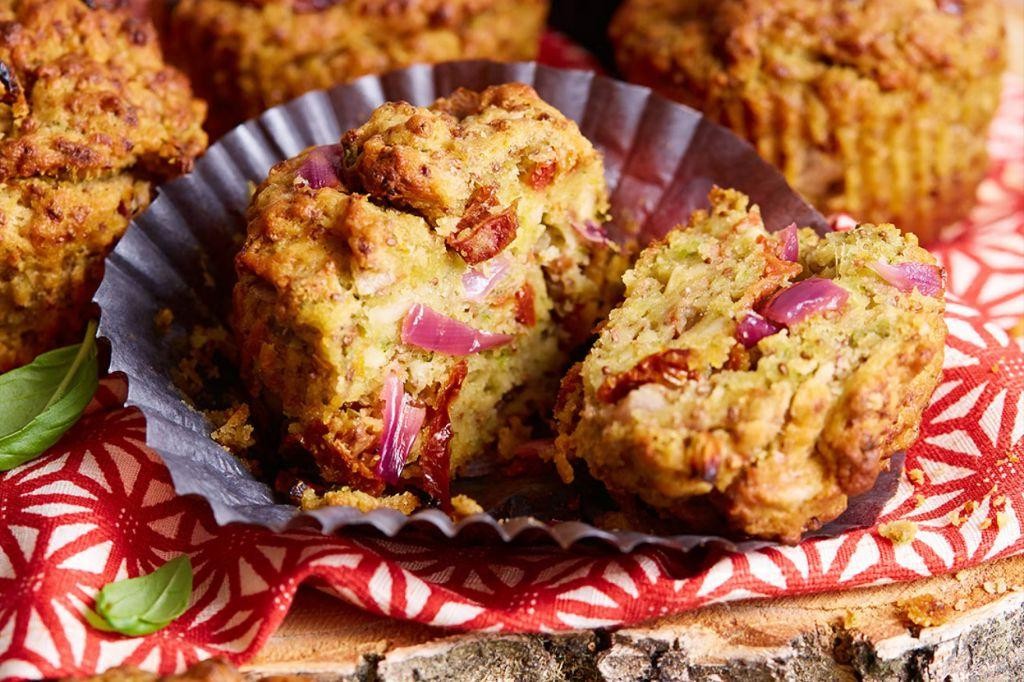
Pumpkin Oatmeal Breakfast Muffins
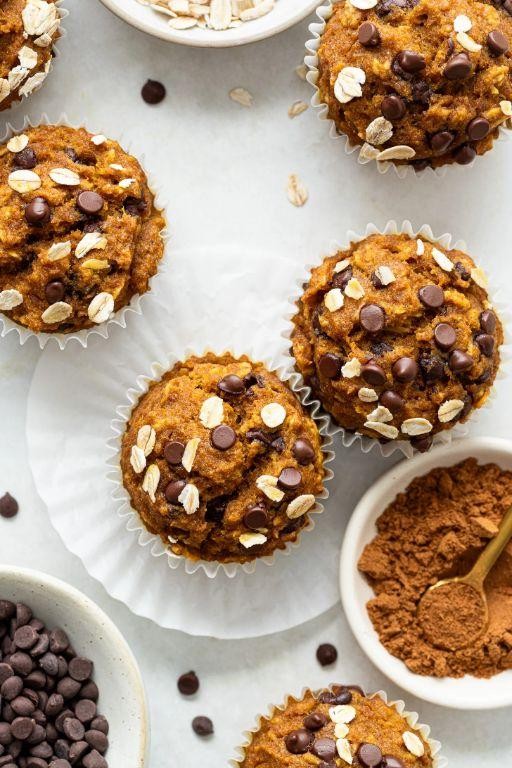
Start your day with a warm and comforting breakfast muffin infused with the flavors of fall. These Pumpkin Oatmeal Breakfast Muffins are perfect for a quick and easy morning meal that’s packed with nutritious ingredients.
Ingredients:
– 1 1/2 cups rolled oats
– 1 cup all-purpose flour
– 1/2 cup canned pumpkin puree
– 1/4 cup brown sugar
– 1/2 teaspoon baking powder
– 1/2 teaspoon salt
– 1/2 cup milk
– 1 large egg
– 1 tablespoon melted butter
– Chopped walnuts or pecans (optional)
Instructions:
1. Preheat oven to 375°F (190°C). Line a 12-cup muffin tin with paper liners.
2. In a large bowl, whisk together oats, flour, pumpkin puree, brown sugar, baking powder, and salt.
3. In a separate bowl, whisk together milk, egg, and melted butter.
4. Add the wet ingredients to the dry ingredients and stir until just combined. Do not overmix.
5. Divide batter evenly among muffin cups.
6. Bake for 20-22 minutes or until a toothpick inserted into the center of a muffin comes out clean.
Cooking Time: 20-22 minutes
Pumpkin and Lentil Stew
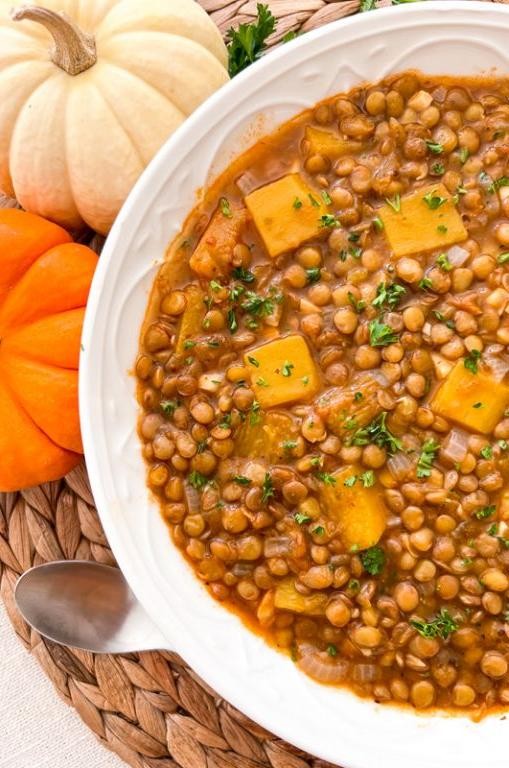
This warm and inviting stew is a perfect way to cozy up on a chilly fall or winter day. The sweetness of the pumpkin pairs beautifully with the earthy flavor of lentils, making for a nutritious and satisfying meal.
Ingredients:
– 1 medium onion, chopped
– 2 cloves garlic, minced
– 1 cup red or brown lentils, rinsed and drained
– 1 small pumpkin (about 1 lb), peeled and cubed
– 4 cups vegetable broth
– 1 can diced tomatoes
– 1 teaspoon cumin
– Salt and pepper, to taste
– Fresh cilantro leaves, for garnish (optional)
Instructions:
1. In a large pot, sauté the onion and garlic in a little water until softened.
2. Add the lentils, pumpkin, vegetable broth, diced tomatoes, and cumin. Bring to a boil, then reduce heat and simmer for 30-40 minutes or until the lentils are tender.
3. Season with salt and pepper to taste.
4. Serve hot, garnished with fresh cilantro leaves if desired.
Cooking Time: Approximately 45-50 minutes.
Pumpkin Hummus with Veggie Sticks
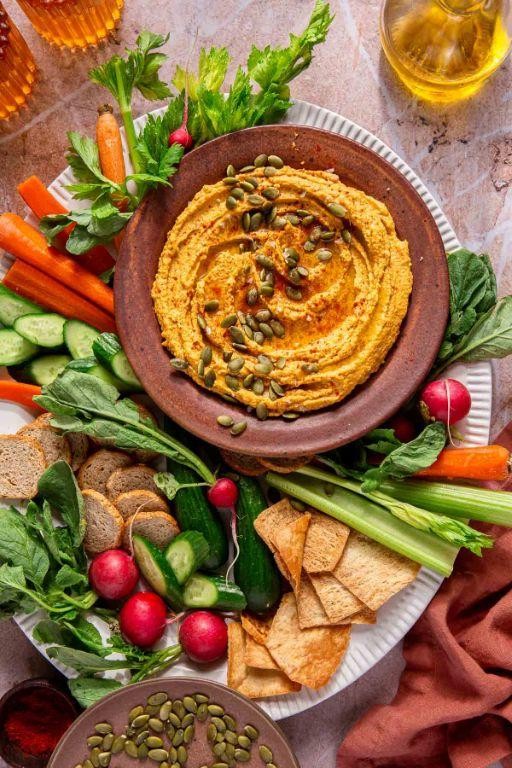
Get ready to enjoy a seasonal twist on the classic hummus recipe! This Pumpkin Hummus is perfect for a healthy snack or as an appetizer for your next fall gathering.
Ingredients:
– 1 cup cooked, mashed pumpkin
– 1/2 cup chickpeas
– 1/4 cup tahini
– 1 tablespoon lemon juice
– 2 cloves garlic, minced
– 1/2 teaspoon salt
– 3 tablespoons olive oil
– 1/4 cup water
– Veggie sticks (carrots, cucumbers, bell peppers) for serving
Instructions:
1. In a blender or food processor, combine pumpkin, chickpeas, tahini, lemon juice, garlic, and salt.
2. Blend until smooth, adding olive oil and water as needed to achieve desired consistency.
3. Taste and adjust seasoning if necessary.
4. Serve with veggie sticks for dipping.
Cooking Time: None! This recipe is ready in just a few minutes.
Pumpkin and Kale Stir-Fry
This autumn-inspired stir-fry combines the sweetness of roasted pumpkin with the earthy flavor of kale, all in one quick and easy dish.
Ingredients:
– 1 small to medium-sized pumpkin (about 2 lbs), peeled and cubed
– 2 cups curly kale leaves, stems removed and discarded
– 2 tablespoons vegetable oil
– 1 small onion, thinly sliced
– 2 cloves garlic, minced
– Salt and pepper to taste
– Optional: soy sauce or chili flakes for added flavor
Instructions:
1. Preheat the oven to 400°F (200°C).
2. Toss the pumpkin cubes with 1 tablespoon of oil and roast in the oven for about 20-25 minutes, or until tender.
3. In a large skillet or wok, heat the remaining 1 tablespoon of oil over medium-high heat.
4. Add the onion and garlic; cook until softened, about 3-4 minutes.
5. Add the kale leaves to the skillet; cook until wilted, about 2-3 minutes.
6. Remove the roasted pumpkin from the oven and add it to the skillet with the kale mixture.
7. Season with salt and pepper to taste. Serve hot.
Cooking Time: About 30-35 minutes total
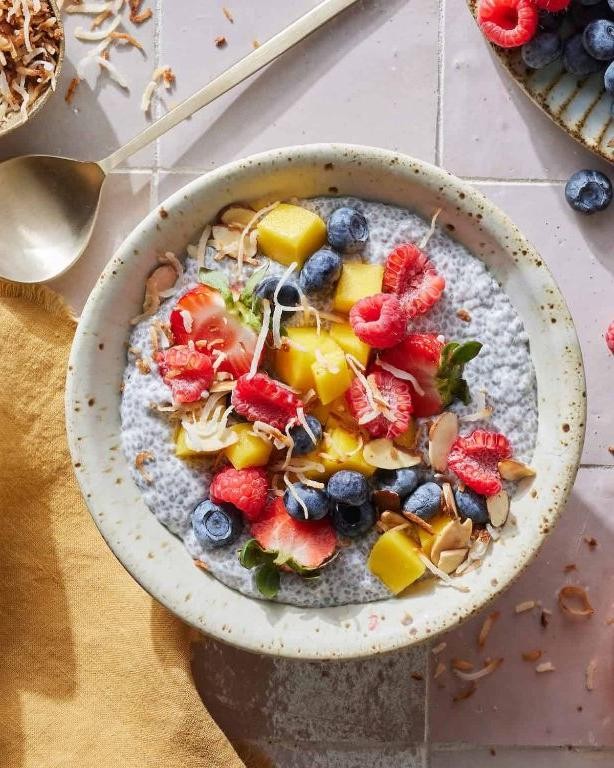
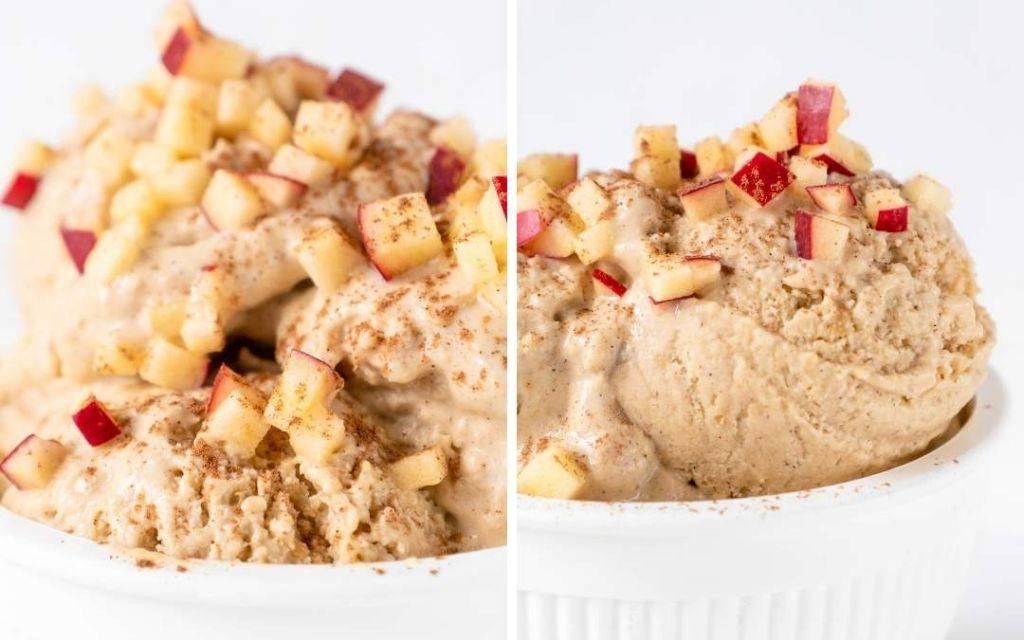
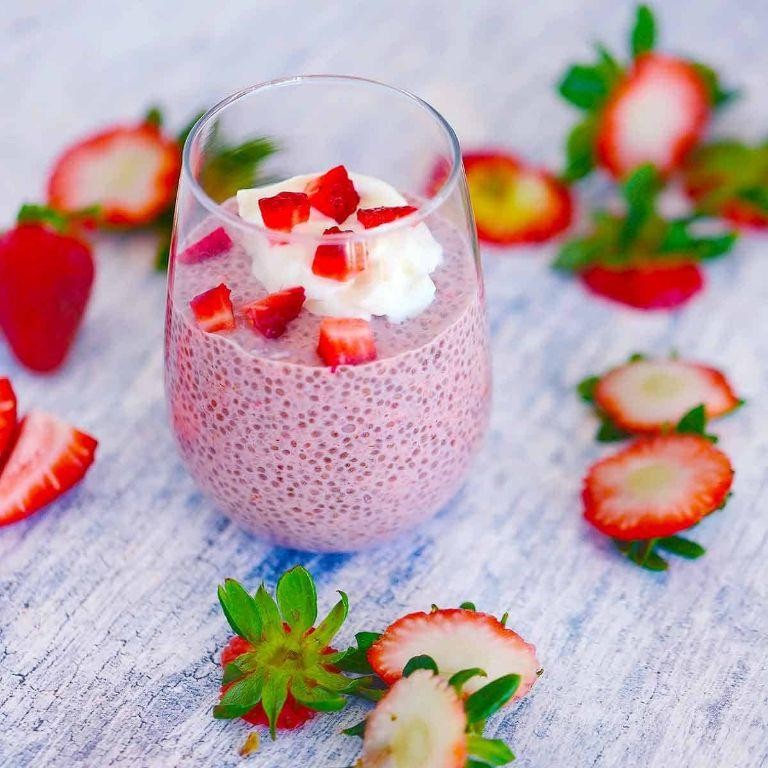
Pumpkin Chia Pudding
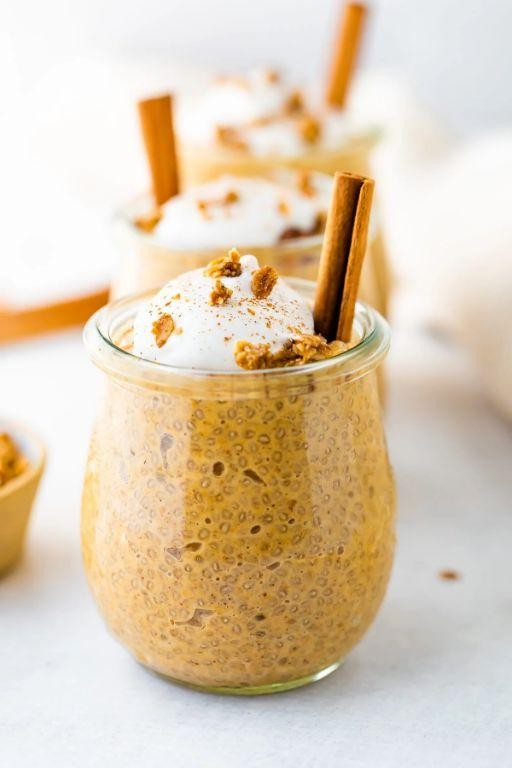
This seasonal recipe combines the warm spices of pumpkin pie with the nutritious benefits of chia seeds, creating a healthy and indulgent dessert option.
Ingredients:
– 1/2 cup chia seeds
– 1/2 cup unsweetened almond milk
– 1/4 cup canned pumpkin puree
– 2 tablespoons honey or maple syrup
– 1/4 teaspoon ground cinnamon
– 1/8 teaspoon ground nutmeg
– Pinch of salt
Instructions:
1. In a small bowl, mix together chia seeds and almond milk. Let it sit for 5 minutes to allow the chia seeds to absorb the liquid.
2. Add pumpkin puree, honey or maple syrup, cinnamon, nutmeg, and salt to the bowl. Stir until well combined.
3. Cover the bowl with plastic wrap and refrigerate for at least 2 hours or overnight to allow the pudding to set.
4. Serve chilled, garnished with your favorite toppings such as chopped nuts, seeds, or dried fruit.
Cooking Time: 2 hours (or overnight)
Pumpkin and Turkey Meatballs
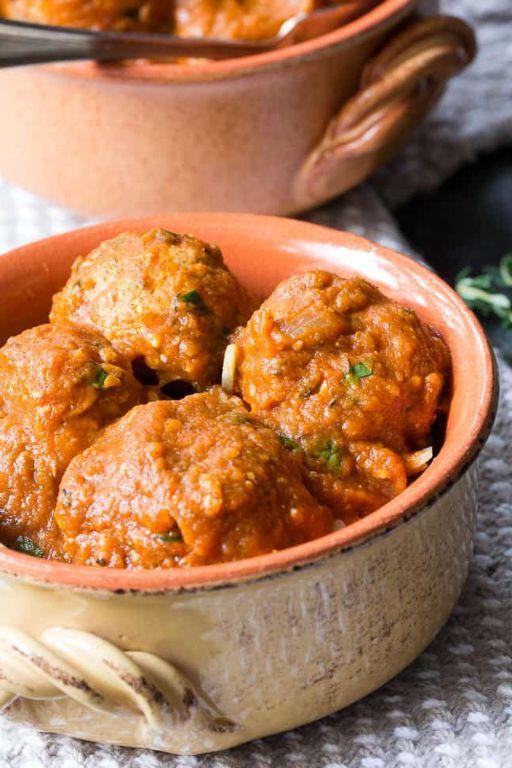
Elevate your mealtime with these moist and flavorful meatballs, packed with the warmth of pumpkin and the savory goodness of turkey. Perfect for a cozy night in or as an appetizer for a gathering.
Ingredients:
– 1 pound ground turkey
– 1/2 cup rolled oats
– 1/4 cup canned pumpkin puree
– 1/4 cup grated cheddar cheese
– 1 egg
– 1 tablespoon Worcestershire sauce
– 1 teaspoon dried sage
– Salt and pepper to taste
– Cooking spray or olive oil
Instructions:
1. Preheat oven to 400°F (200°C).
2. In a large bowl, combine turkey, oats, pumpkin puree, cheese, egg, Worcestershire sauce, and sage. Mix until just combined.
3. Use your hands to shape the mixture into meatballs, about 1 1/2 inches (3.8 cm) in diameter. Place on a baking sheet lined with parchment paper.
4. Drizzle with cooking spray or olive oil and bake for 18-20 minutes or until cooked through.
Cooking Time: 18-20 minutes
Pumpkin and Black Bean Tacos

Pumpkin and Black Bean Tacos: A flavorful twist on traditional tacos, combining roasted pumpkin with black beans, spices, and a hint of lime.
Ingredients:
– 1 small pumpkin (about 2 lbs), peeled and cubed
– 1 can black beans, drained and rinsed
– 1 onion, diced
– 2 cloves garlic, minced
– 1 teaspoon ground cumin
– 1/2 teaspoon chili powder
– Salt and pepper to taste
– 8-10 corn tortillas
– Lime wedges (optional)
– Optional toppings: avocado, sour cream, shredded cheese, cilantro
Instructions:
1. Preheat oven to 400°F (200°C).
2. Toss pumpkin cubes with cumin, chili powder, salt, and pepper. Spread on a baking sheet and roast for 30-40 minutes or until tender.
3. In a large skillet, cook onion and garlic over medium-high heat until softened, about 5 minutes.
4. Add black beans to the skillet and stir to combine. Cook for an additional 2-3 minutes.
5. Warm tortillas by wrapping them in a damp paper towel and microwaving for 20-30 seconds.
6. Assemble tacos by spooning roasted pumpkin and black bean mixture onto tortillas. Serve with lime wedges, if desired, and add your favorite toppings.
Cooking Time: 40-50 minutes
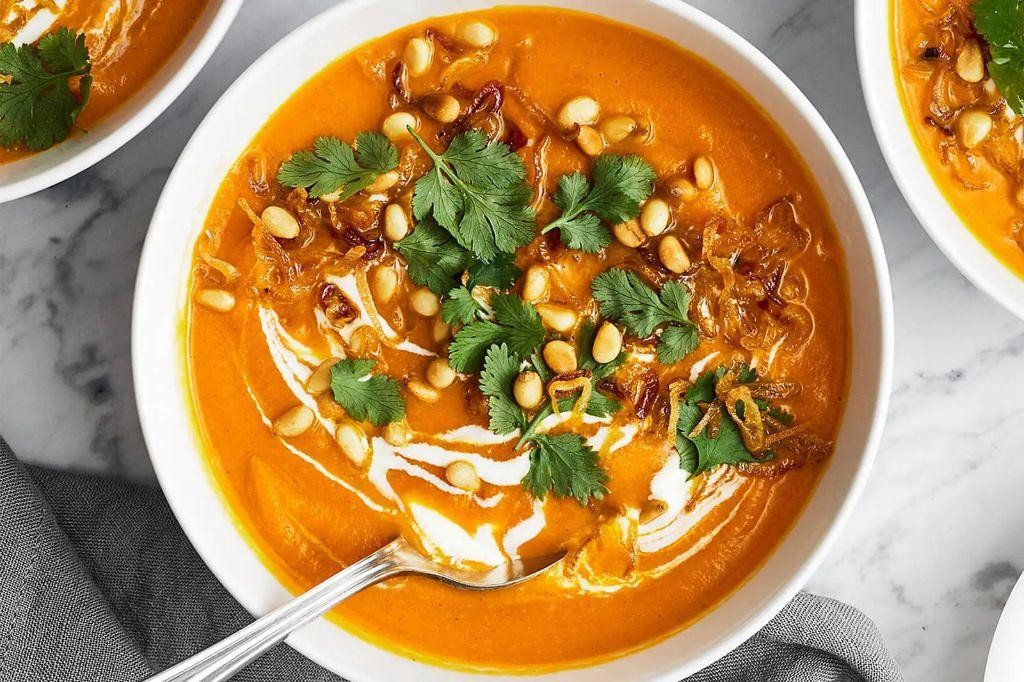
Pumpkin and Coconut Milk Soup
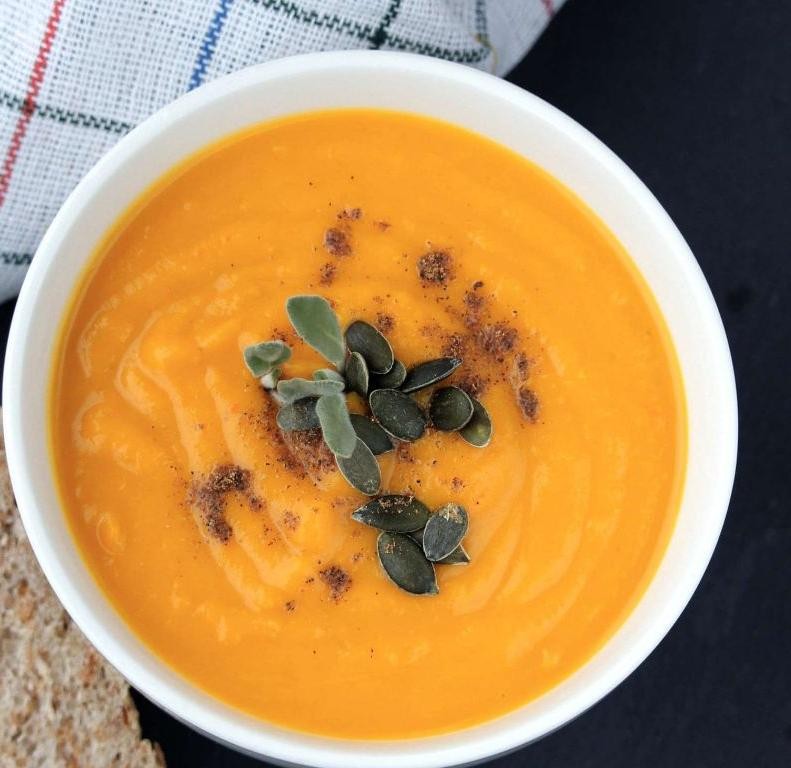
This creamy soup is a perfect blend of autumnal flavors, with roasted pumpkin and aromatic spices simmered in rich coconut milk. It’s a cozy treat for a chilly day.
Ingredients:
– 1 small sugar pumpkin (about 2 lbs), peeled and cubed
– 2 tablespoons olive oil
– 1 onion, chopped
– 3 cloves garlic, minced
– 1 teaspoon ground cumin
– 1/2 teaspoon ground nutmeg
– 1/4 teaspoon ground cinnamon
– 1 can (14 oz) coconut milk
– 4 cups vegetable broth
– Salt and pepper to taste
– Fresh cilantro or scallions for garnish (optional)
Instructions:
1. Preheat oven to 400°F (200°C).
2. Toss pumpkin cubes with olive oil, salt, and pepper on a baking sheet. Roast for 30 minutes.
3. In a large pot, sauté onion and garlic until softened. Add cumin, nutmeg, and cinnamon; cook for 1 minute.
4. Add roasted pumpkin, coconut milk, and vegetable broth to the pot. Bring to a simmer.
5. Reduce heat and let soup simmer for 20 minutes or until flavors have melded together.
6. Season with salt and pepper to taste.
7. Serve hot, garnished with fresh cilantro or scallions if desired.
Cooking Time: 50-60 minutes
Pumpkin and Almond Butter Protein Bars
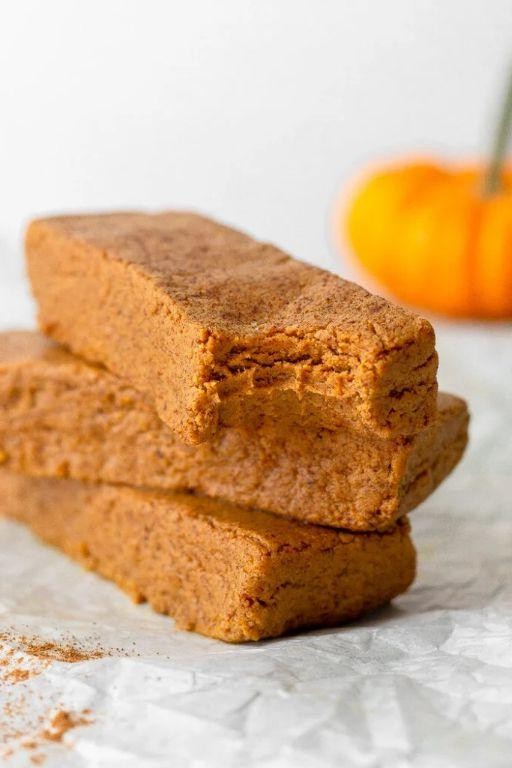
These no-bake bars combine the comforting flavors of pumpkin and almond butter with the benefits of protein-rich ingredients. Perfect for a quick energy boost or post-workout snack, these bars are easy to make and packed with nutrients.
Ingredients:
– 2 cups rolled oats
– 1 cup dates, pitted
– 1/2 cup pumpkin puree
– 1/4 cup almond butter
– 1/4 cup protein powder of your choice
– 1 tablespoon honey
– Pinch of salt
– Optional: chopped nuts or seeds for topping
Instructions:
1. In a large mixing bowl, combine oats, dates, and pumpkin puree.
2. Stir in almond butter, protein powder, and honey until well combined.
3. Press the mixture into a lined or greased 8×8-inch baking dish.
4. Refrigerate for at least 30 minutes to set.
5. Cut into bars and store in an airtight container for up to 5 days.
Cooking Time: None, as these are no-bake bars!
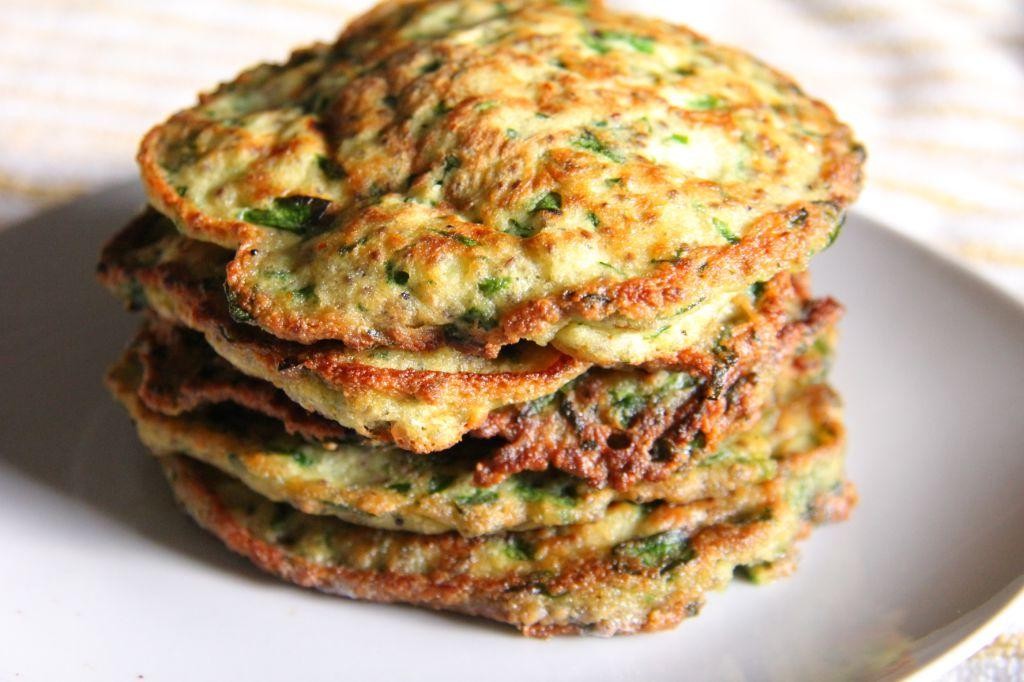
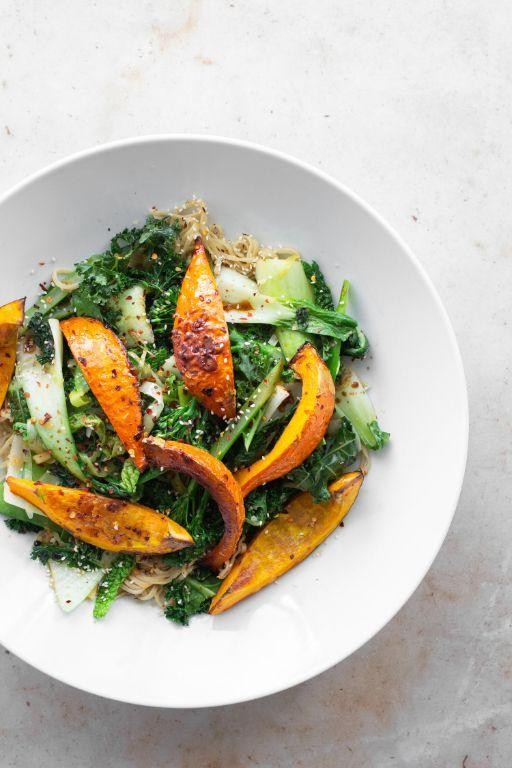
Pumpkin and Zucchini Noodles
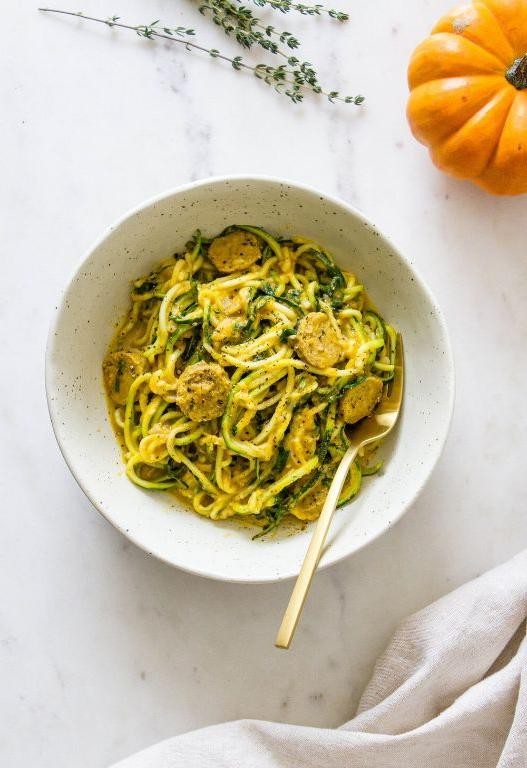
This seasonal recipe combines the flavors of fall with the simplicity of zucchini noodles, creating a delicious and healthy meal option. Perfect for a chilly evening or as a quick lunch.
Ingredients:
– 1 medium pumpkin, peeled and spiralized
– 2 medium zucchinis, spiralized
– 2 tablespoons olive oil
– 1 small onion, finely chopped
– 2 cloves garlic, minced
– Salt and pepper to taste
– Optional: grated Parmesan cheese for serving
Instructions:
1. Preheat oven to 375°F (190°C).
2. Toss pumpkin noodles with 1 tablespoon olive oil, salt, and pepper on a baking sheet.
3. Roast in the preheated oven for 20-25 minutes or until tender.
4. In a large skillet, heat the remaining 1 tablespoon olive oil over medium-high heat.
5. Add chopped onion and cook until translucent, about 3-4 minutes.
6. Add garlic and cook for an additional minute.
7. Add zucchini noodles to the skillet and cook for 2-3 minutes or until tender.
8. Combine roasted pumpkin noodles with cooked zucchini noodles and toss to combine.
Cooking Time: 35-40 minutes
Pumpkin and Greek Yogurt Parfait
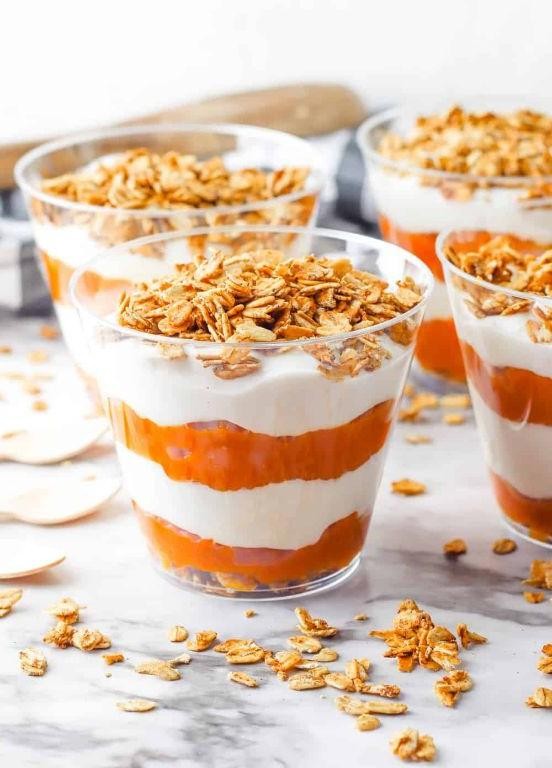
Combine the warmth of pumpkin with the creaminess of Greek yogurt, topped with crunchy granola and sweet honey. This parfait is a perfect treat for fall or winter mornings.
Ingredients:
– 1 cup cooked, mashed pumpkin
– 6 oz Greek yogurt
– 2 tbsp honey
– 1/4 cup granola
– Pinch of salt
Instructions:
1. In a small bowl, mix together the mashed pumpkin and Greek yogurt until well combined.
2. Spoon half of the pumpkin-yogurt mixture into a glass or parfait dish.
3. Top with half of the granola and drizzle with 1 tbsp honey.
4. Repeat steps 2-3 to create another layer.
5. Finish with a sprinkle of salt to balance the sweetness.
Cooking Time: None! This parfait is ready in just a few minutes.
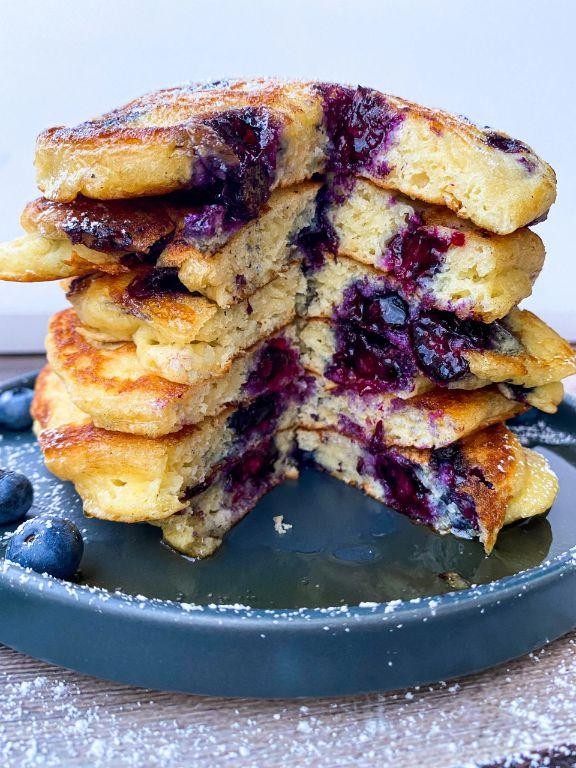
Pumpkin and Flaxseed Pancakes
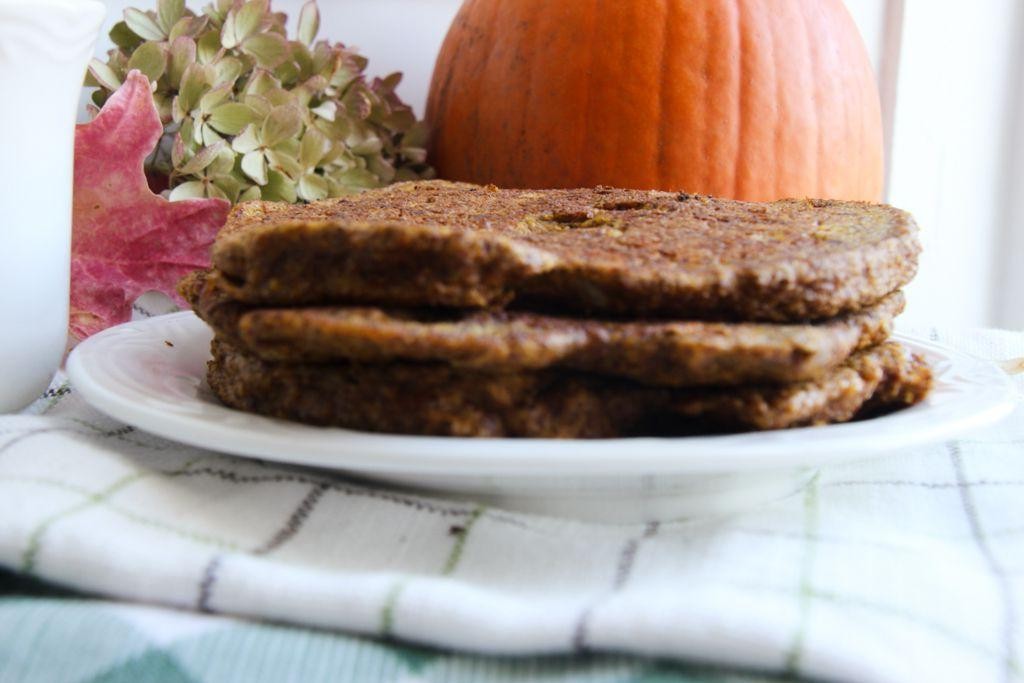
Start your day with a nutritious and delicious breakfast by making these moist and flavorful pancakes, packed with the goodness of pumpkin and flaxseed.
Ingredients:
– 1 cup all-purpose flour
– 2 tablespoons rolled oats
– 1/2 cup canned pumpkin puree
– 1/4 cup granulated sugar
– 2 teaspoons baking powder
– 1/4 teaspoon salt
– 1/2 cup milk
– 1 large egg
– 2 tablespoons ground flaxseed
– 2 tablespoons melted unsalted butter
– Maple syrup or honey (optional)
Instructions:
1. In a bowl, whisk together flour, oats, sugar, baking powder, and salt.
2. In another bowl, whisk together pumpkin puree, milk, egg, and melted butter.
3. Add the wet ingredients to the dry ingredients and stir until just combined.
4. Fold in ground flaxseed.
5. Heat a non-stick skillet or griddle over medium heat.
6. Drop batter by 1/4 cupfuls onto the skillet.
7. Cook for 2-3 minutes, until bubbles appear on surface.
8. Flip and cook for an additional 1-2 minutes.
Cooking Time: 10-12 minutes
Pumpkin and Cauliflower Mash
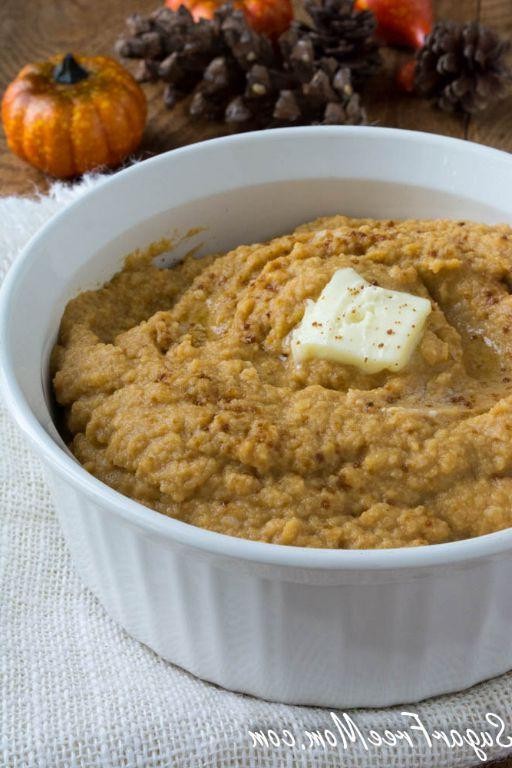
This fall-inspired side dish combines roasted pumpkin and cauliflower with a hint of garlic and creaminess, making it a perfect accompaniment to your favorite autumnal dishes. With just a few ingredients and minimal cooking time, this recipe is sure to become a new favorite.
Ingredients:
– 1 small pumpkin (about 2 lbs), peeled and cubed
– 1 head of cauliflower, broken into florets
– 2 cloves of garlic, minced
– 2 tablespoons butter
– 1/4 cup heavy cream or half-and-half
– Salt and pepper to taste
Instructions:
1. Preheat oven to 400°F (200°C).
2. Toss pumpkin cubes with 1 tablespoon of butter and roast for 20-25 minutes, or until tender.
3. In a separate pan, sauté cauliflower florets in the remaining 1 tablespoon of butter until they start to brown.
4. Add garlic, salt, and pepper to the cauliflower and stir to combine.
5. Once the pumpkin is done roasting, add it to the cauliflower mixture along with heavy cream or half-and-half. Mash together until smooth and creamy.
Cooking Time: 30-40 minutes
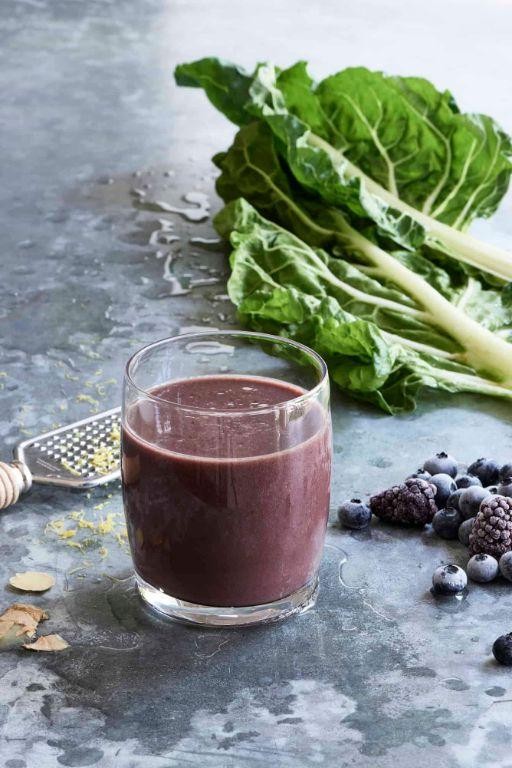
Pumpkin and Berry Smoothie
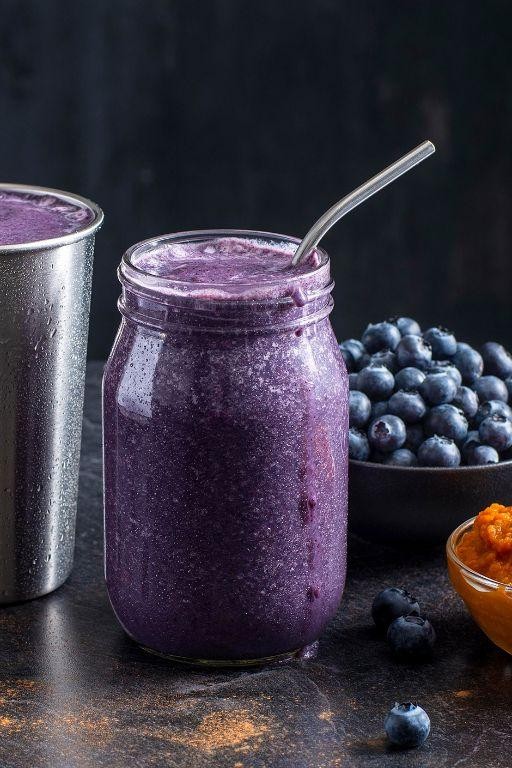
This refreshing fall smoothie combines the warm flavors of pumpkin with the sweetness of mixed berries, making it a perfect treat for a crisp autumn day.
Ingredients:
– 1/2 cup cooked, mashed pumpkin
– 1 cup frozen mixed berries (such as blueberries, strawberries, and raspberries)
– 1/2 banana, sliced
– 1 tablespoon honey
– 1/2 cup plain Greek yogurt
– Ice cubes (as needed)
Instructions:
1. In a blender, combine mashed pumpkin, frozen berries, sliced banana, and honey.
2. Blend the mixture on high speed until smooth and creamy.
3. Add the Greek yogurt and blend until well combined.
4. Taste and adjust sweetness as needed.
5. Add ice cubes if desired to chill and thicken the smoothie.
6. Pour into a glass and serve immediately.
Cooking Time: 2-3 minutes (blending time)
Summary
Get ready to fall in love with these 20 delicious and healthy pumpkin recipes that will support your weight loss journey. From savory dishes like Roasted Pumpkin and Quinoa Salad and Pumpkin Spice Smoothie Bowl, to comforting soups like Low-Calorie Pumpkin Soup and Pumpkin and Chickpea Curry, there’s something for everyone. You’ll also find sweet treats like Pumpkin Oatmeal Breakfast Muffins and Pumpkin Chia Pudding, as well as savory main courses like Pumpkin and Spinach Stuffed Chicken and Pumpkin and Turkey Meatballs. Start cooking and enjoy the nutritional benefits of pumpkin!