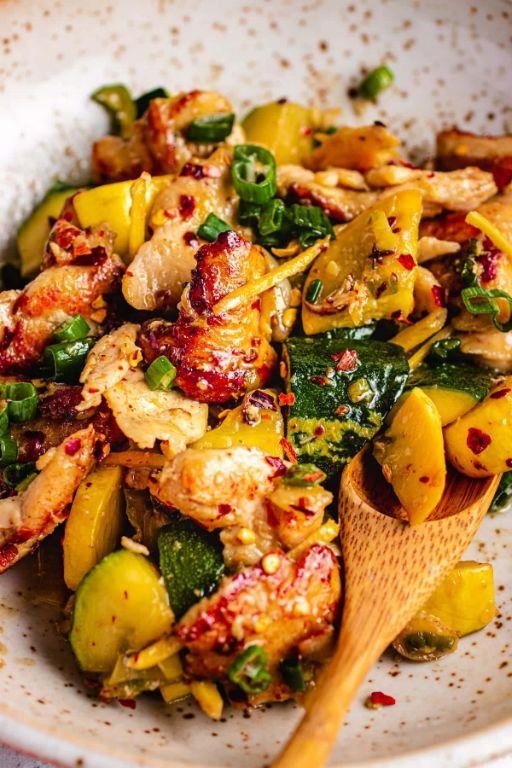
Are you tired of the same old salmon recipes? Look no further! In this article, we’ll be exploring 20 unique and flavorful salmon recipes that will take your cooking to the next level. From sweet and savory maple glazed salmon with a pecan crust to spicy and tangy blackened salmon tacos with mango salsa, there’s something for everyone.
We’ll start with some classic combinations, like coconut curry poached salmon and smoked salmon and dill croissant bake. But we won’t stop there – we’ll also be diving into more adventurous options, such as salmon stuffed portobello mushrooms and teriyaki salmon pineapple boats. And for all you sushi lovers out there, we’ve got a special treat in store with our recipe for salmon and avocado tartare with lime dressing.
Maple Glazed Salmon with Pecan Crust
Maple Glazed Salmon with Pecan Crust: A sweet and savory combination that’s sure to impress!
Ingredients:
– 4 salmon fillets (6 oz each)
– 1/2 cup pure maple syrup
– 2 tbsp honey
– 2 tbsp olive oil
– 1 cup chopped pecans
– 1 tsp ground cumin
– Salt and pepper, to taste
Instructions:
1. Preheat oven to 400°F (200°C).
2. In a small bowl, whisk together maple syrup, honey, and olive oil.
3. Place the salmon fillets on a baking sheet lined with parchment paper. Brush the glaze evenly over each fillet.
4. In a separate bowl, mix together chopped pecans, cumin, salt, and pepper.
5. Sprinkle the pecan crust mixture evenly over the glazed salmon fillets.
6. Bake for 12-15 minutes or until cooked through.
Cooking Time: 12-15 minutes
Salmon Sushi Pizza with Spicy Mayo
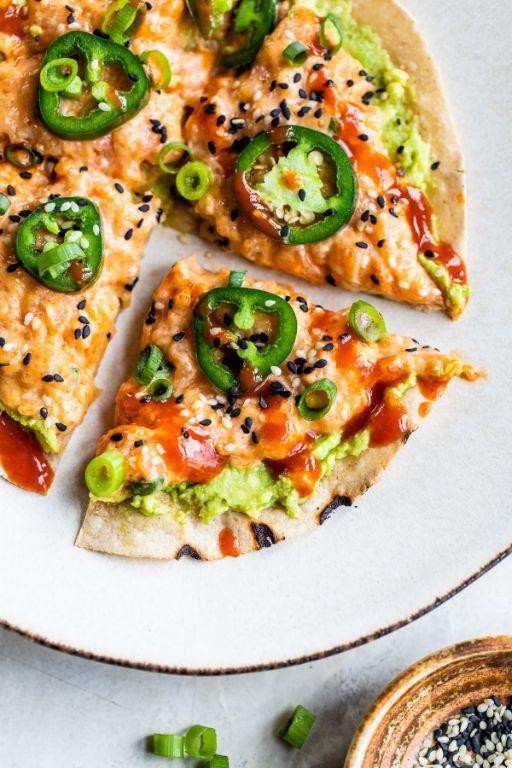
This unique fusion dish combines the freshness of salmon sashimi, the crunch of pizza crust, and the creaminess of spicy mayonnaise. Perfect for adventurous eaters looking to mix things up!
Ingredients:
– 1 piece of sushi-grade salmon (about 6 oz)
– 1 pizza crust
– Spicy mayo (store-bought or homemade)
– Cucumber slices
– Avocado slices
– Sesame seeds
– Soy sauce
Instructions:
1. Preheat the oven to 400°F (200°C).
2. Cook the pizza crust according to package instructions.
3. Slice the salmon into thin strips, about 1/4 inch thick.
4. Assemble the sushi pizza by spreading spicy mayo on the cooked crust, followed by a layer of cucumber and avocado slices.
5. Place the salmon strips on top, leaving a small border around the edges.
6. Sprinkle sesame seeds and drizzle soy sauce to finish.
7. Serve immediately.
Cooking Time: 15-20 minutes (including cooking time for pizza crust)
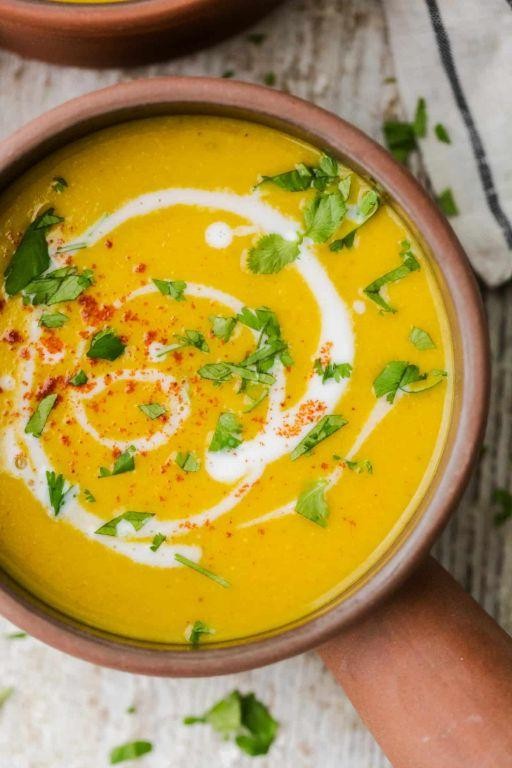
Coconut Curry Poached Salmon
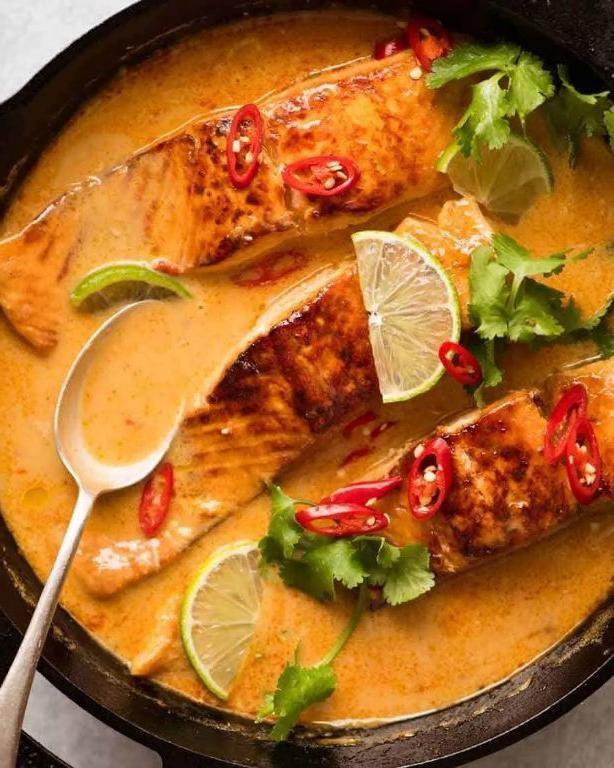
Experience the flavors of the tropics with this aromatic and flavorful recipe that combines the richness of coconut milk, the warmth of curry powder, and the delicate flavor of poached salmon.
Ingredients:
– 4 salmon fillets (6 oz each)
– 1 can coconut milk
– 2 tbsp curry powder
– 1 tsp ground cumin
– 1/2 tsp turmeric powder
– Salt and pepper to taste
– Fresh cilantro leaves for garnish
Instructions:
1. Preheat oven to 400°F (200°C).
2. In a small saucepan, combine coconut milk, curry powder, cumin, turmeric, salt, and pepper.
3. Bring the mixture to a simmer over medium heat.
4. Reduce the heat to low and poach the salmon fillets for 12-15 minutes or until cooked through.
5. Remove the salmon from the liquid and serve with additional curry sauce spooned over the top.
6. Garnish with fresh cilantro leaves and enjoy!
Cooking Time: 20-25 minutes
Salmon and Avocado Tartare with Lime Dressing
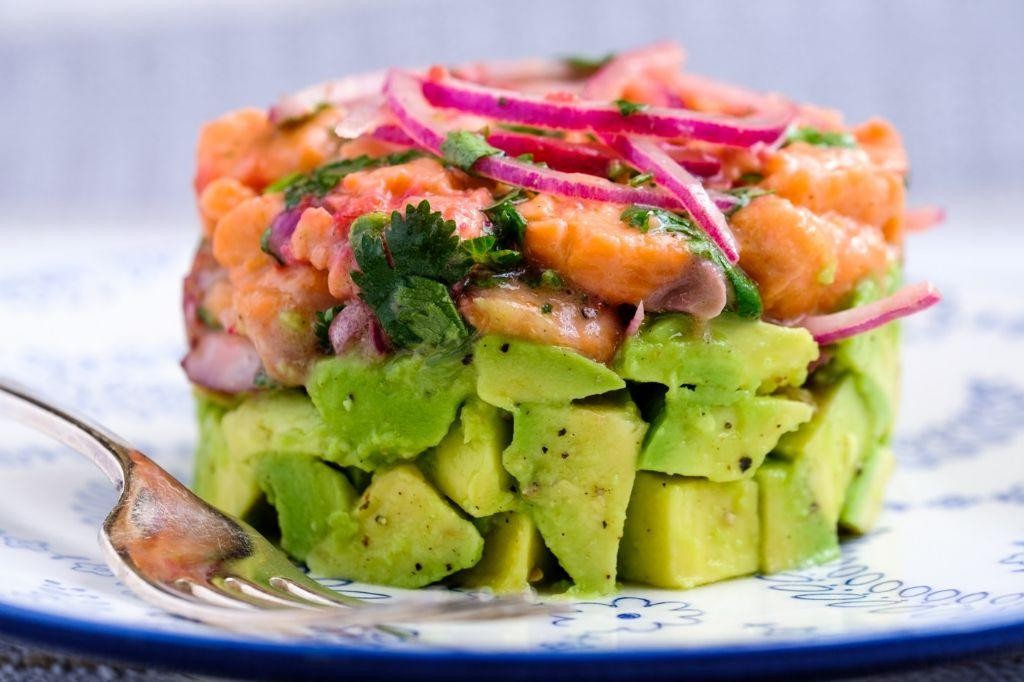
Elevate your appetizer game with this refreshing and flavorful tartare recipe, combining the richness of salmon with the creaminess of avocado and a squeeze of lime.
Ingredients:
– 1/2 pound sashimi-grade salmon, cut into small pieces
– 1 ripe avocado, diced
– 1 tablespoon freshly squeezed lime juice
– 1 tablespoon olive oil
– 1 minced clove garlic
– Salt and pepper to taste
– Fresh cilantro leaves for garnish (optional)
Instructions:
1. In a medium bowl, combine salmon pieces, diced avocado, lime juice, olive oil, and garlic.
2. Gently mix until well combined, taking care not to break down the fish or avocado.
3. Season with salt and pepper to taste.
4. Cover and refrigerate for at least 30 minutes to allow flavors to meld.
5. Serve chilled, garnished with fresh cilantro leaves if desired.
Cooking Time: None! This recipe is a raw appetizer, perfect for a light and refreshing start to your meal.
Smoked Salmon and Dill Croissant Bake
Elevate your brunch game with this flavorful and visually appealing dish that combines the richness of smoked salmon with the buttery flakiness of croissants.
Ingredients:
– 1 package of frozen puff pastry, thawed
– 6-8 slices of smoked salmon
– 1/4 cup of fresh dill leaves, chopped
– 2 tablespoons of unsalted butter, softened
– Salt and pepper to taste
Instructions:
1. Preheat the oven to 400°F (200°C). Line a baking sheet with parchment paper.
2. Roll out the puff pastry on a lightly floured surface to a thickness of about 1/8 inch. Cut into 6-8 squares, depending on desired croissant size.
3. Place a slice or two of smoked salmon in the center of each square, leaving a 1-inch border around the edges.
4. Sprinkle chopped dill and softened butter over the salmon, then fold the pastry squares in half to enclose the filling.
5. Brush the tops with a little water and bake for 20-25 minutes, or until golden brown.
6. Serve warm and enjoy!
Salmon Stuffed Portobello Mushrooms
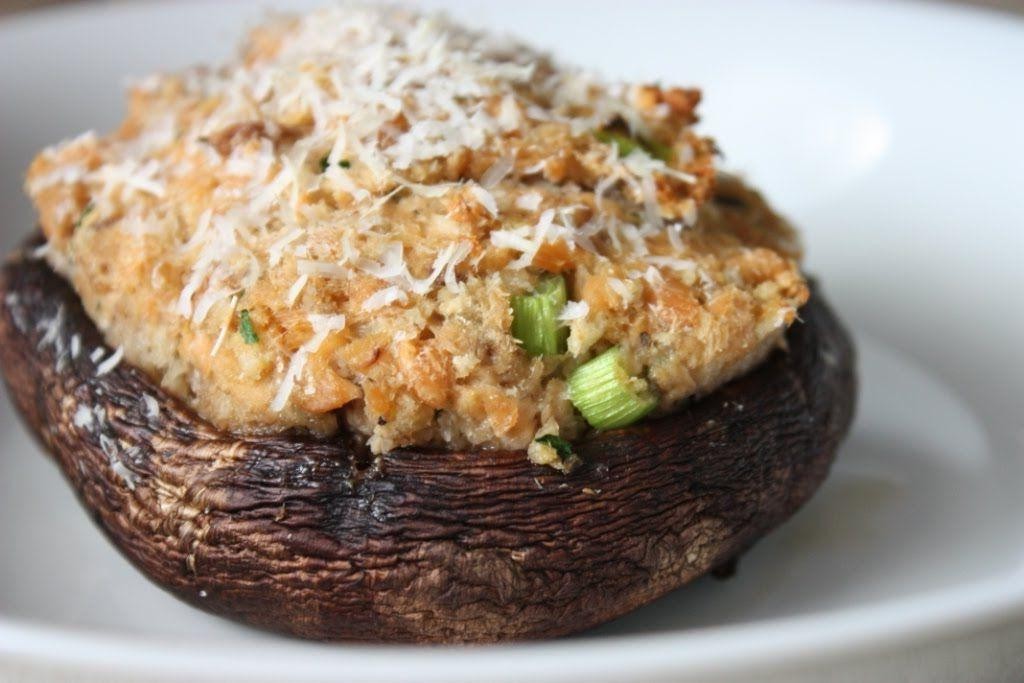
These flavorful mushrooms combine the earthy taste of portobellos with the rich, omega-rich goodness of salmon. Perfect for a quick and impressive dinner or appetizer.
Ingredients:
– 4 large portobello mushrooms, stems removed
– 1 can (6 oz) of salmon, drained and flaked
– 2 cloves garlic, minced
– 1 tablespoon olive oil
– 1/2 cup breadcrumbs
– 1/4 cup grated cheddar cheese
– Salt and pepper to taste
– Fresh parsley, chopped (optional)
Instructions:
1. Preheat oven to 375°F (190°C).
2. In a bowl, mix together salmon, garlic, olive oil, breadcrumbs, and cheese.
3. Stuff each mushroom cap with the salmon mixture, dividing it evenly among the four mushrooms.
4. Place the stuffed mushrooms on a baking sheet lined with parchment paper.
5. Bake for 20-25 minutes or until the mushrooms are tender and the filling is heated through.
6. Garnish with chopped parsley, if desired.
Cooking Time: 20-25 minutes
Blackened Salmon Tacos with Mango Salsa
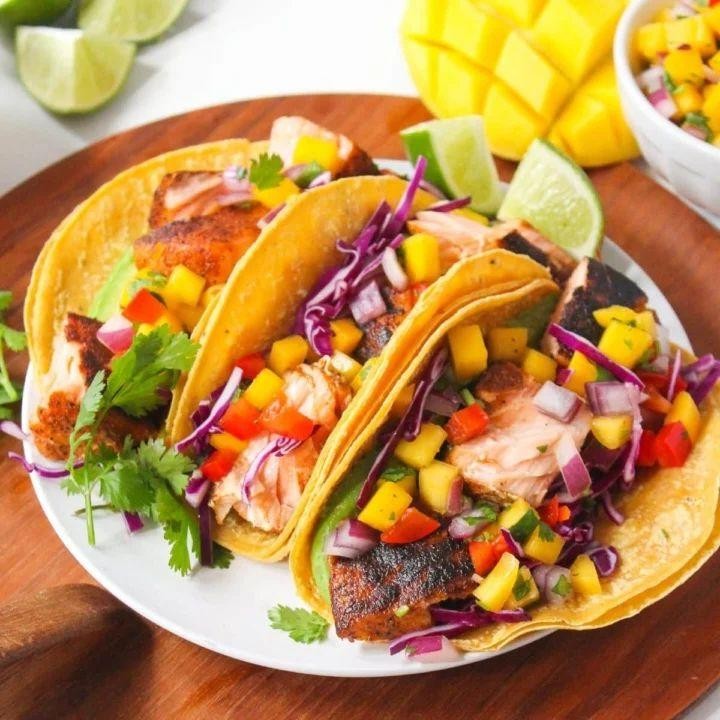
This recipe combines the bold flavors of blackened salmon with the sweetness of mango salsa, all wrapped up in a crispy taco shell. Perfect for a quick and delicious dinner or lunch.
Ingredients:
– 4 salmon fillets (6 oz each)
– 2 tbsp blackening seasoning
– 1/4 cup olive oil
– 8 corn tortillas
– Mango Salsa (recipe below)
– Lime wedges, cilantro, and avocado for garnish
Mango Salsa:
– 2 ripe mangos, diced
– 1 jalapeño pepper, seeded and finely chopped
– 1/4 cup red onion, thinly sliced
– Juice of 1 lime
– Salt to taste
Instructions:
1. Preheat oven to 400°F (200°C).
2. Season salmon with blackening seasoning.
3. Heat olive oil in an oven-safe skillet over medium-high heat. Cook salmon for 2-3 minutes per side, or until cooked through.
4. Warm tortillas by wrapping them in a damp paper towel and microwaving for 20-30 seconds.
5. Assemble tacos with blackened salmon, mango salsa, and desired garnishes.
Cooking Time: 12-15 minutes
Salmon Wellington with Spinach and Feta
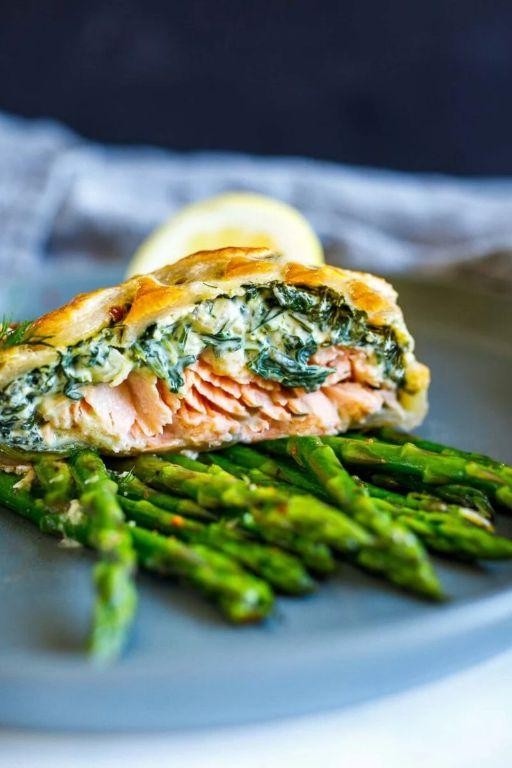
This show-stopping Salmon Wellington is a twist on the classic dish, featuring tender salmon fillets wrapped in flaky puff pastry, spinach, and crumbled feta cheese.
Ingredients:
– 4 salmon fillets (6 oz each)
– 1 package puff pastry, thawed
– 1/2 cup fresh spinach leaves
– 1/2 cup crumbled feta cheese
– 2 tbsp olive oil
– Salt and pepper to taste
Instructions:
1. Preheat oven to 400°F (200°C).
2. In a bowl, mix together spinach and feta cheese.
3. Place a salmon fillet on a work surface, leaving a 1-inch border around the fish.
4. Spoon the spinach-feta mixture onto the salmon, leaving a small border around the edges.
5. Roll out puff pastry to a large rectangle, about 1/8 inch thick.
6. Place the pastry over the salmon, pressing gently to seal.
7. Brush the top of the pastry with olive oil and season with salt and pepper.
8. Bake for 20-25 minutes or until the pastry is golden brown.
Cooking Time: 20-25 minutes
Teriyaki Salmon Pineapple Boats
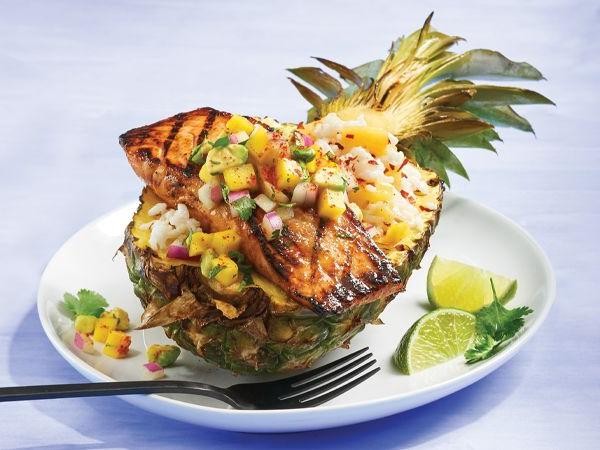
These bite-sized Teriyaki Salmon Pineapple Boats are a perfect combination of sweet and savory flavors, featuring juicy salmon, tangy pineapple, and sticky teriyaki sauce. Serve as an appetizer or main course for a crowd-pleasing experience.
Ingredients:
– 6 salmon fillets (6 oz each)
– 1 ripe pineapple, cut into 12 slices
– 1/4 cup teriyaki sauce
– 2 tbsp soy sauce
– 2 tbsp brown sugar
– 2 tsp grated ginger
– 1 tsp garlic powder
– Sesame seeds and chopped green onions for garnish (optional)
Instructions:
1. Preheat oven to 400°F (200°C).
2. In a small bowl, whisk together teriyaki sauce, soy sauce, brown sugar, ginger, and garlic powder.
3. Place a salmon fillet on each pineapple slice, leaving a 1/2-inch border around the fish.
4. Brush the teriyaki mixture evenly over the salmon.
5. Bake for 12-15 minutes or until cooked through.
6. Garnish with sesame seeds and chopped green onions (if using).
7. Serve warm and enjoy!
Cooking Time: 12-15 minutes
Salmon and Asparagus Risotto
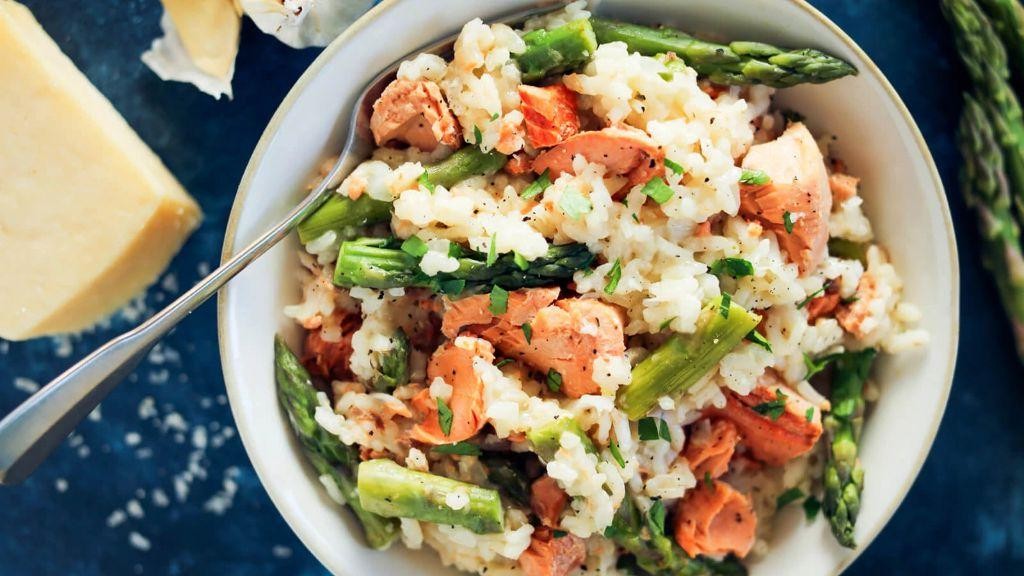
This Italian-inspired dish combines the rich flavors of salmon, asparagus, and Parmesan cheese with a creamy Arborio rice base. Perfect for a special occasion or a weeknight dinner.
Ingredients:
– 1 pound salmon fillet, cooked and flaked
– 2 cups mixed asparagus, trimmed
– 1 cup Arborio rice
– 4 cups vegetable broth, warmed
– 2 tablespoons olive oil
– 2 cloves garlic, minced
– 1/2 cup white wine (optional)
– 2 tablespoons butter
– 1/2 cup grated Parmesan cheese
– Salt and pepper, to taste
Instructions:
1. Heat the oil in a large skillet over medium-high heat. Add asparagus and cook until tender, about 5 minutes. Set aside.
2. In the same skillet, add garlic and Arborio rice. Cook for 1-2 minutes, stirring constantly.
3. Add white wine (if using) and cook until absorbed. Then, add 1/2 cup broth and stir until absorbed. Repeat with remaining broth, stirring frequently.
4. Stir in butter and Parmesan cheese. Combine cooked salmon and asparagus into the rice mixture. Season with salt and pepper to taste.
5. Serve immediately, garnished with additional Parmesan cheese if desired.
Cooking Time: 25-30 minutes
Pesto Crusted Salmon with Sun-Dried Tomatoes
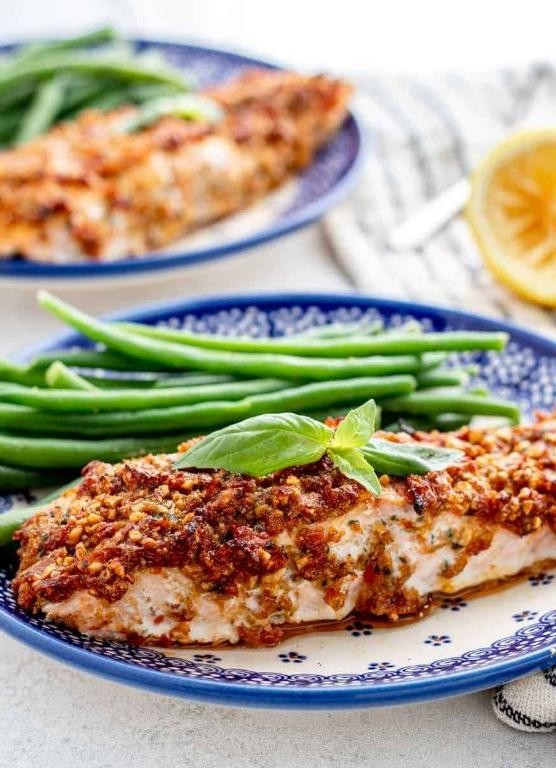
Pesto Crusted Salmon with Sun-Dried Tomatoes: A flavorful and vibrant dish that combines the richness of salmon with the bold flavors of pesto, sun-dried tomatoes, and crispy breadcrumbs. Perfect for a quick weeknight dinner or special occasion.
Ingredients:
– 4 salmon fillets (6 oz each)
– 1/2 cup pesto
– 1/4 cup breadcrumbs
– 1/4 cup grated Parmesan cheese
– 1/4 cup chopped sun-dried tomatoes
– Salt and pepper to taste
– Lemon wedges, for serving (optional)
Instructions:
1. Preheat oven to 400°F (200°C).
2. In a shallow dish, mix together pesto, breadcrumbs, and Parmesan cheese.
3. Season the salmon fillets with salt and pepper.
4. Coat each salmon fillet in the pesto mixture, pressing gently to adhere.
5. Place the coated salmon on a baking sheet lined with parchment paper.
6. Bake for 12-15 minutes or until cooked through.
7. Top with chopped sun-dried tomatoes and serve with lemon wedges (if desired).
Cooking Time: 12-15 minutes
Salmon Chowder with Corn and Bacon
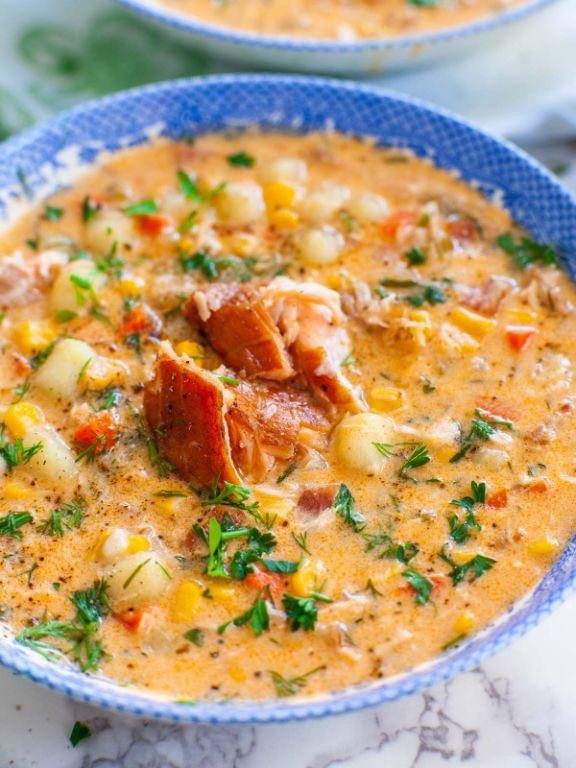
This hearty chowder combines the rich flavors of salmon, smoky bacon, and sweet corn in a creamy broth. Perfect for a chilly evening or a comforting meal.
Ingredients:
– 1 lb salmon fillet, skin removed
– 6 slices of thick-cut bacon, diced
– 2 medium corn on the cob, cut into 1-inch pieces
– 2 medium potatoes, peeled and diced
– 2 cups fish stock (or chicken stock)
– 1 cup heavy cream
– 1 tsp dried thyme
– Salt and pepper to taste
Instructions:
1. Cook bacon in a large pot over medium heat until crispy.
2. Add corn, potatoes, and salmon fillet. Cook for 3-4 minutes or until the fish starts to flake apart.
3. Pour in fish stock and bring to a simmer.
4. Reduce heat to low and add heavy cream, thyme, salt, and pepper. Stir to combine.
5. Simmer for 10-12 minutes or until the soup has thickened slightly.
6. Serve hot, garnished with chopped scallions and crusty bread on the side.
Cooking Time: 20-25 minutes
Salmon and Goat Cheese Phyllo Parcels
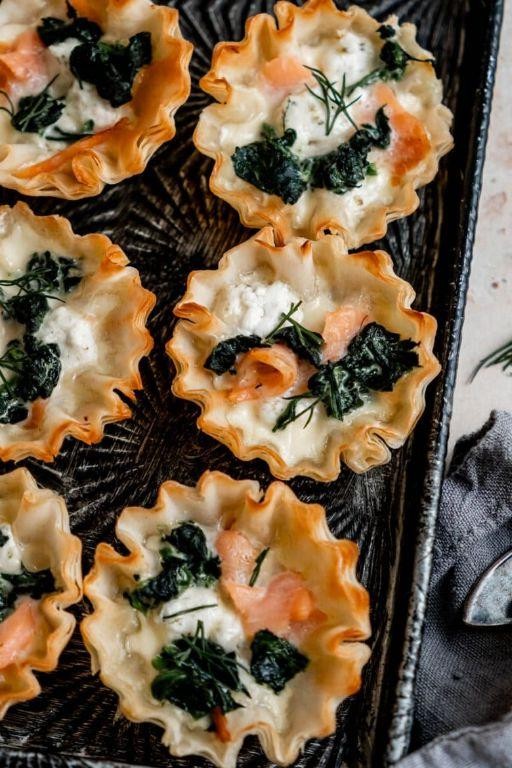
These savory pastries combine the rich flavors of salmon and goat cheese with the crispy texture of phyllo dough. Perfect as an appetizer or main course, these parcels are sure to impress.
Ingredients:
– 1 sheet of phyllo dough
– 1/2 pound cooked salmon, flaked
– 2 tablespoons crumbled goat cheese
– 1 tablespoon chopped fresh parsley
– Salt and pepper to taste
– 1 tablespoon olive oil
Instructions:
1. Preheat oven to 375°F (190°C).
2. Thaw phyllo dough according to package instructions.
3. In a bowl, mix together salmon, goat cheese, parsley, salt, and pepper.
4. Place a sheet of phyllo dough on a flat surface. Brush with olive oil.
5. Spoon the salmon mixture onto one half of the phyllo dough, leaving a 1/2-inch border.
6. Fold the other half over the filling to form a triangle or square shape. Press edges to seal.
7. Place parcels on a baking sheet lined with parchment paper. Brush tops with olive oil.
8. Bake for 15-20 minutes or until golden brown.
Cooking Time: 15-20 minutes
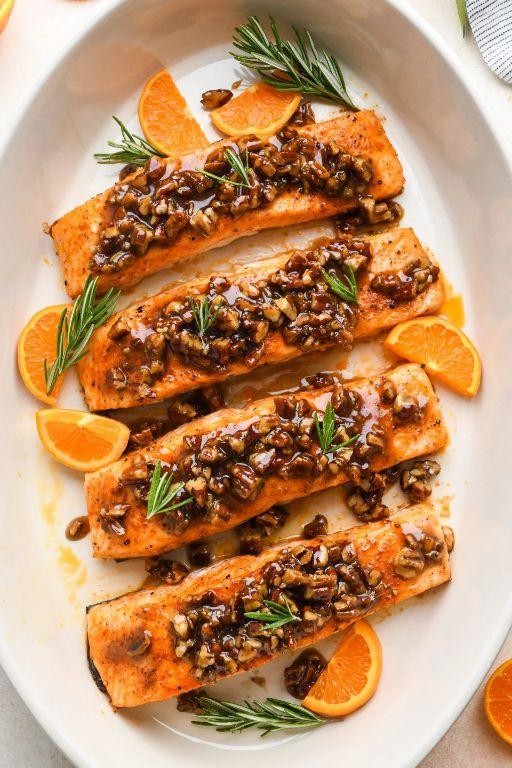
Grilled Salmon with Blueberry Balsamic Glaze
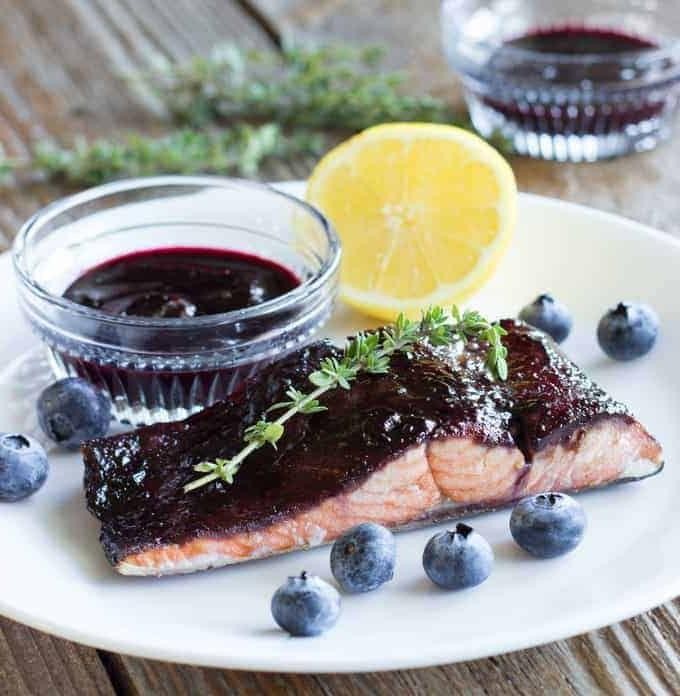
A sweet and tangy twist on classic grilled salmon, this recipe combines the richness of blueberries with the bold flavors of balsamic glaze.
Ingredients:
– 4 salmon fillets (6 oz each)
– 1 cup blueberries
– 1/2 cup balsamic vinegar
– 2 tbsp honey
– 2 tbsp olive oil
– Salt and pepper, to taste
– Fresh thyme, for garnish
Instructions:
1. Preheat grill to medium-high heat.
2. In a blender or food processor, puree blueberries, balsamic vinegar, and honey until smooth.
3. Brush both sides of the salmon fillets with olive oil and season with salt and pepper.
4. Grill salmon for 4-5 minutes per side, or until cooked through.
5. During the last minute of grilling, brush the blueberry-balsamic glaze on the salmon.
6. Remove from heat and garnish with fresh thyme.
7. Serve immediately.
Cooking Time: 12-15 minutes
Salmon and Quinoa Stuffed Bell Peppers
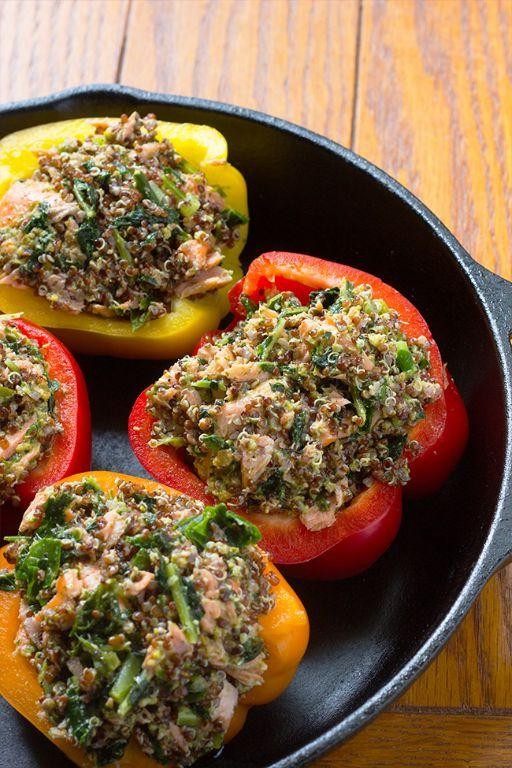
A flavorful and nutritious twist on traditional stuffed peppers, this recipe combines the omega-rich benefits of salmon with the nutty goodness of quinoa. Perfect for a healthy weeknight dinner or special occasion.
Ingredients:
– 4 bell peppers (any color), seeded and chopped
– 1 cup cooked quinoa
– 6 oz salmon fillet, flaked
– 2 tablespoons olive oil
– 1 small onion, finely chopped
– 2 cloves garlic, minced
– 1 teaspoon paprika
– Salt and pepper to taste
– Fresh parsley, chopped (optional)
Instructions:
1. Preheat oven to 375°F (190°C).
2. Cook quinoa according to package instructions.
3. In a skillet, heat olive oil over medium-high. Add onion, garlic, and paprika; cook until softened.
4. Add cooked salmon and stir to combine.
5. Stuff each bell pepper with the quinoa-salmon mixture and top with chopped parsley (if using).
6. Place peppers on a baking sheet lined with parchment paper and bake for 25-30 minutes, or until tender.
Cooking Time: 25-30 minutes
Salmon Ceviche with Coconut Milk
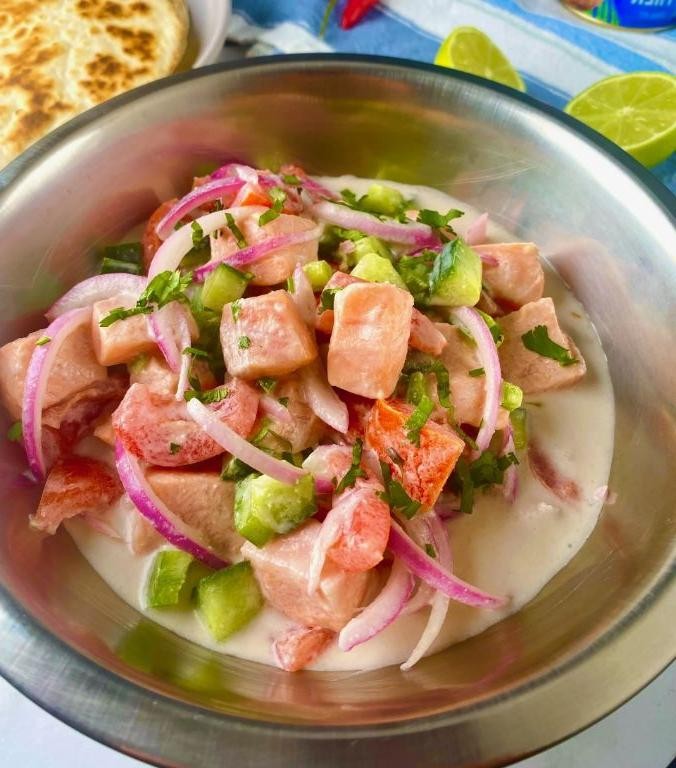
This recipe combines the rich flavor of salmon with the creamy texture of coconut milk, creating a unique and delicious ceviche dish perfect for warm weather.
Ingredients:
– 1 pound fresh salmon fillet, cut into small pieces
– 1/2 cup coconut milk
– 1/4 cup freshly squeezed lime juice
– 1/4 cup chopped red onion
– 1 jalapeño pepper, seeded and finely chopped
– 1 avocado, diced (optional)
– Salt to taste
– Fresh cilantro leaves for garnish
Instructions:
1. In a large bowl, combine salmon pieces, coconut milk, lime juice, red onion, and jalapeño pepper.
2. Cover the bowl with plastic wrap and refrigerate for at least 30 minutes or up to 2 hours to allow the flavors to meld.
3. Just before serving, stir in diced avocado (if using).
4. Taste and adjust seasoning as needed.
5. Serve chilled, garnished with fresh cilantro leaves.
Cooking Time: None! This dish is ready in just a few minutes of refrigeration time.
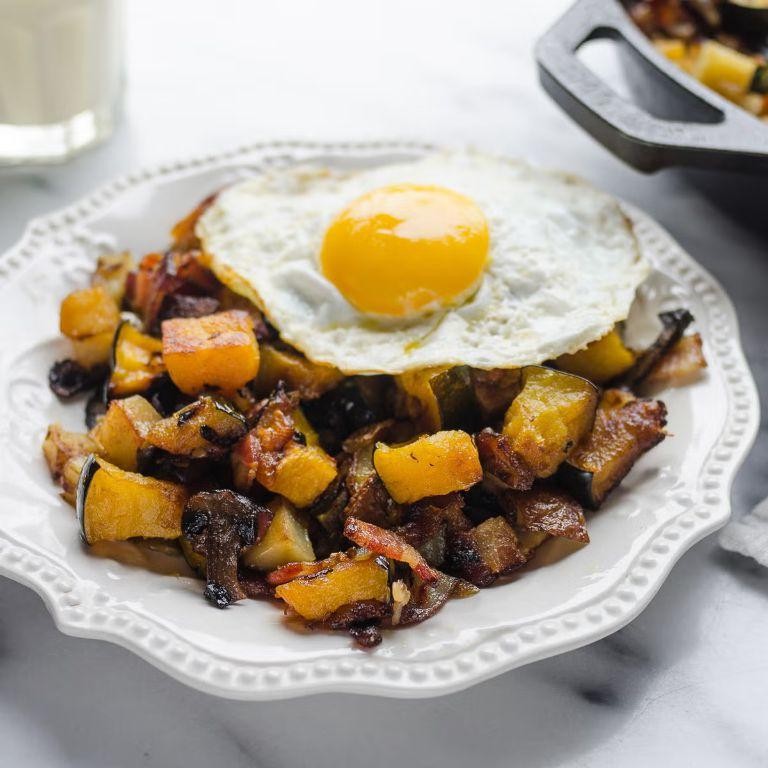
Salmon and Sweet Potato Hash

This recipe combines the rich flavors of grilled salmon with the comforting sweetness of roasted sweet potatoes, all wrapped up in a crispy hash. Perfect for a quick and satisfying brunch or dinner.
Ingredients:
– 4 salmon fillets (6 oz each)
– 2 large sweet potatoes, peeled and diced
– 1/4 cup olive oil
– 1 small onion, diced
– 2 cloves garlic, minced
– Salt and pepper to taste
– Fresh parsley, chopped (optional)
Instructions:
1. Preheat oven to 425°F (220°C).
2. Toss sweet potatoes with 2 tbsp olive oil, salt, and pepper on a baking sheet. Roast for 20-25 minutes or until tender.
3. Grill salmon fillets for 4-5 minutes per side or until cooked through.
4. In a large skillet, heat the remaining 2 tbsp olive oil over medium-high heat. Add onion and garlic; cook for 2-3 minutes or until softened.
5. Add roasted sweet potatoes to the skillet; toss to combine with onion mixture.
6. Serve salmon on top of the sweet potato hash, garnished with chopped parsley if desired.
Cooking Time: 30-35 minutes
Salmon Poke Bowl with Pickled Ginger

Experience the flavors of Hawaii with this refreshing and flavorful Salmon Poke Bowl featuring pickled ginger and a medley of textures.
Ingredients:
– 1 lb sashimi-grade salmon, cut into small cubes
– 1/4 cup soy sauce
– 2 tbsp sesame oil
– 2 tbsp chopped green onions
– 1 tsp grated ginger
– 1/4 cup pickled ginger, thinly sliced
– 1 cup cooked white rice
– Salt and pepper to taste
Instructions:
1. In a large bowl, whisk together soy sauce, sesame oil, green onions, and grated ginger.
2. Add the salmon cubes to the marinade and refrigerate for at least 30 minutes or up to 2 hours.
3. Cook white rice according to package instructions.
4. To assemble the bowls, place a scoop of cooked rice in the bottom, followed by the marinated salmon, pickled ginger slices, and any desired garnishes (e.g., diced mango, chopped cilantro).
5. Season with salt and pepper to taste.
Cooking Time: 30 minutes (including marinating time)
Salmon en Papillote with Lemon and Herbs
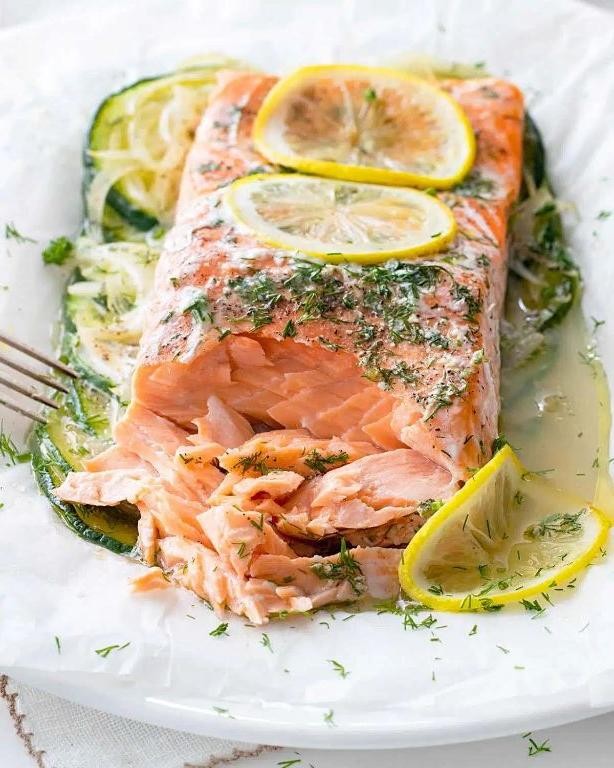
This classic French technique, also known as “baking in parchment,” results in a moist and flavorful salmon dish with a delicate balance of lemon and herbs.
Ingredients:
– 4 salmon fillets (6 oz each)
– 1/4 cup olive oil
– 2 lemons, sliced
– 1/4 cup chopped fresh parsley
– 1/4 cup chopped fresh dill
– 2 cloves garlic, minced
– Salt and pepper to taste
Instructions:
1. Preheat oven to 400°F (200°C).
2. Cut four pieces of parchment paper into large squares.
3. Place a salmon fillet in the center of each square.
4. Drizzle olive oil over the salmon, then top with a lemon slice, some parsley, and a sprinkle of garlic.
5. Fold the parchment paper over the salmon to form a sealed package.
6. Bake for 12-15 minutes or until the salmon is cooked through.
7. Serve hot, garnished with additional herbs if desired.
Cooking Time: 12-15 minutes
Salmon and Cream Cheese Sushi Roll
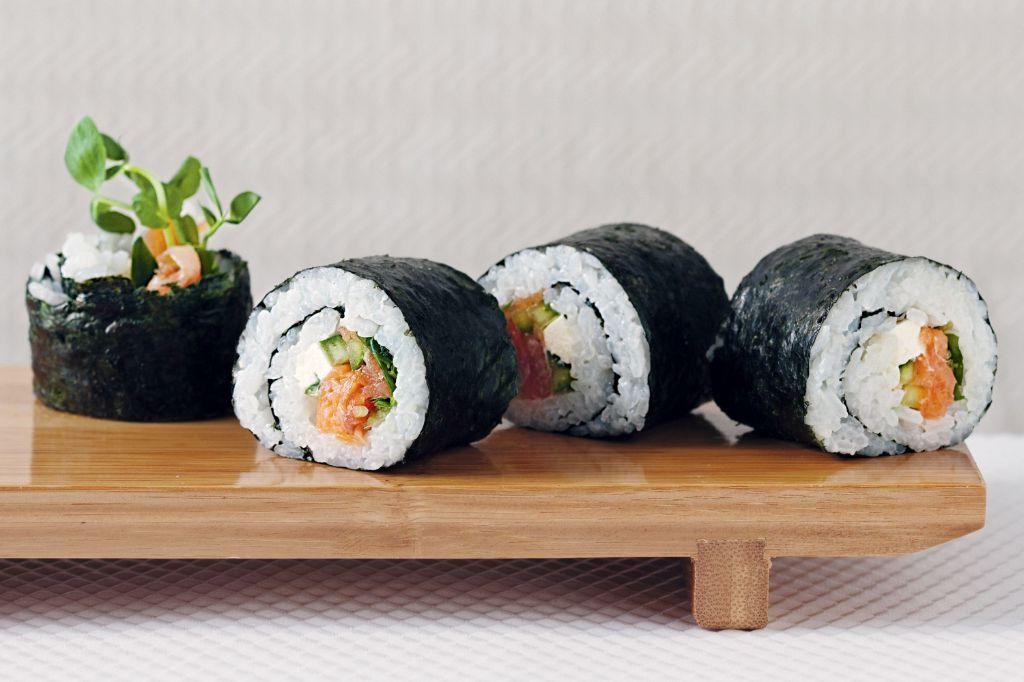
This unique sushi roll combines the richness of salmon with the creaminess of cream cheese, creating a delightful flavor combination perfect for adventurous palates. With this easy-to-follow recipe, you can create a delicious and visually appealing dish in no time.
Ingredients:
– 1/2 cup cooked salmon
– 1 tablespoon cream cheese softened
– 1 cup cooked Japanese rice (preferably short-grain rice)
– 1 sheet of nori seaweed
– Sesame seeds for garnish
Instructions:
1. Prepare the sushi rice according to package instructions.
2. Cut the cooked salmon into small pieces and mix with the cream cheese until well combined.
3. Lay a sheet of nori seaweed flat on a surface.
4. Spread a thin layer of sushi rice onto the nori, leaving a 1-inch border at the top.
5. Place the salmon-cream cheese mixture in the middle of the rice.
6. Roll the sushi using a bamboo sushi mat or your hands, applying gentle pressure.
7. Slice into individual pieces and garnish with sesame seeds.
Cooking Time: 10 minutes
Summary
Get ready to elevate your salmon game with these 20 unique and flavorful recipes! From sweet and savory to spicy and tangy, this collection has something for every taste. Try maple-glazed salmon with a pecan crust, or go international with sushi pizza featuring spicy mayo. For a twist on classic dishes, look to coconut curry poached salmon, or blackened salmon tacos with mango salsa. And don’t forget the indulgent treats like smoked salmon and dill croissant bake, and pesto-crusted salmon with sun-dried tomatoes. There’s something for every palate in this deliciously inventive guide!